Feb 22, 2024
Introduction to VOXL 2
The VOXL 2 platform is a powerful single-board AI autopilot designed for drone development, offering an extensive range of capabilities from basic flight control to advanced computational tasks. It’s quickly becoming a favorite among drone engineers for its processing power per penny and its SWaP-optimized form factor. For our monthly drone software meetup, we invited Andrew Wilkins, Co-Founder, Ascend Engineering, to break down all the things you need to get started with VOXL 2. This written tutorial will cover all the major points Andrew hit on during the meetup.
Getting Started with VOXL 2
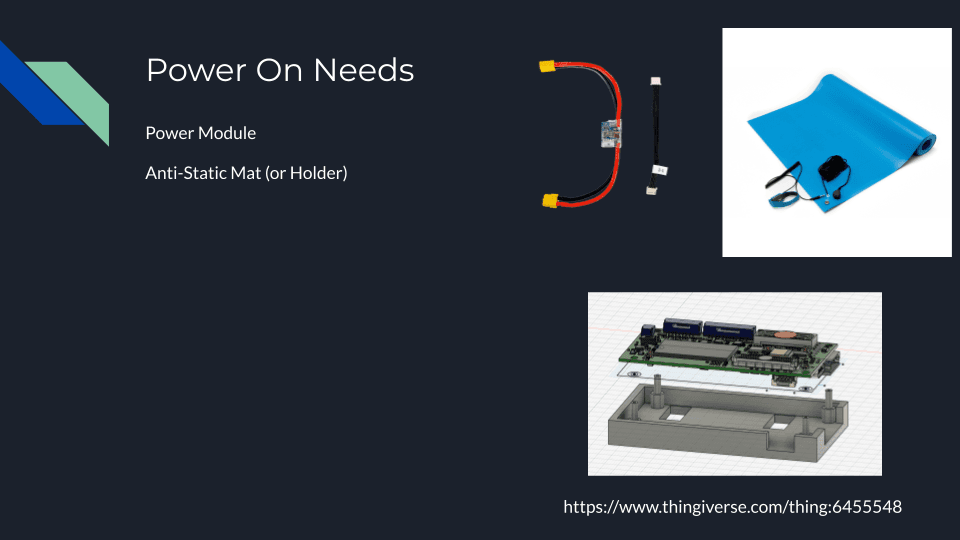
The VOXL 2 comes equipped with a power module essential for its operation. Before connecting any power source, it is highly recommended to set up your work area with an anti-static mat to prevent any potential damage from electrostatic discharge.Components Required:VOXL 2 Power Module (included in your kit)Anti-static mat for safetyBattery (2S to 6S compatibility)
Steps for Powering Up
Prepare the Power Module: Locate the power module included with your VOXL 2. This module is specifically designed to safely power the VOXL 2 from your chosen battery.
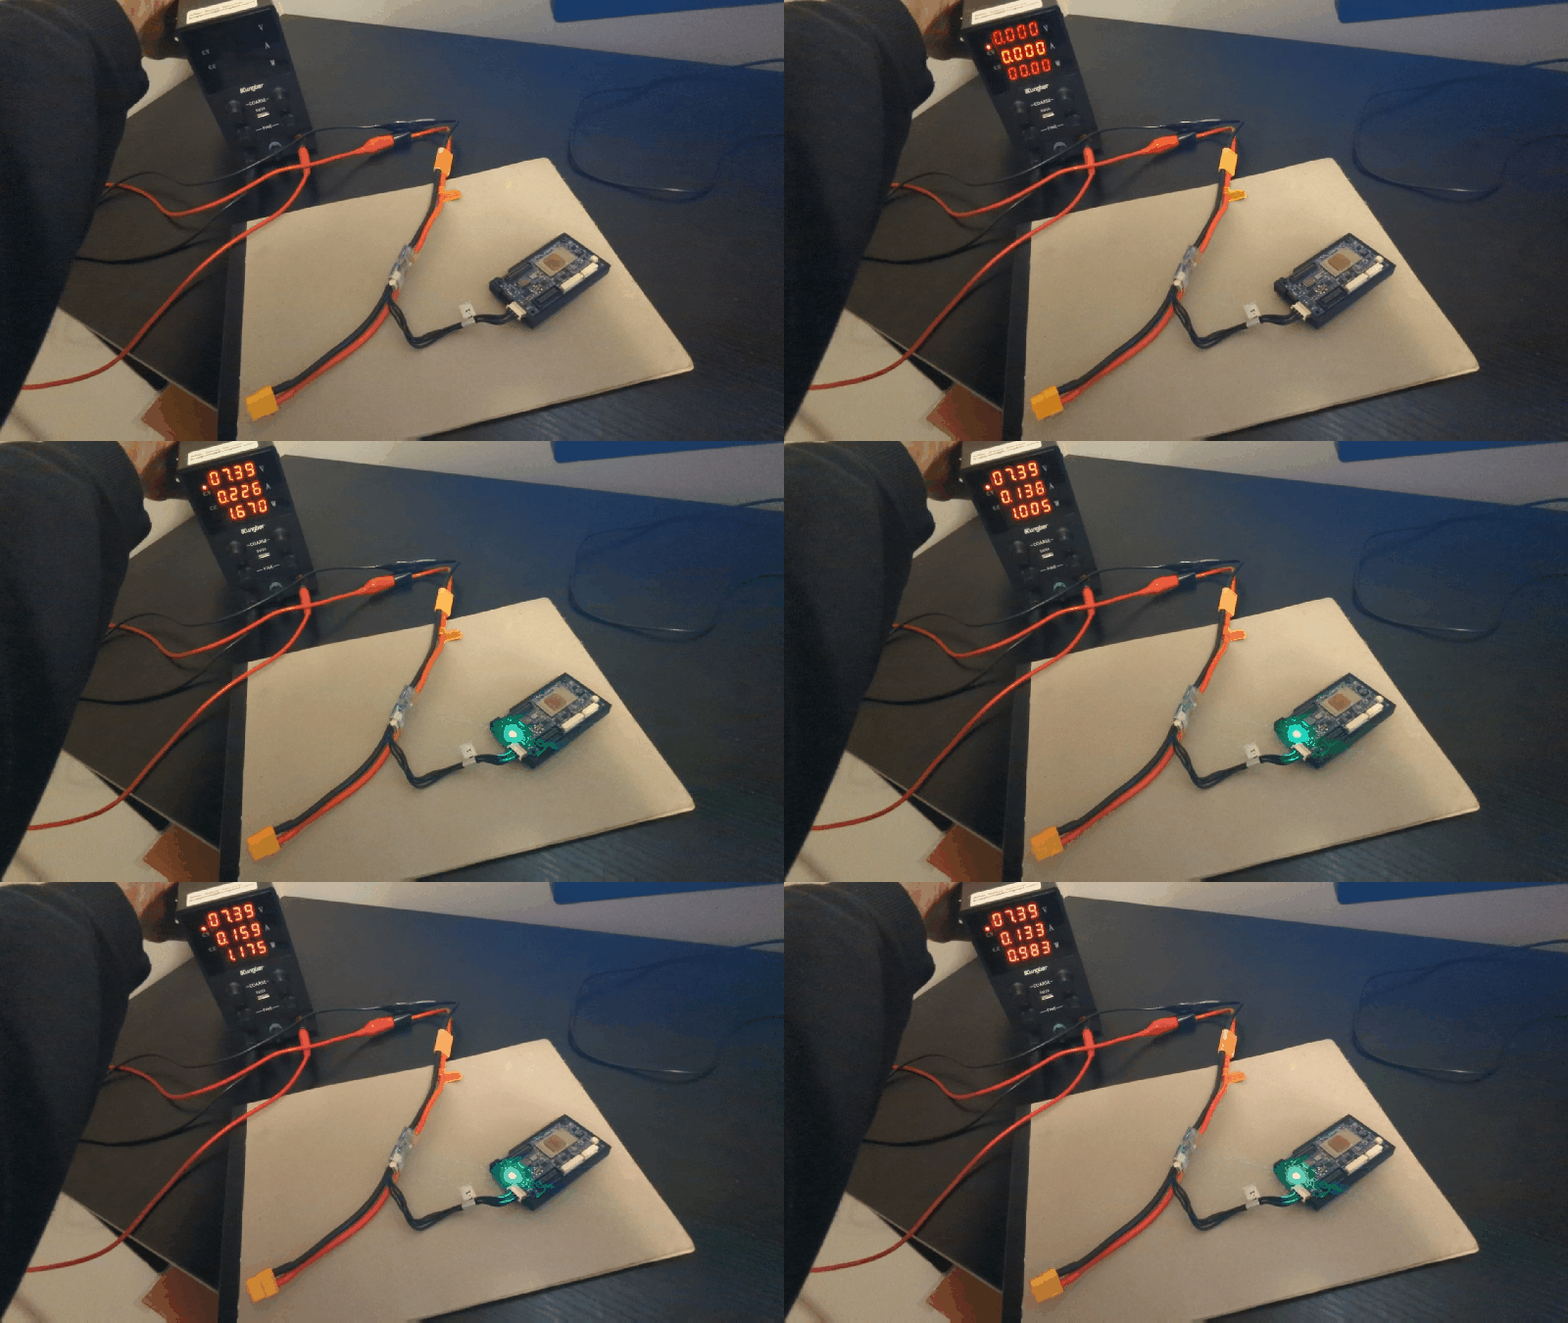
Battery Connection: Connect your battery to the power module. The VOXL 2 supports a wide range of batteries from 2S to 6S, providing flexibility in power options. Ensure the battery’s voltage matches the requirements (for example, 7.4V for a 2S battery).VOXL 2 Connection: With the power module connected to the battery, proceed to connect the module to the VOXL 2. Ensure all connections are secure and properly aligned to avoid any damage.
Initial Configuration:
Connection via USB-C.
Installation of ADB (Android Debug Bridge) to get a command prompt.
Accessing VOXL 2:
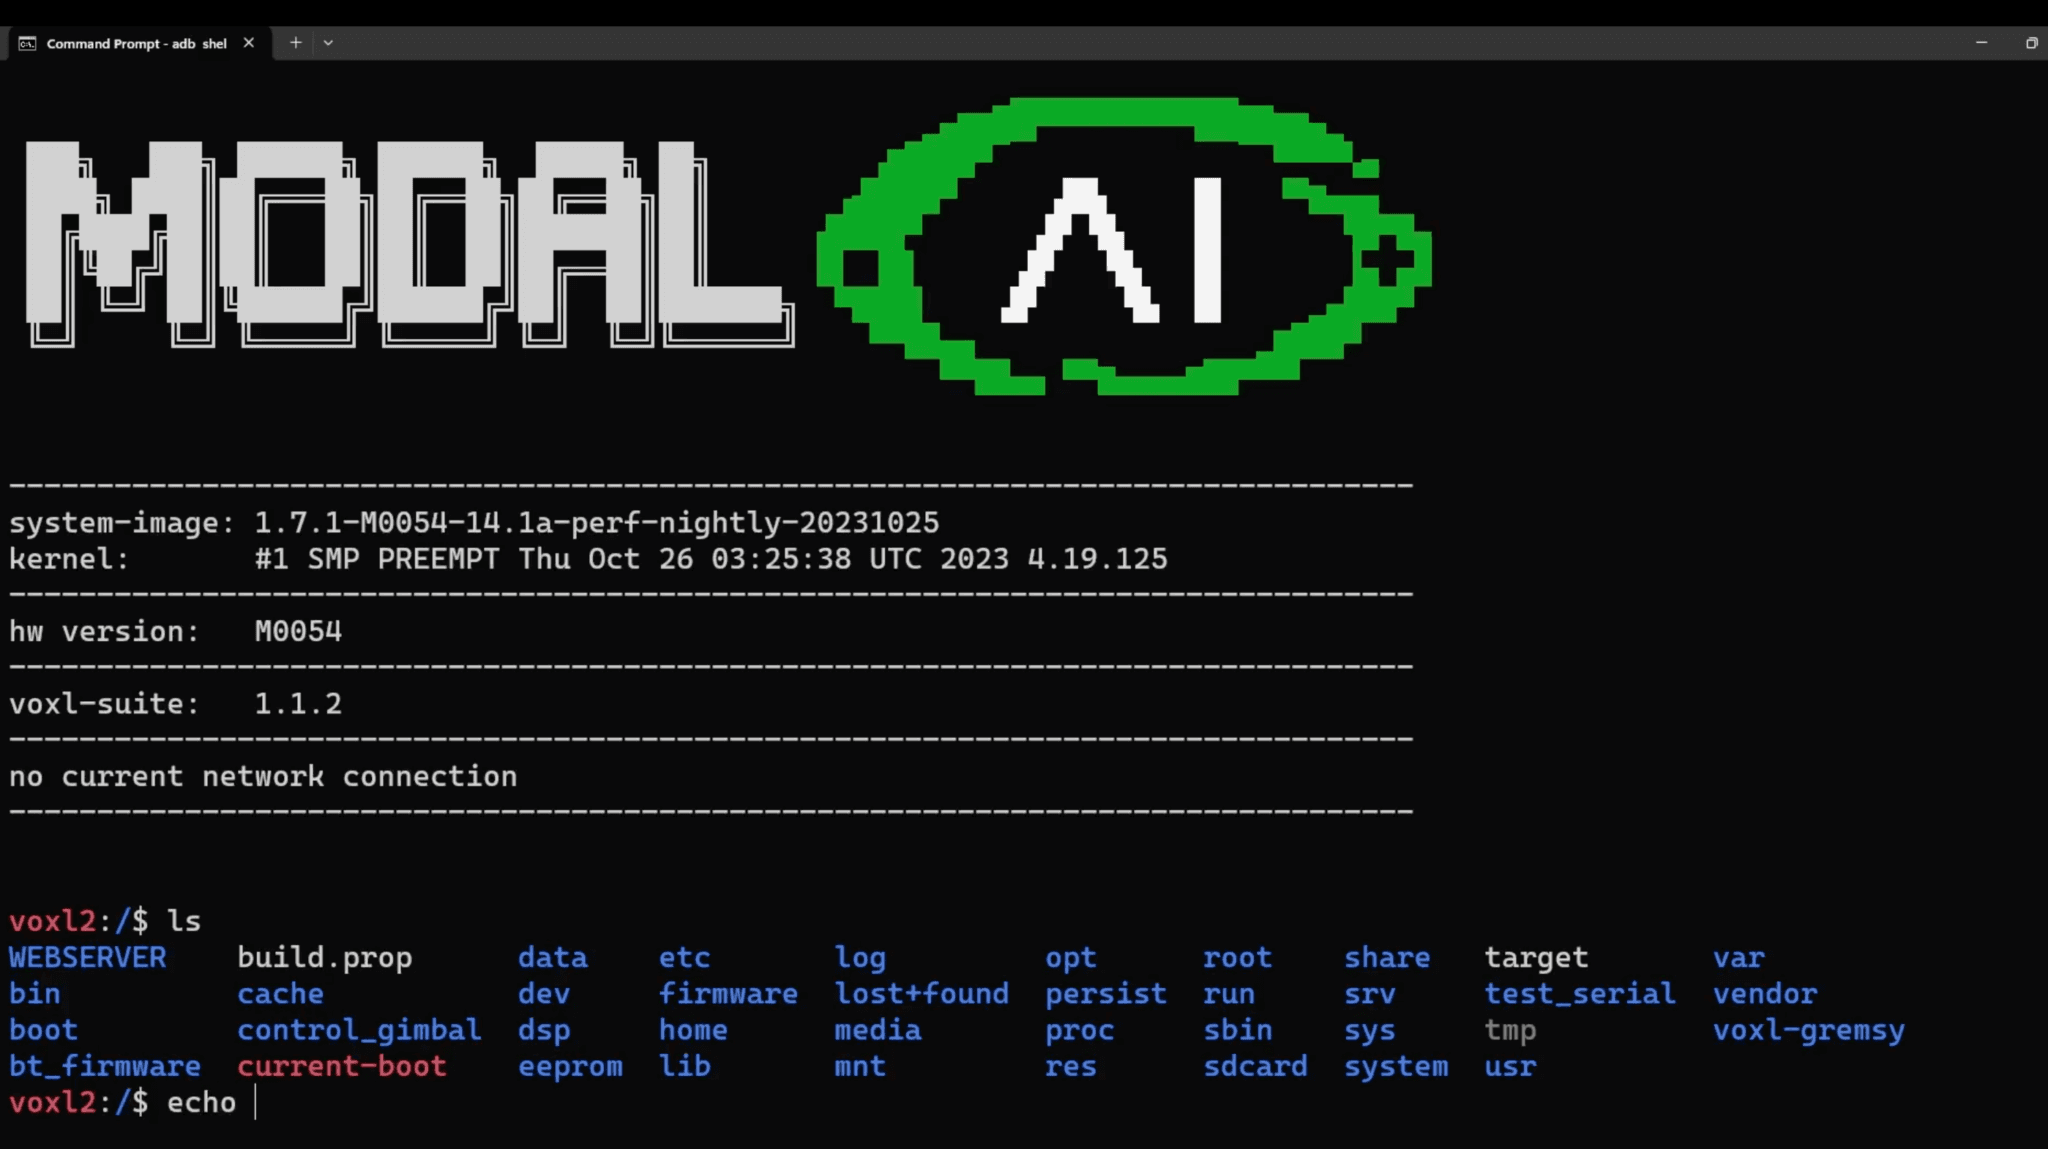
ADB shell access reveals an Ubuntu 18.04 environment, familiar territory for software engineers.
Steps for Configuration
USB-C Connection: Connect the VOXL 2 to your computer using a USB-C cable. This connection will allow for data transfer and command-line access to the VOXL 2.
ADB Installation: Before accessing the VOXL 2, ensure that ADB (Android Debug Bridge) is installed on your computer. ADB is a versatile command-line tool that lets you communicate with a device. It is available as part of the Android SDK Platform-Tools package.
Accessing the Command Prompt: With ADB installed and the VOXL 2 connected via USB-C, open a terminal on your computer. Enter the command
adb shellto initiate a shell session on the VOXL 2. This command gives you direct access to the VOXL 2’s command-line interface.
Exploring VOXL Software
For software engineers intimidated by hardware, you can see that with a few simple steps, we are back in a very familiar environment.
We’re running this demo on Ubuntu 18.04, so be sure to check for OS and version for possible discrepancies. To verify the operating system version, you can use the command lsb_release -a. This will display the Ubuntu version along with other distribution information, confirming that you are running Ubuntu 18.04.
To take full control of your VOXL 2 for development, you are first going to want to install the SDK. You can check here for information about the pkg manager and additional information on how to install the SDK. Also, (which is kind of nice) you can take a look at all of the software that runs on the VOXL.
Managing Services with VOXL Commands
VOXL 2 utilizes a set of custom commands designed to simplify the management of system services and hardware interactions. Let’s take a look at a few to get familiar with the system.
voxl-inspect-servicesPurpose: Lists all the services running on the VOXL 2, providing a snapshot of the system’s current state. This command is invaluable for debugging and system monitoring.

systemctl start <service>,systemctl stop <service>Purpose: These commands allow you to start and stop individual services on the VOXL 2. Managing services in this way helps optimize system performance and resource usage.
systemctl status <service>Purpose: Provides detailed status information for a specific service on the VOXL 2, including whether it is active, its current state, and recent log entries, aiding in troubleshooting and system monitoring.
voxl-configurePurpose: Enables the customization and configuration of VOXL 2 system services to tailor the platform’s functionality for specific drone applications.

voxl-inspect-services and voxl-configure are a very powerful pair. They allow you to make modifications to any of the individual running services and then check whether they are running as intended.
For illustration purposes let’s enable and configure the IMU (Inerital Measurement Unit). First we’ll call voxl-configure-imu and then select 1 to clear factory defaults (bye bye), and then select 1 a second time to enable the voxl-imu-server.
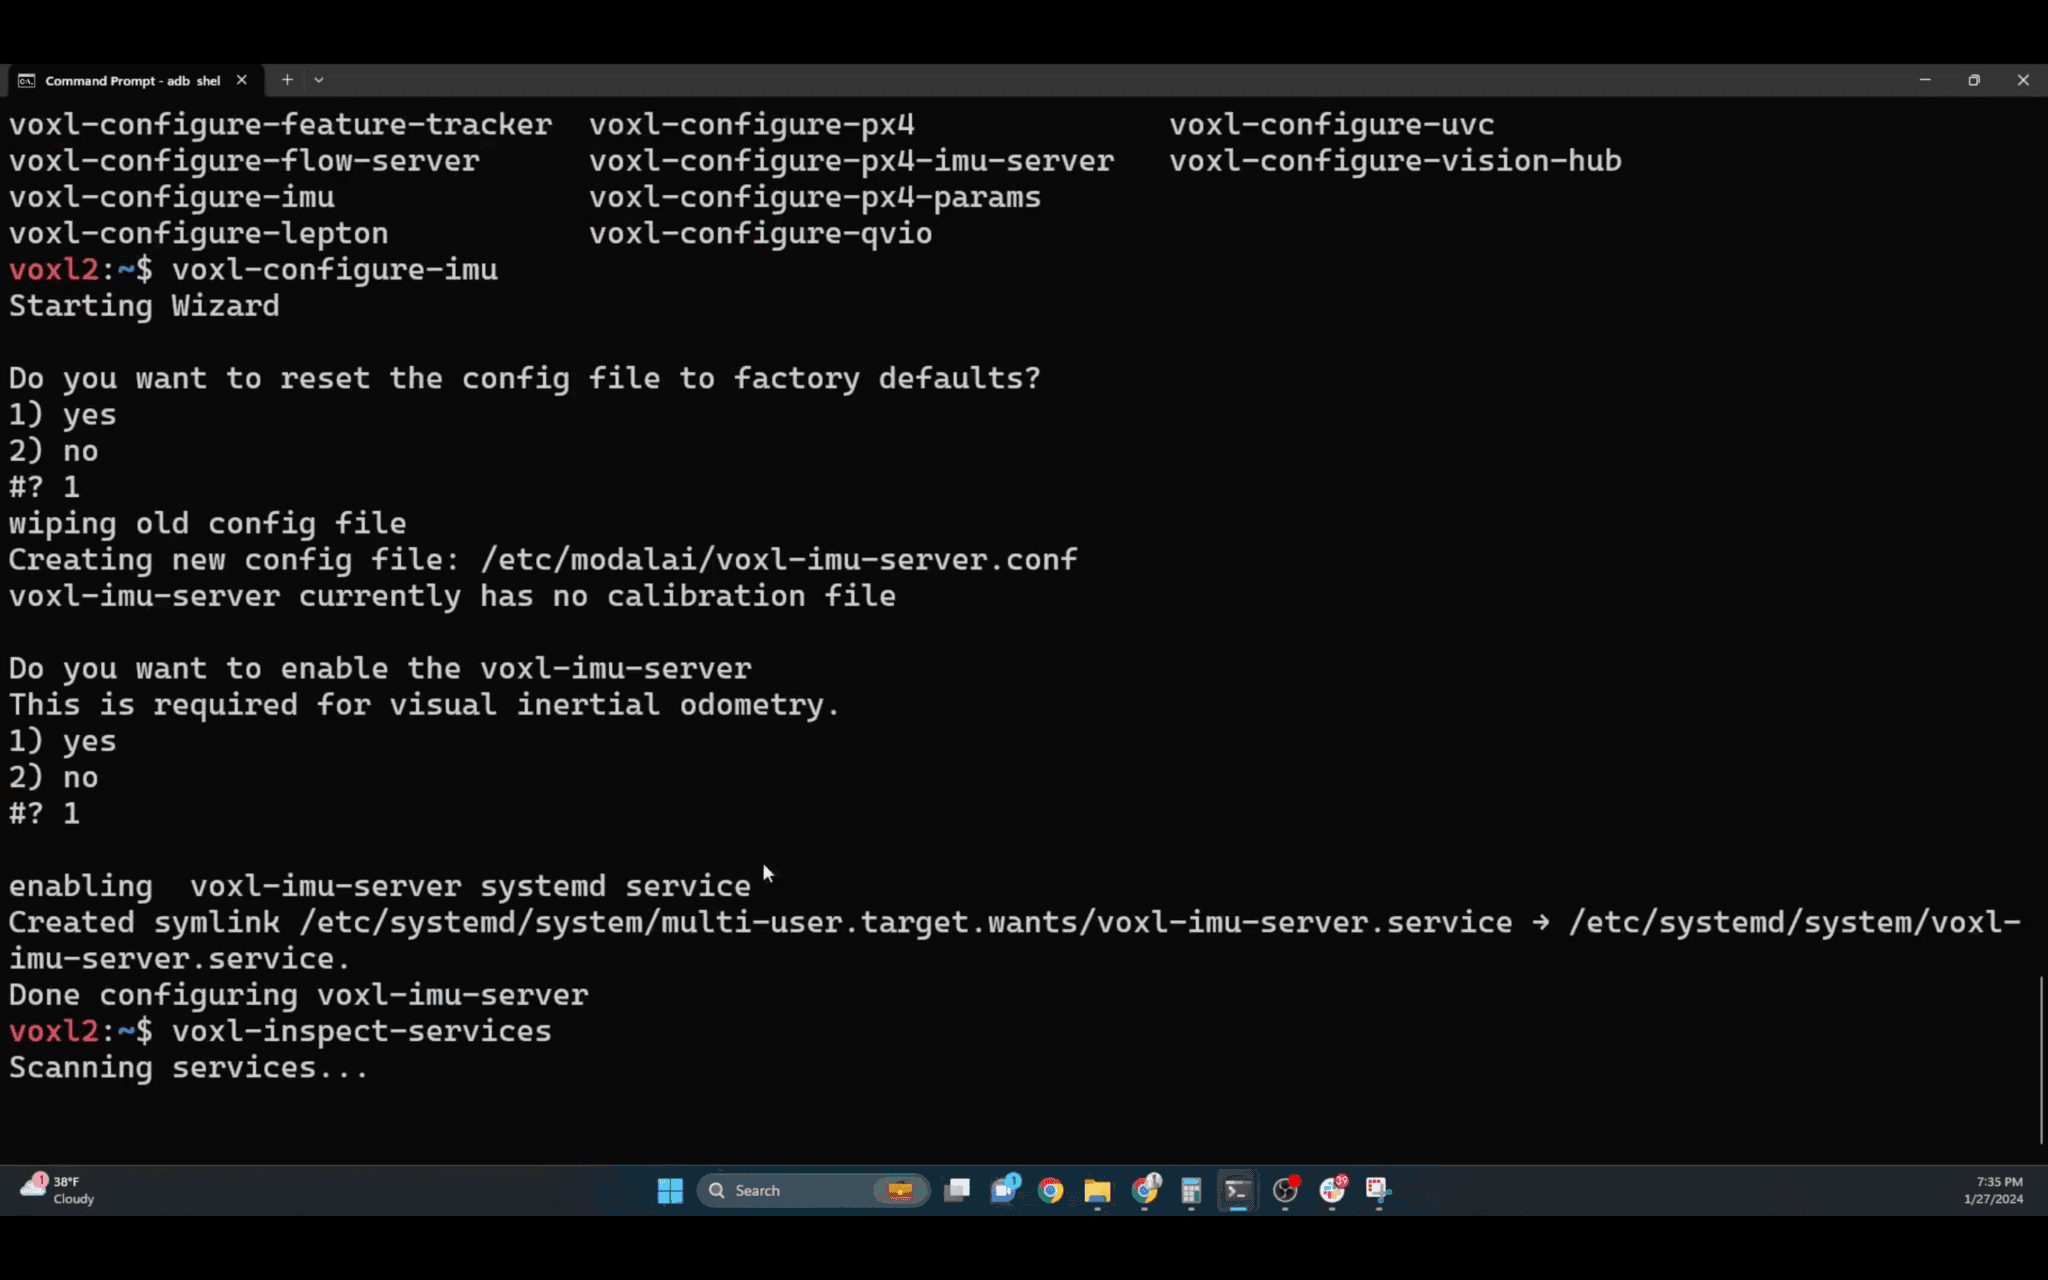
Now we’ll run voxl-inspect-services again to check if it has worked.
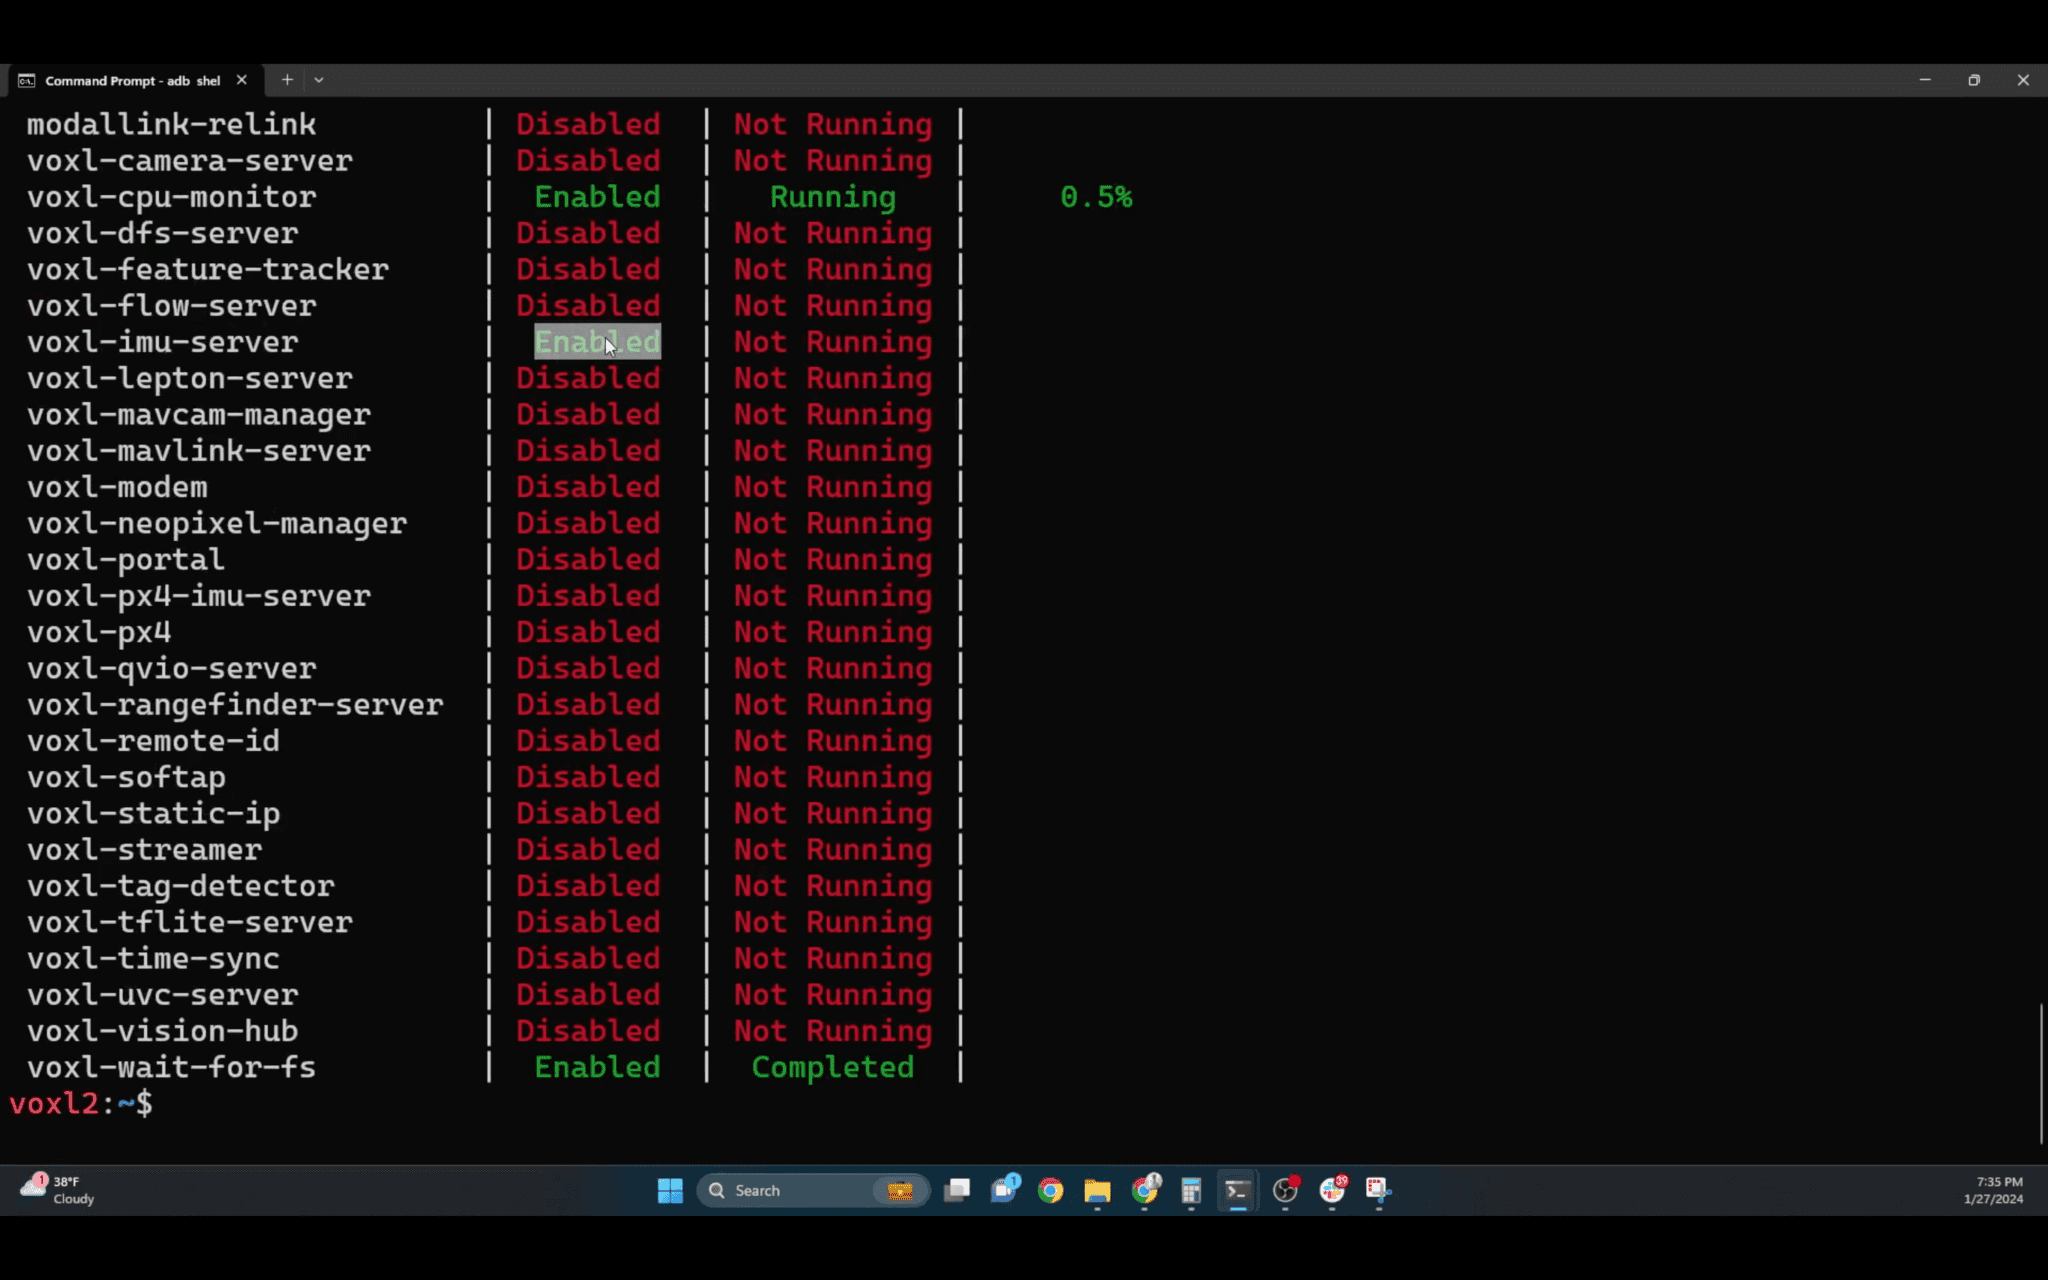
Sweet! It’s Enabled, but wait a second, it’s NOT RUNNING. Don’t worry, now we’re going to use our systemctl start <service>command to rev it up. Call systemctl start voxl-imu-server and run systemctl status voxl-imu-server to check that everything is functioning as intended.
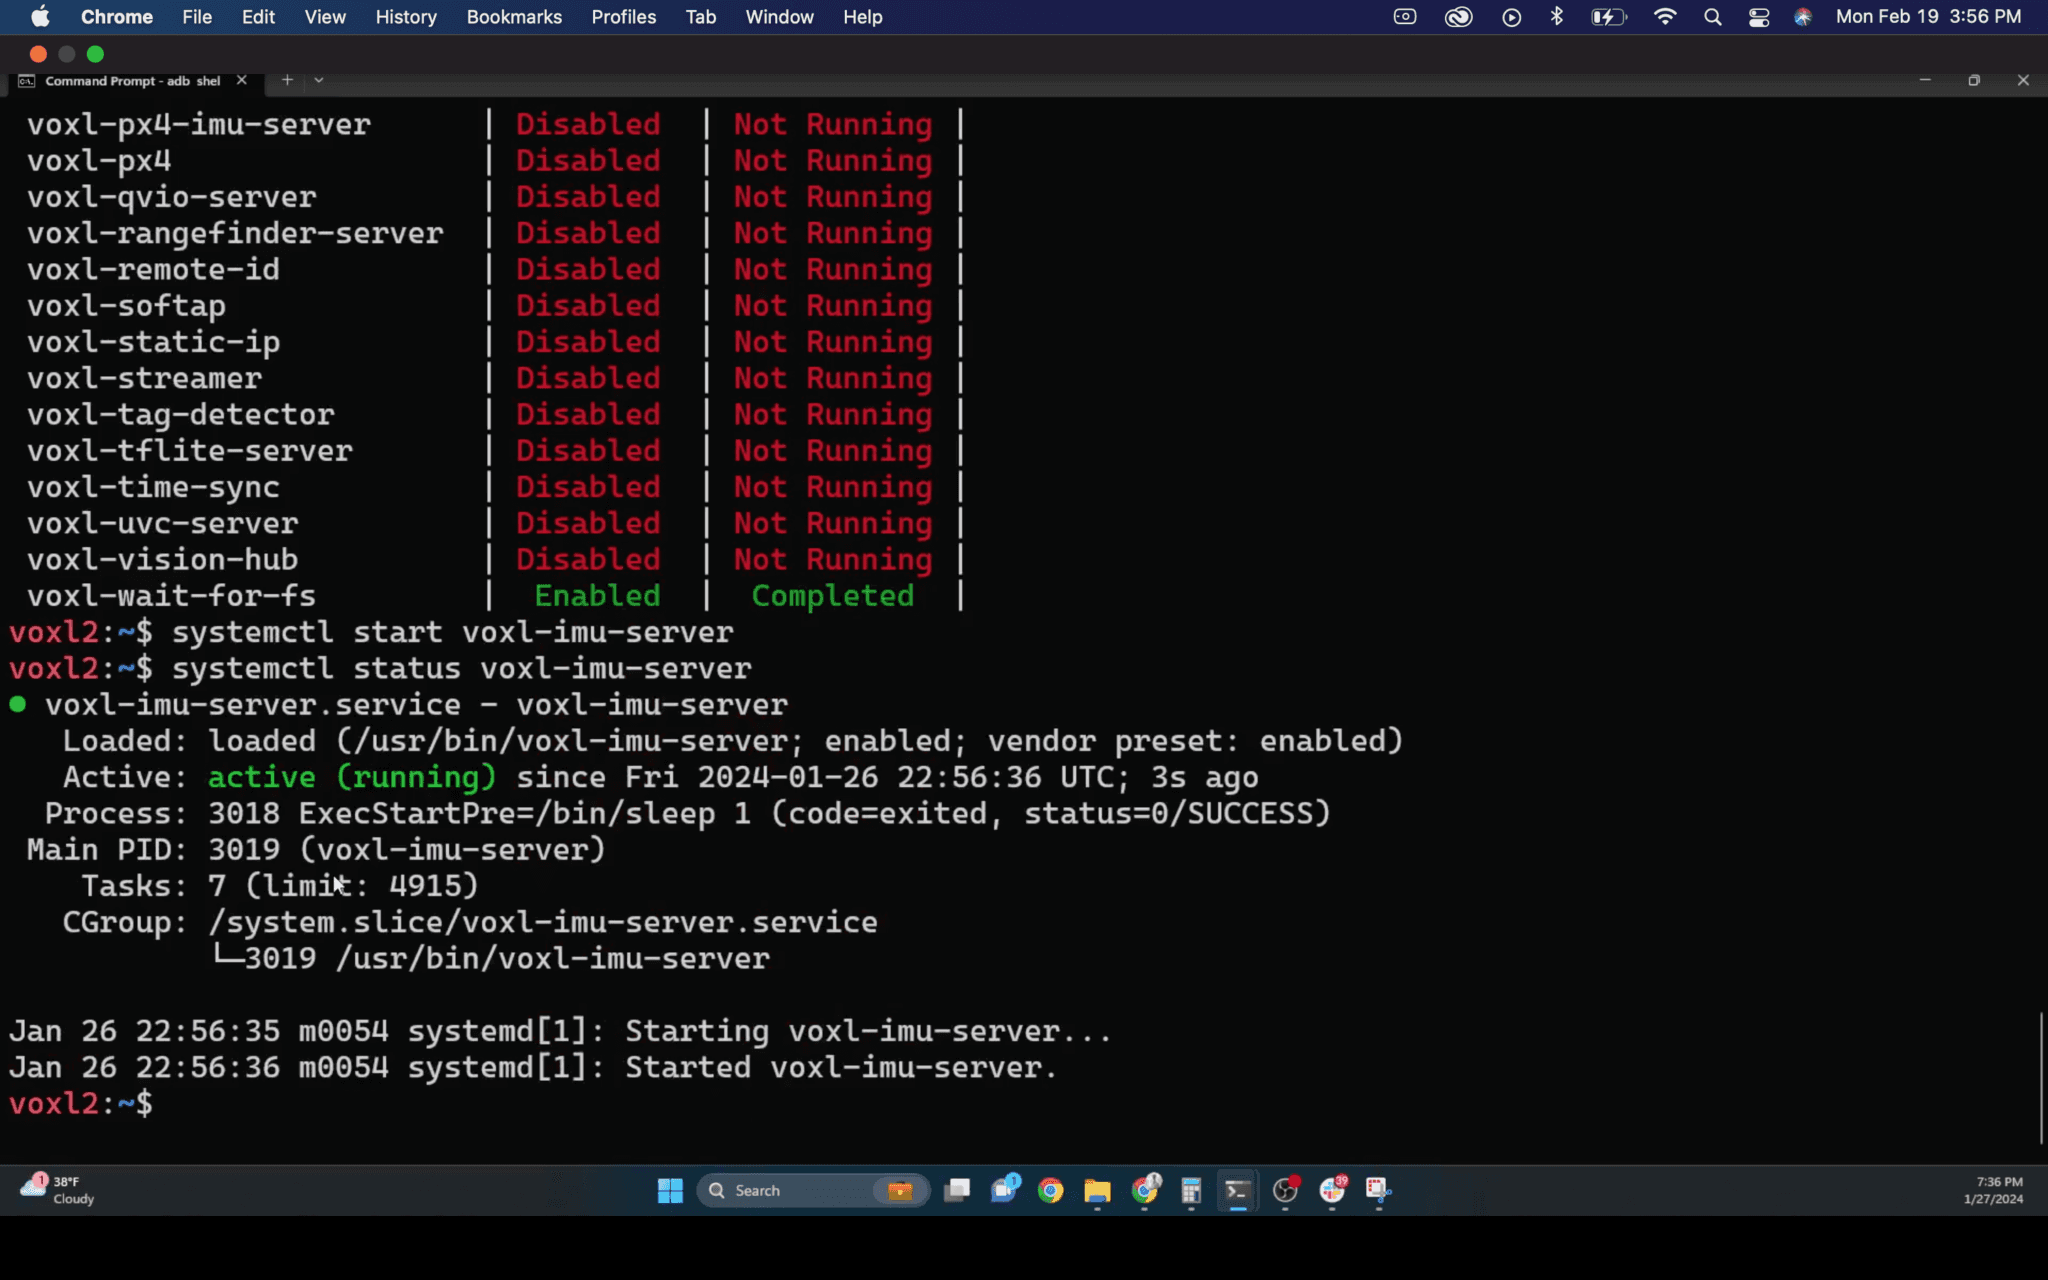
Everything looks like it’s running okay now, but what if we want to get a deeper look? Luckily, the VOXL 2 SDK comes with great inspect tools. Type in voxl-inspect- to see the full list of options.

Let’s check out our now-enabled IMU’s output by typing voxl-inspect-imu imu-apps into the command line.
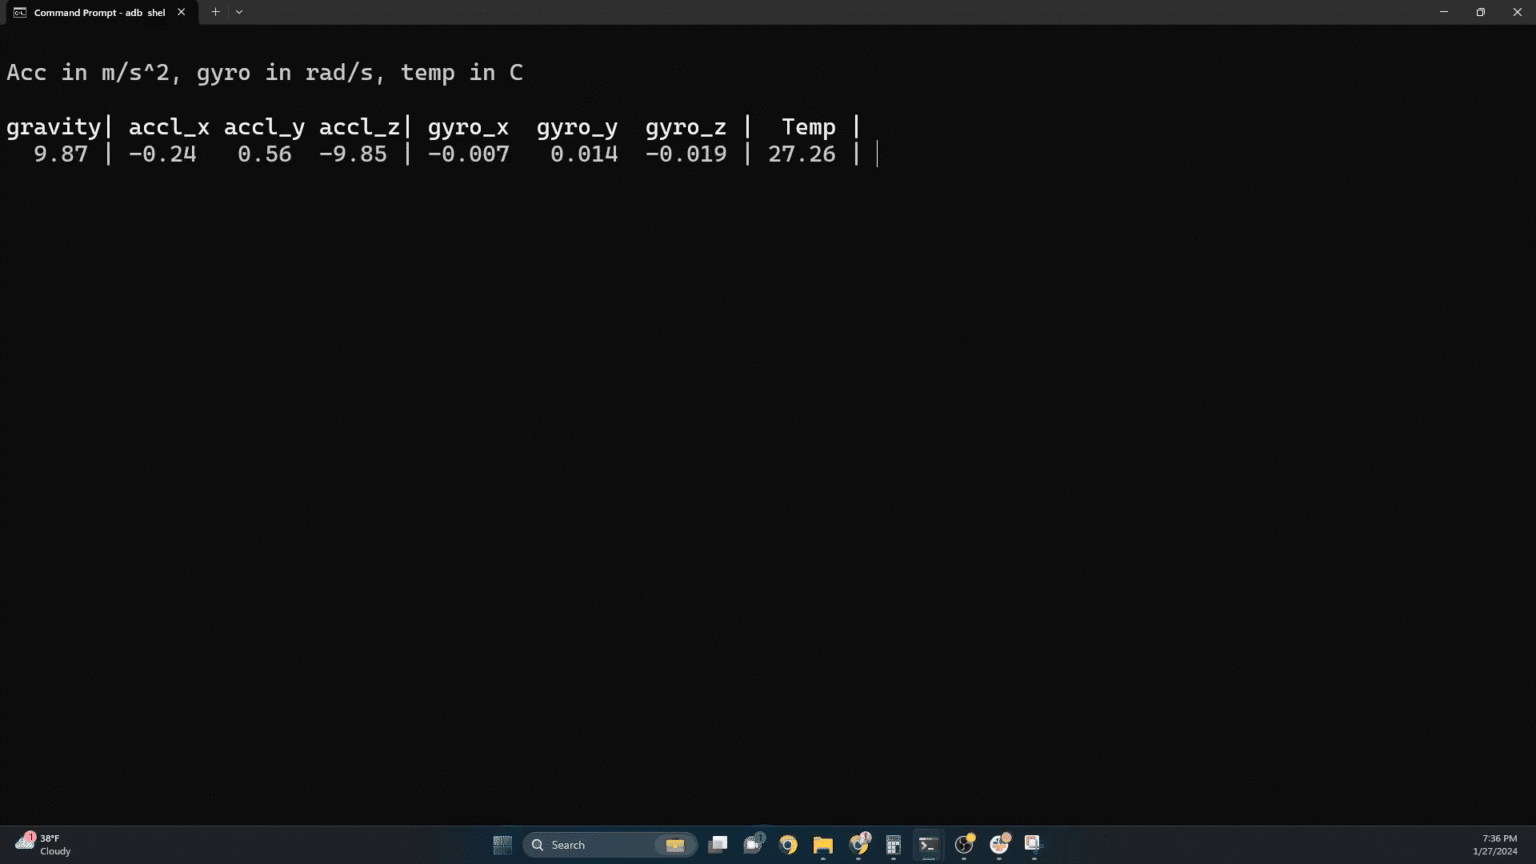
Awesome! Now, when we move the VOXL 2 around we can see the sensor data change in real time.
Stay tuned for Part 2, where we’ll dive into MPA pipelines, connecting to external devices and networks, and integrating cameras and external flight controllers.
This is just the tip of the iceberg for what you can do with the VOXL SDK, so be sure to take a look at the documentation to find out more.
