Jun 20, 2024

If you’ve landed here, chances are you know that MAVLink is the most widely used drone communication protocol outside of DJI. The MAVSDK provides collection of libraries designed to interface with MAVLink systems such as drones, cameras, or ground control systems (GCS). It provides a simple API for managing one or more vehicles, offering programmatic access to vehicle information, telemetry, and control over missions, movement, and other operations. Quite simply, you can use it to build apps to control your drone (and other cool autonomous systems). At a recent gathering of the Drone Software Meetup Group, Godfrey Nolan, President of RIIS LLC. showed attendees how to get started with the MAVSDK on Android. Feel free to follow along with the video or read the blog below to jump start your MAVSDK development. This post includes both a “Stupid Simple Example” as well as a more hands on tutorial if you want to roll up your sleeves and get your hands dirty.
Stupid Simple Setup
For our Stupid Simple Example, we will be using Java for a Software in the Loop (SITL) simulation. By coding with the MAVSDK we are skipping over QGroundControl (QGC). Although QGC has a lot of benefits and a great suite of tools, it’s a whole other tutorial, and we want to keep things simple. For our example we will be using PX4, but Ardupilot can also be used.
The SITL setup doesn’t require much in terms of hardware. In fact, this is a pretty bare bones setup for this tutorial.

However, you do need to follow several steps to ensure that your development environment is correctly configured.
Prerequisites
Docker: Ensure Docker is installed on your machine. Docker will be used to run the headless simulator.
Android Studio: Install Android Studio for developing the Android client.
MAVSDK-Java: Clone the MAVSDK-Java repository from GitHub.
Step-by-Step Setup
1. Clone the MAVSDK-Java Repository
2. Set up Docker
Special thanks to Jonas Vautherin, Software Engineer, Auterion for providing this ^^
3. Edit MapsActivity.java
Open the android-client in the examples folder in Android Studio. Also, make sure your Android Gradle Plugin version is 4.0.1 and your Gradle Version is 6.5.
Look for the runMavsdkServer().
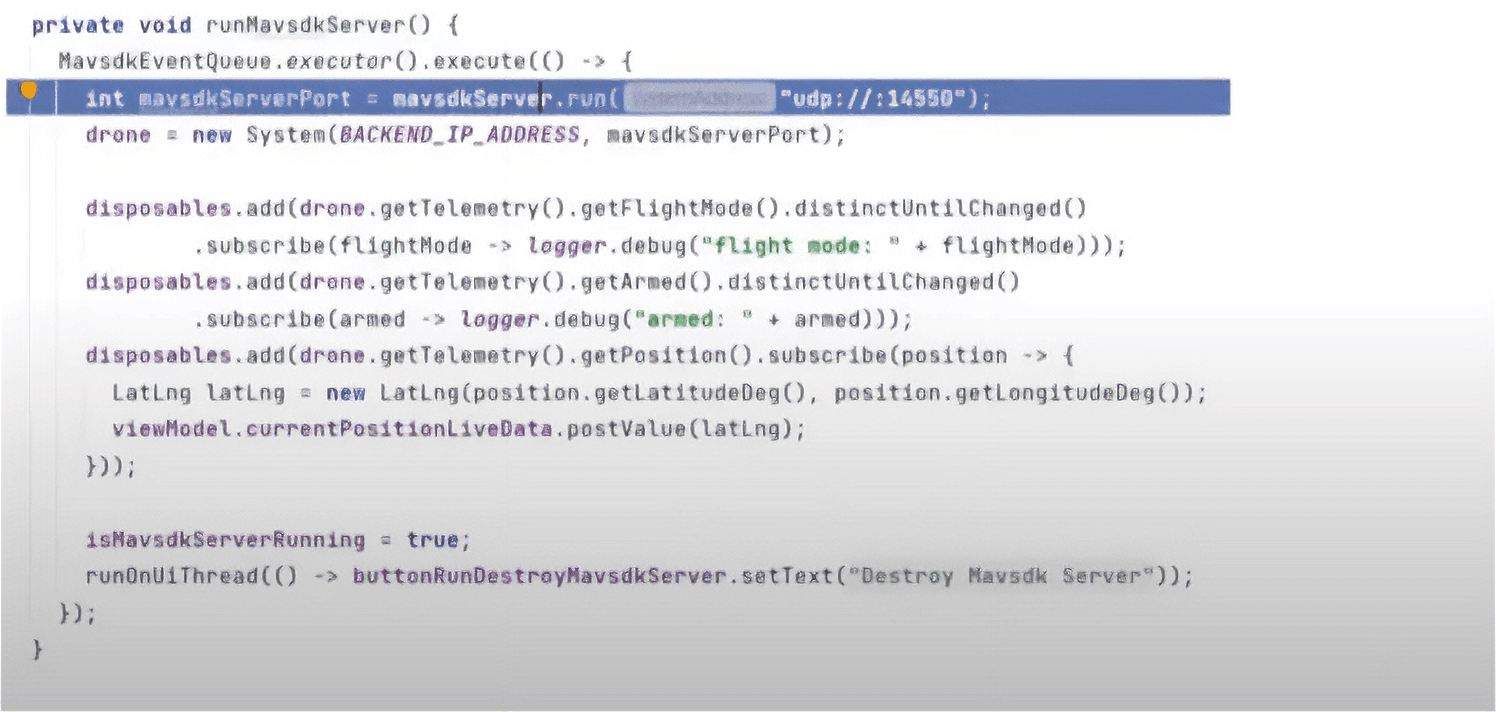
Then change this:
To this:
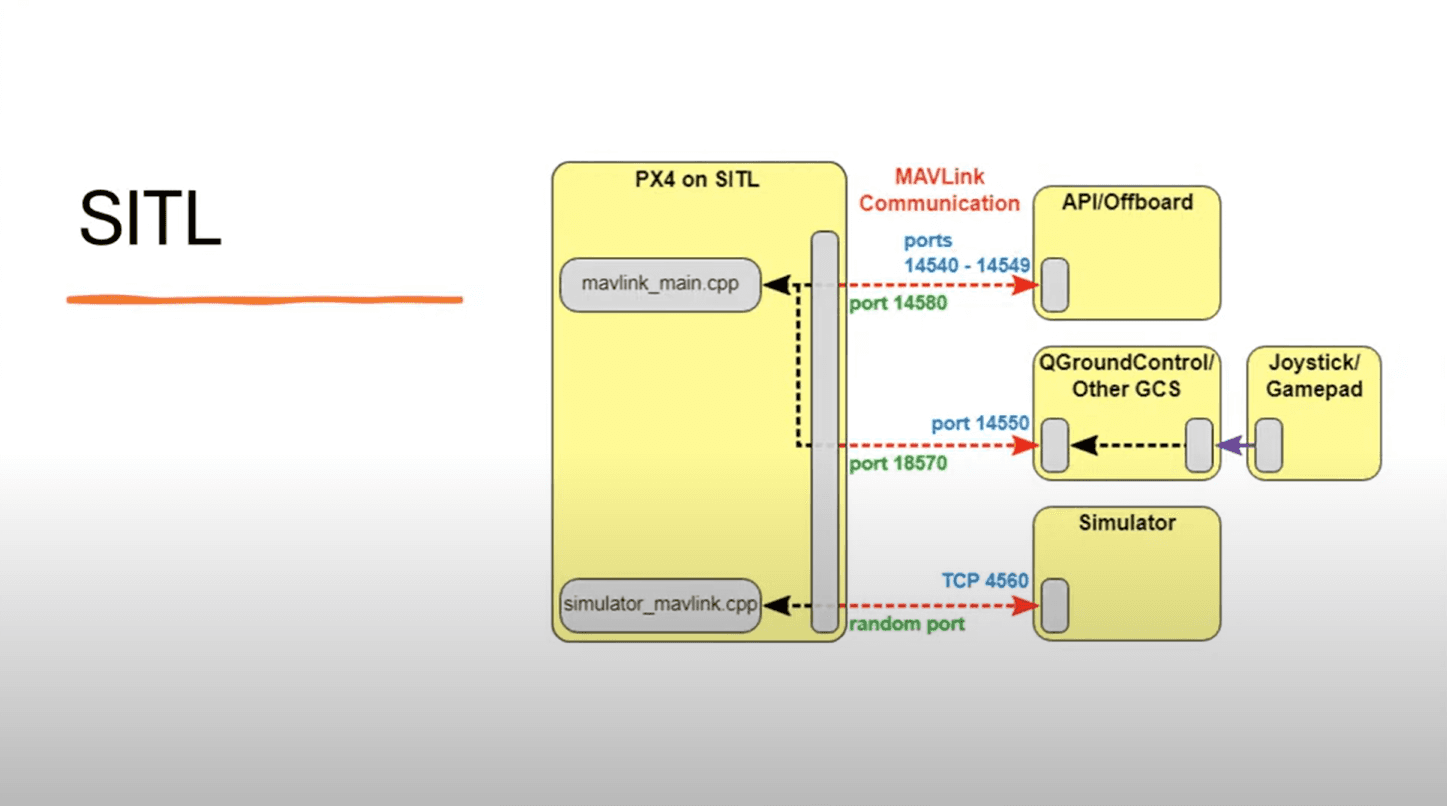
If you were paying attention to the SITL diagram earlier you will notice that the port we are running the mavSDKServer on is the one that points to the GCS.
Sample Client
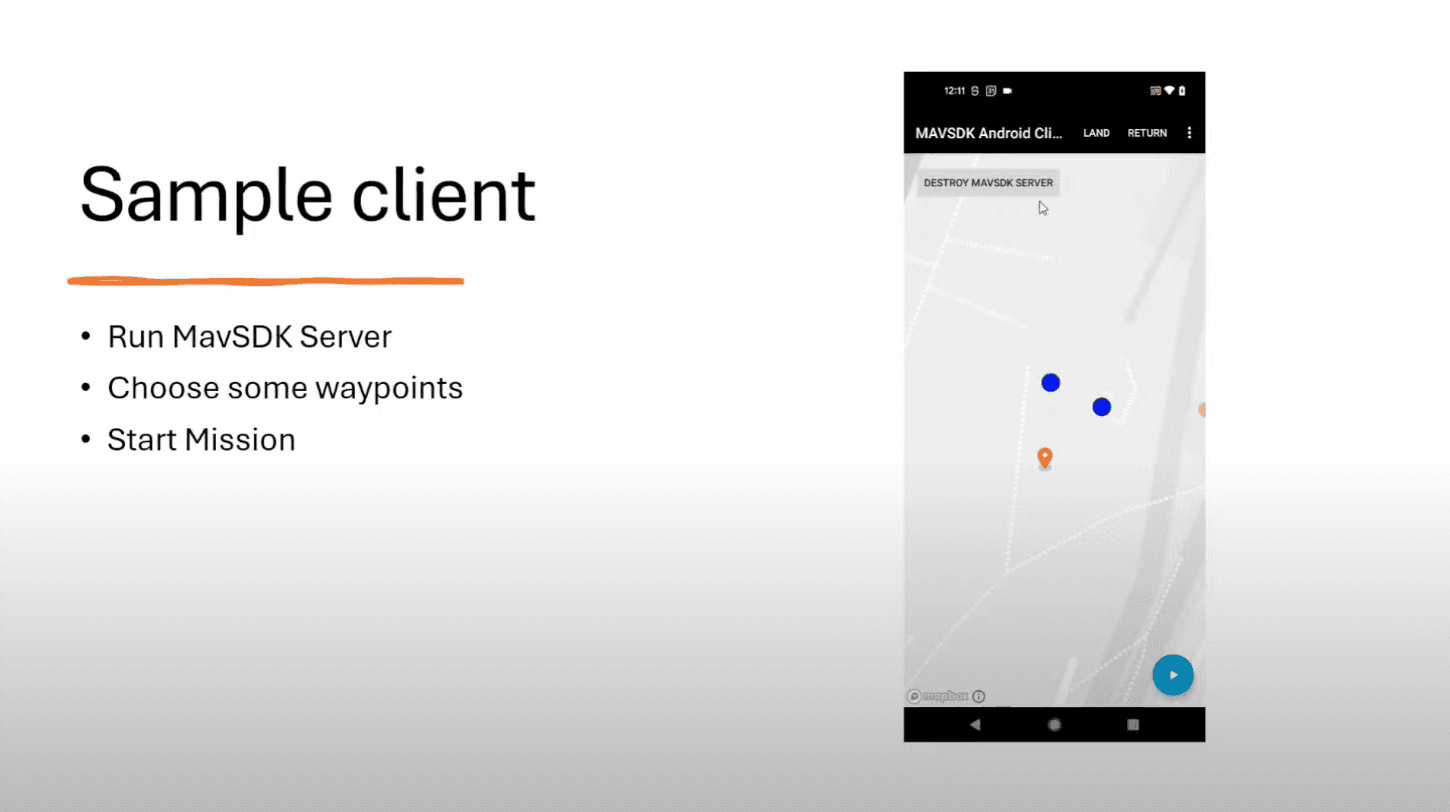
Make sure your phone is running is connected to your computer via USB and set to debug mode, then hit the play button in Android Studio to see what happens.
A More Hand’s On Example
A 2-Minute Crash Course on Android Development
For an Android app you need a layout file, activity_main.xml and you need a main activity file, MainActivity.java. Your layout is controlled by layout a file, and the main activity file is were things get done, like buttons, functions etc.
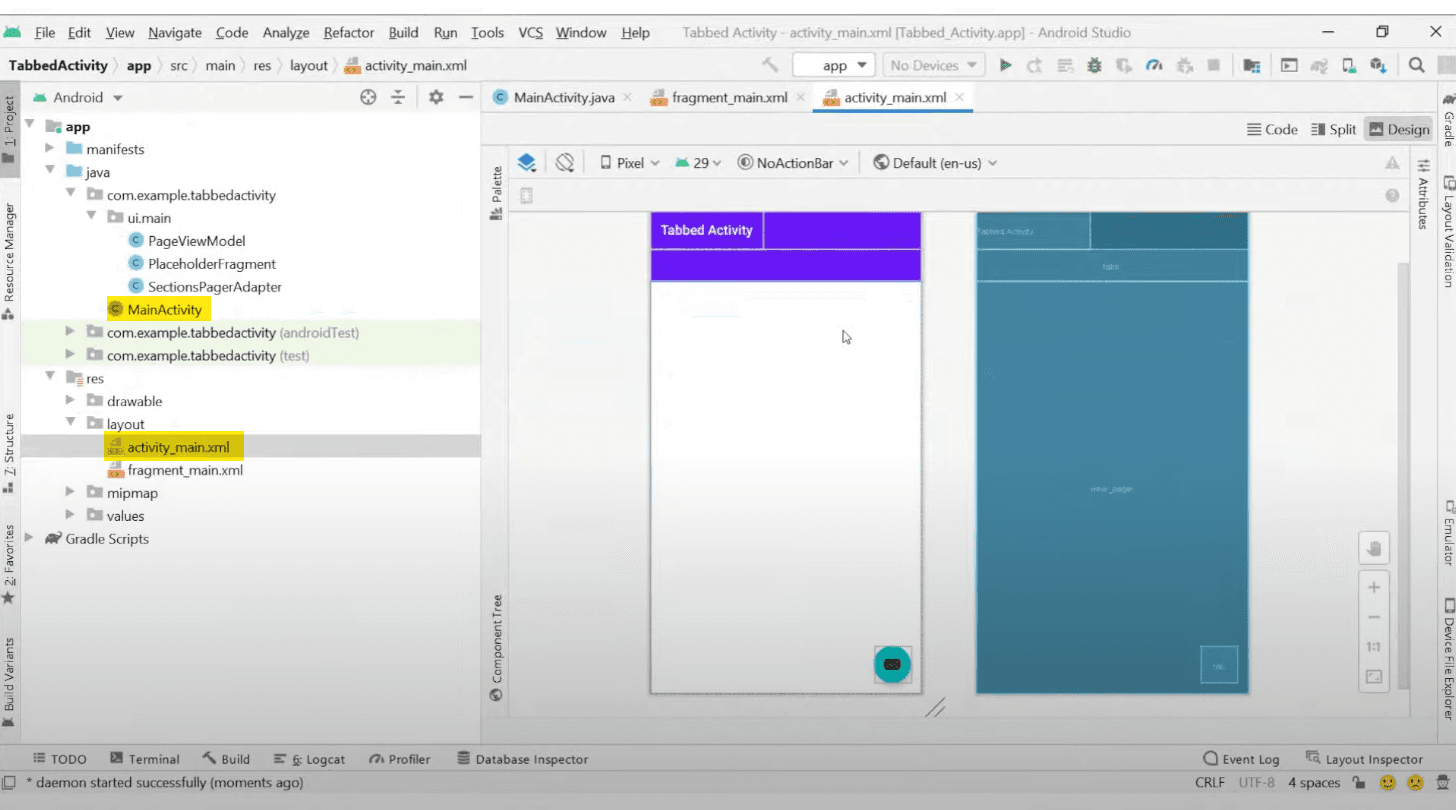
Creating a Layout
For simplicities sake, we are only trying to do three things, connect to the server, take off, and land, so we need to build a layout within activity_main.xml that includes three buttons, one for each of those functions.
Writing the Functions and Listeners in MainActivity.java
In MainActivity.java add the below code within the MainActivity class.
What we are doing here is really simple. We create the btn variables and connect them to our layout buttons by using the findViewById method. Then we add listeners to each of those variables which will invoke the functions at the bottom of the code for each of the corresponding buttons.
Let’s breakdown the functions more.
initializeServerAndDrone()
The first line creates a new instance of the MavsdkServer class, which is responsible for handling the communication between the application and the drone. Then we bind the server to the UDP port. Lastly we create a new System object which represents the drone.
takeoff()
This arms the drone, issues a takeoff command and then subscribes to the observable stream created by the chained commands.
land()
Land functions similarly except it issues a land command.
Updating the Dependencies
Add the following changes within dependencies{}{ in the build.gradle file:
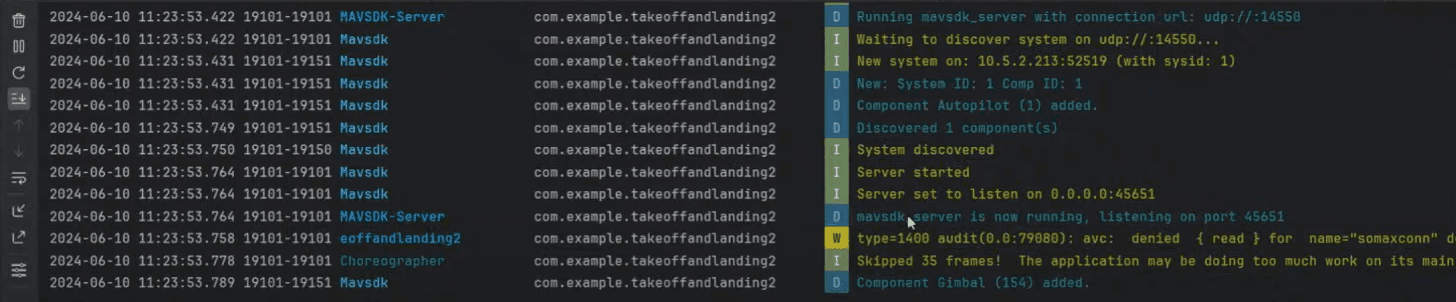
Run the App for the First Time
In the terminal run docker run --rm -it jonasvautherin/px4-gazebo-headless:1.11.0.
Make sure your Android device is connected via USB with debugging enabled. Run the app on the device and it should connect to the simulator on your machine.
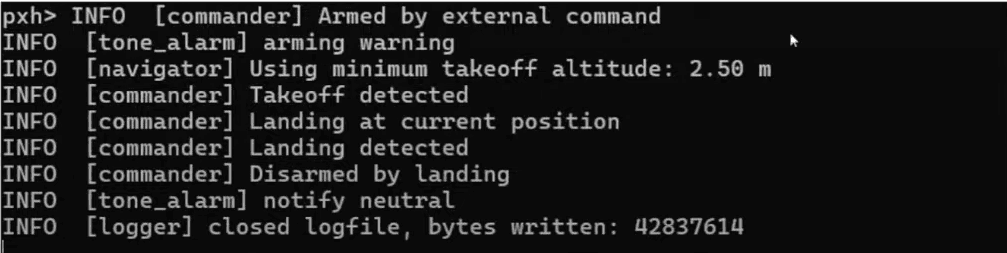
Take Off!
Hit the Take off button in the app on the Android device and you should see this in the command line:

All the log info here is from the thread you subscribed to in the takeoff().
Landing!
Hitting the landing button should give you this set of logs:
What Next?
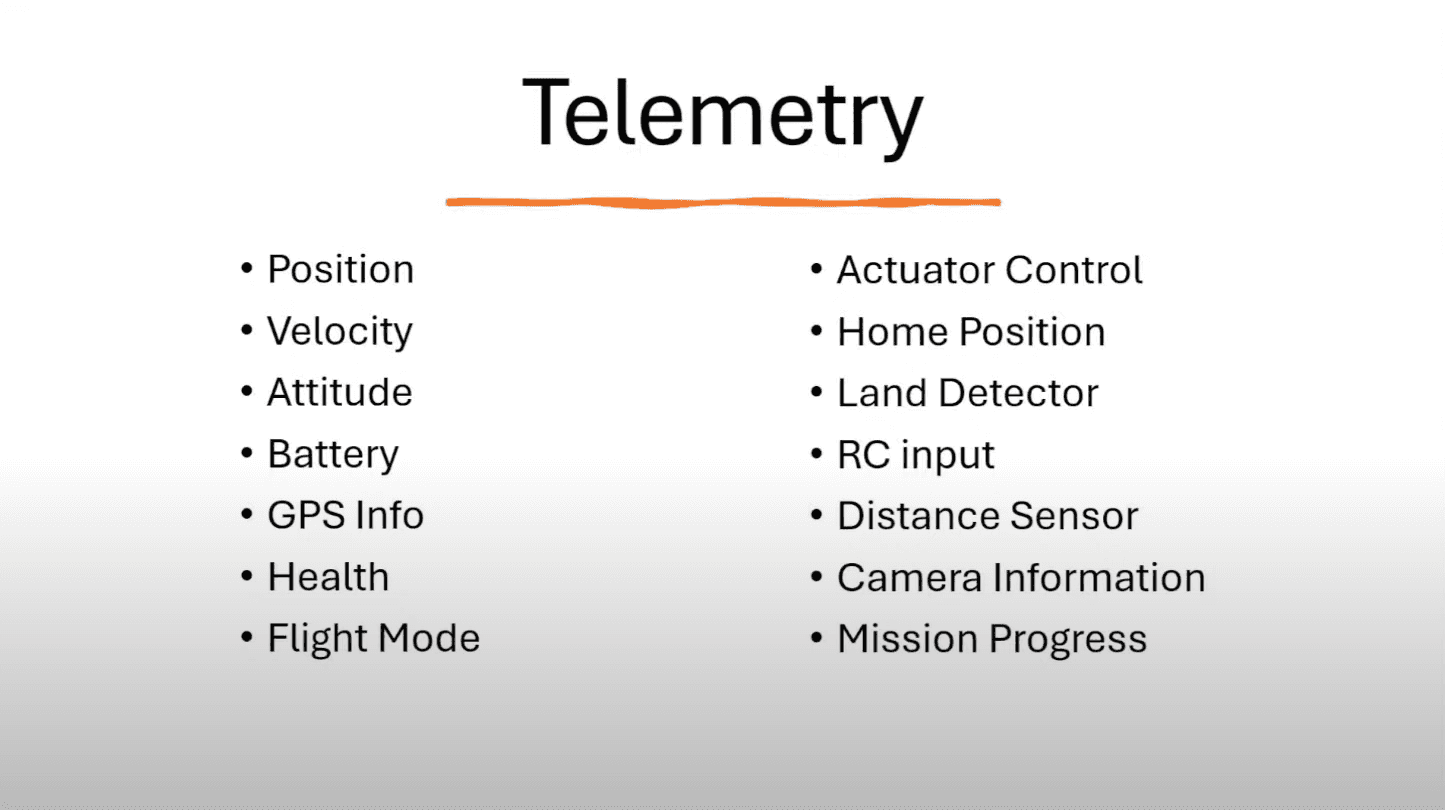
We can make drone go up and make drone go down, but what if we want to do something more interesting or useful. In order to make a drone do anything interesting we will need telemetry information. Here is a non-comprehensive list of the telemetry data you can receive from the drone.
Why don’t we start by getting some altitude data. Add this code to MainActivity.java:
This code is using RxJava to retrieve the altitude of a drone from its telemetry data in a reactive way. mDrone.getTelemetry().getPosition() returns a Flowable that emits Telemetry.Position objects containing the drone's position data. The map operator is used to transform each Telemetry.Position object into a Float representing the relative altitude in meters, using the provided lambda function: position -> position.getRelativeAltitudeM() Then the subscribeOn operator is used to specify the Scheduler on which the source Flowable should execute its work while the observeOn operator is used to specify the Scheduler on which the downstream operators (after observeOn) execute.
More simply, this code retrieves the drone's position data from the telemetry on the IO Scheduler thread pool, transforms each position object into a Float representing the relative altitude, and emits the altitude values on a single-threaded Scheduler. Essentially, we are logging whatever altitude data comes streaming in.
Adding Latitude and Longitude
Going up and down is nice, but it might be useful to go North, South, East, and West also. Let’s add some Latitude and Longitude data to get a better idea of our drone’s position in the world.
This is very similar to our getAltitude() with but with an important key difference. Here we are no longer transforming the position data into a float.
Before moving on, if you haven’t already, be sure to add Get Altitude and Get Position buttons to the activity_main.xml file.
Now if you hit the Get Position button you should see Latitude and Longitude data in the console.

Creating a Simple Mission
First, add a ‘Start orbit flight’ button within activity_main.xml.
Then add the following code to MainActivity.java:
We’ve prefilled our mission with some data, but what does it all mean. The first two numbers are our latitude and longitude. The first 10F is our relative altitude and our second 10F is our speed. The true sets isFlyThrough to on. The last 10F is a relative radius to make sure the drone orbits.
This whole list is actually just one mission item.
After the mission is over we have the drone return to its launch position with mDrone.getMission().setReturToLaunchAfterMission(true); and then we upload the mission and reset the drone’s mission status.
Hit the Play button in Android Studio to build and run.
Assuming this works you should see logs like this in the console.

Final Thoughts
By following this comprehensive tutorial, you should now have the skills to develop Android applications that can interface with and control drones and other autonomous systems using the MAVSDK (MAVLink Software Development Kit). You learned how to set up the required development environment, including installing Docker, Android Studio, and cloning the MAVSDK-Java repository. The tutorial guided you through creating a basic Android app with user interface elements like buttons to connect to a simulated drone server, arm the drone, initiate takeoff and landing commands, and subscribe to telemetry data streams like altitude, latitude, and longitude using RxJava. You gained hands-on experience creating a simple missions and you are now equipped to build more advanced drone applications leveraging the MAVSDK's awesome capabilities.
