GitHub Copilot is changing the way developers write code. Whether it’s novices ‘vibe coding’ or seasoned developers using it to reduce the boilerplate they have to write, the shift towards LLM tools seamlessly integrated into IDEs is moving in one direction. In a recent OpenAI Application Explorers meetup, Godfrey Nolan, President at RIIS demonstrated how this groundbreaking tool can enhance your productivity, help you write better code, and streamline your development process. As usual, you can follow along with the video as well as the tutorial below.
Understanding GitHub Copilot
GitHub Copilot is essentially ChatGPT for your code editor. It integrates directly into your IDE, providing real-time coding assistance as you work. Using machine learning models, Copilot analyzes your code, comments, and context to suggest relevant code completions.
Pricing Options
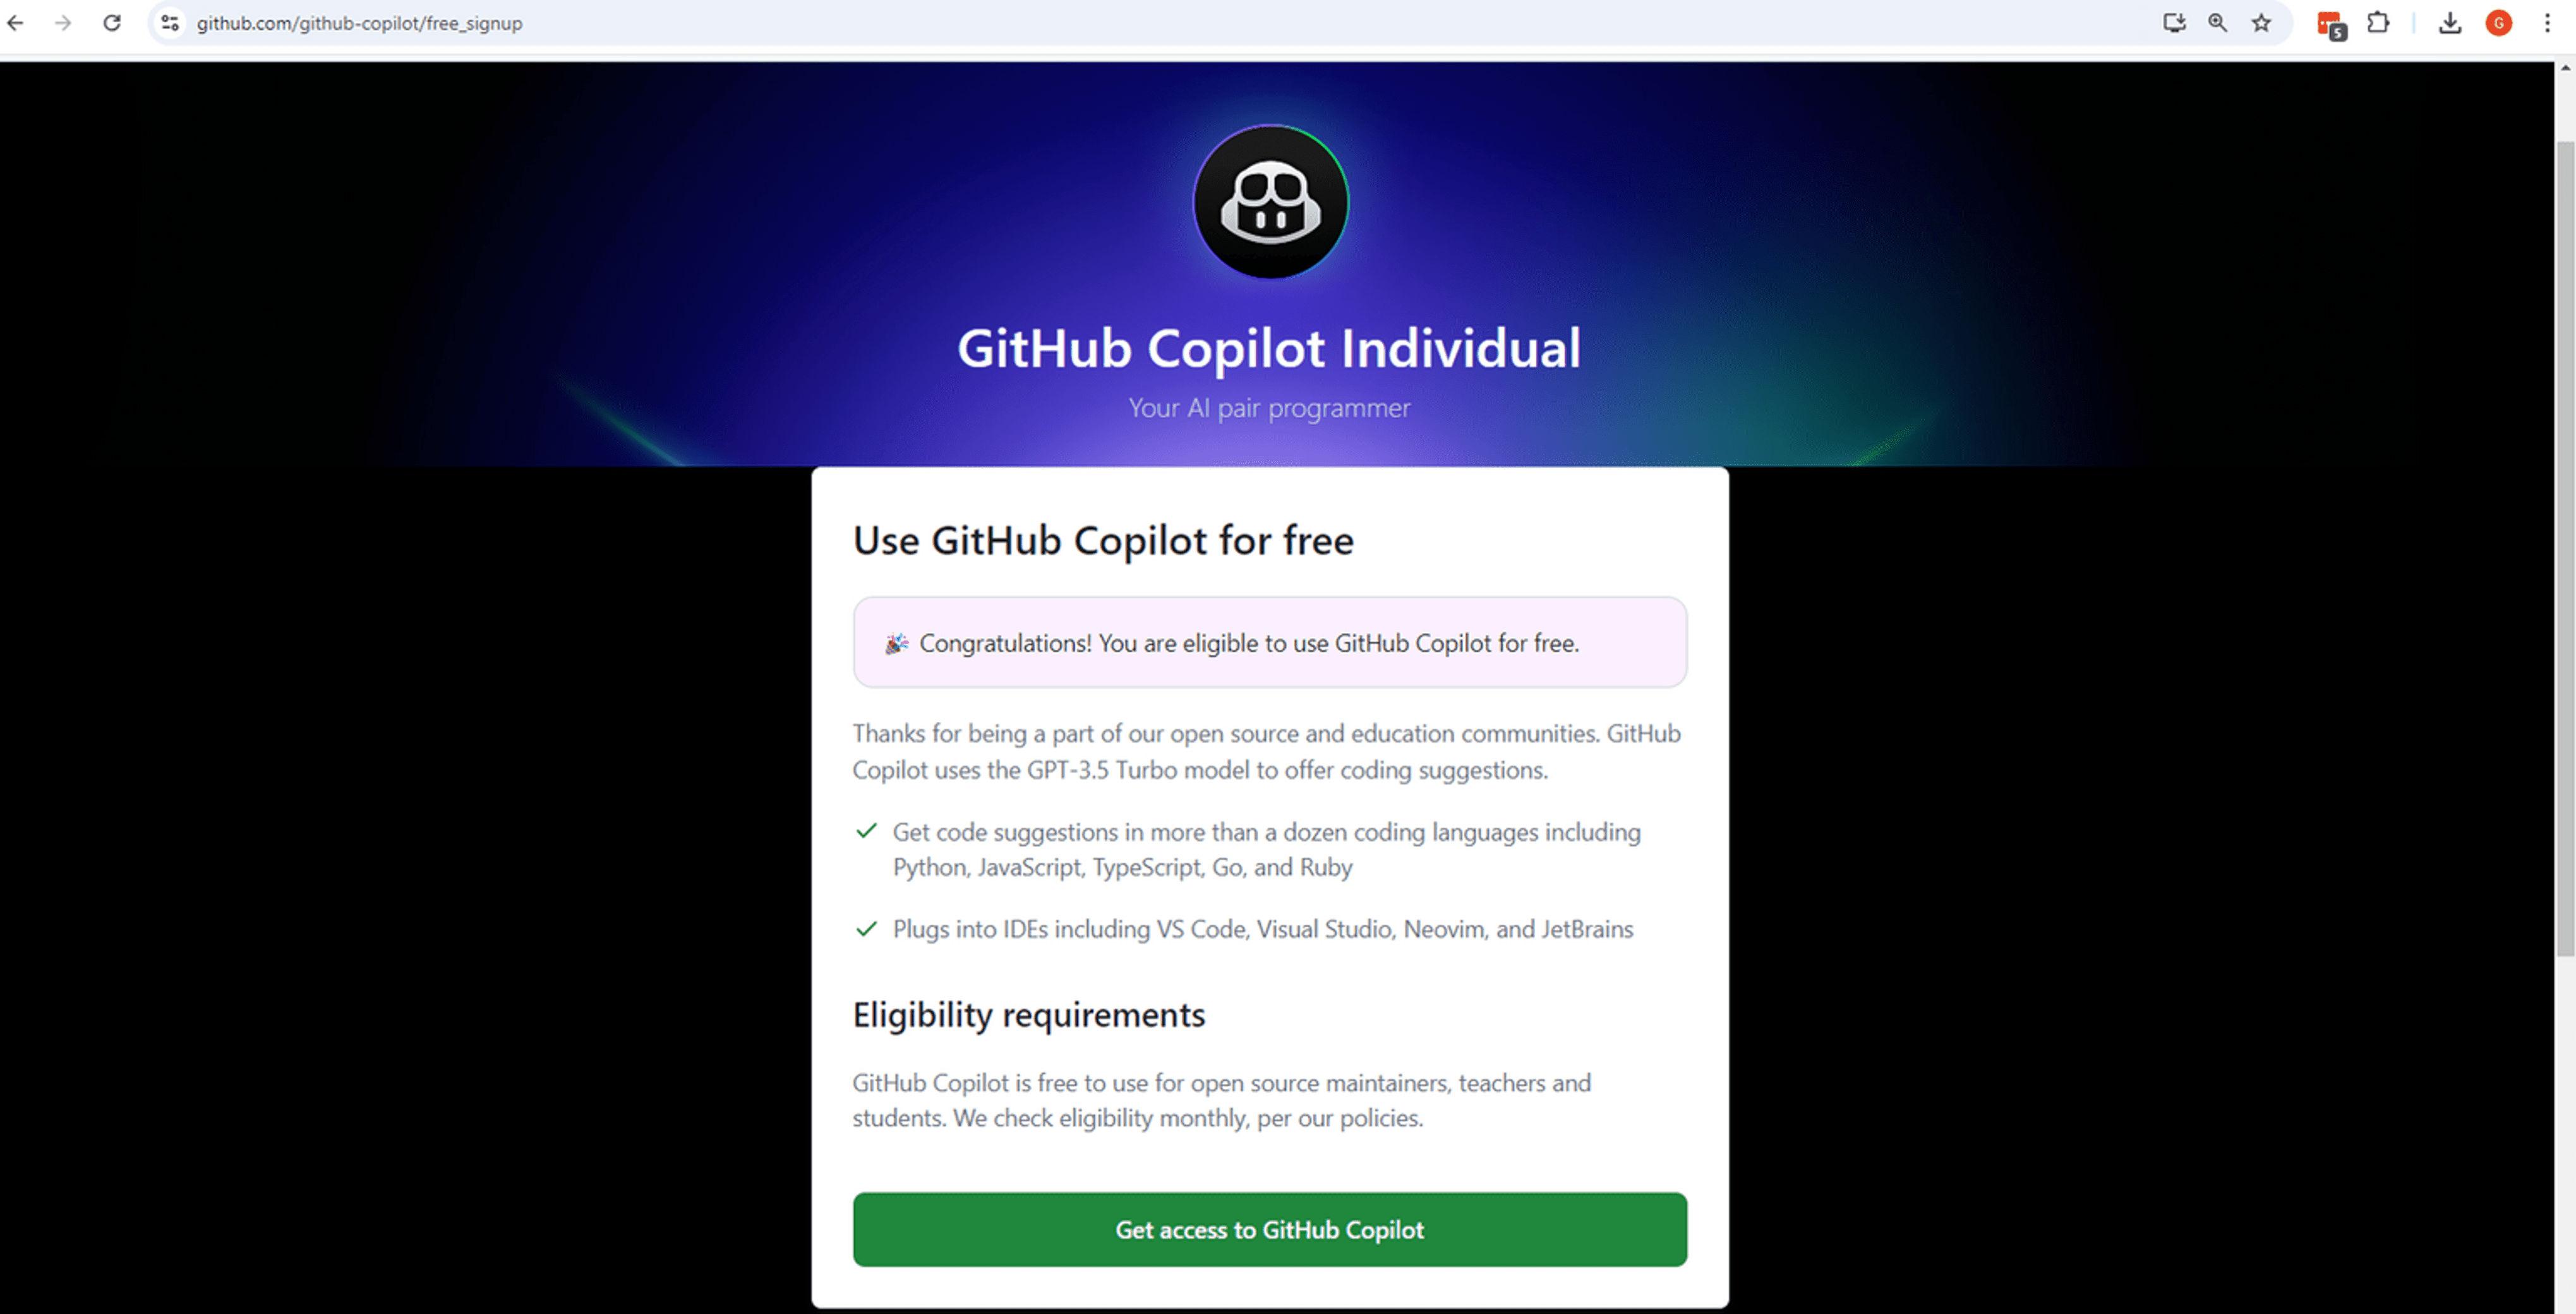
Although there is a free tier for GitHub Copilot, we recommend you go with the paid tier at approximately $19 per seat. There’s also a free version with limited capabilities that works with GPT but doesn’t support other models. Also, if you are a professor or a student, don’t fear, there’s an “Education” tier with free access.
Getting Started with GitHub Copilot
Setting up GitHub Copilot is straightforward, but ensuring you have the right configuration is essential for making the most of its capabilities. We are going to use VS Code for this tutorial, but feel free to use the IDE of your choice.
Installation
To get started with GitHub Copilot:
Sign up for GitHub Copilot through your GitHub account. Under accounts, you can find it in the 4th spot titled Your Copilot.

Take a look at Copilot Policies and make sure that you have enabled Copilot Chat in the IDE.

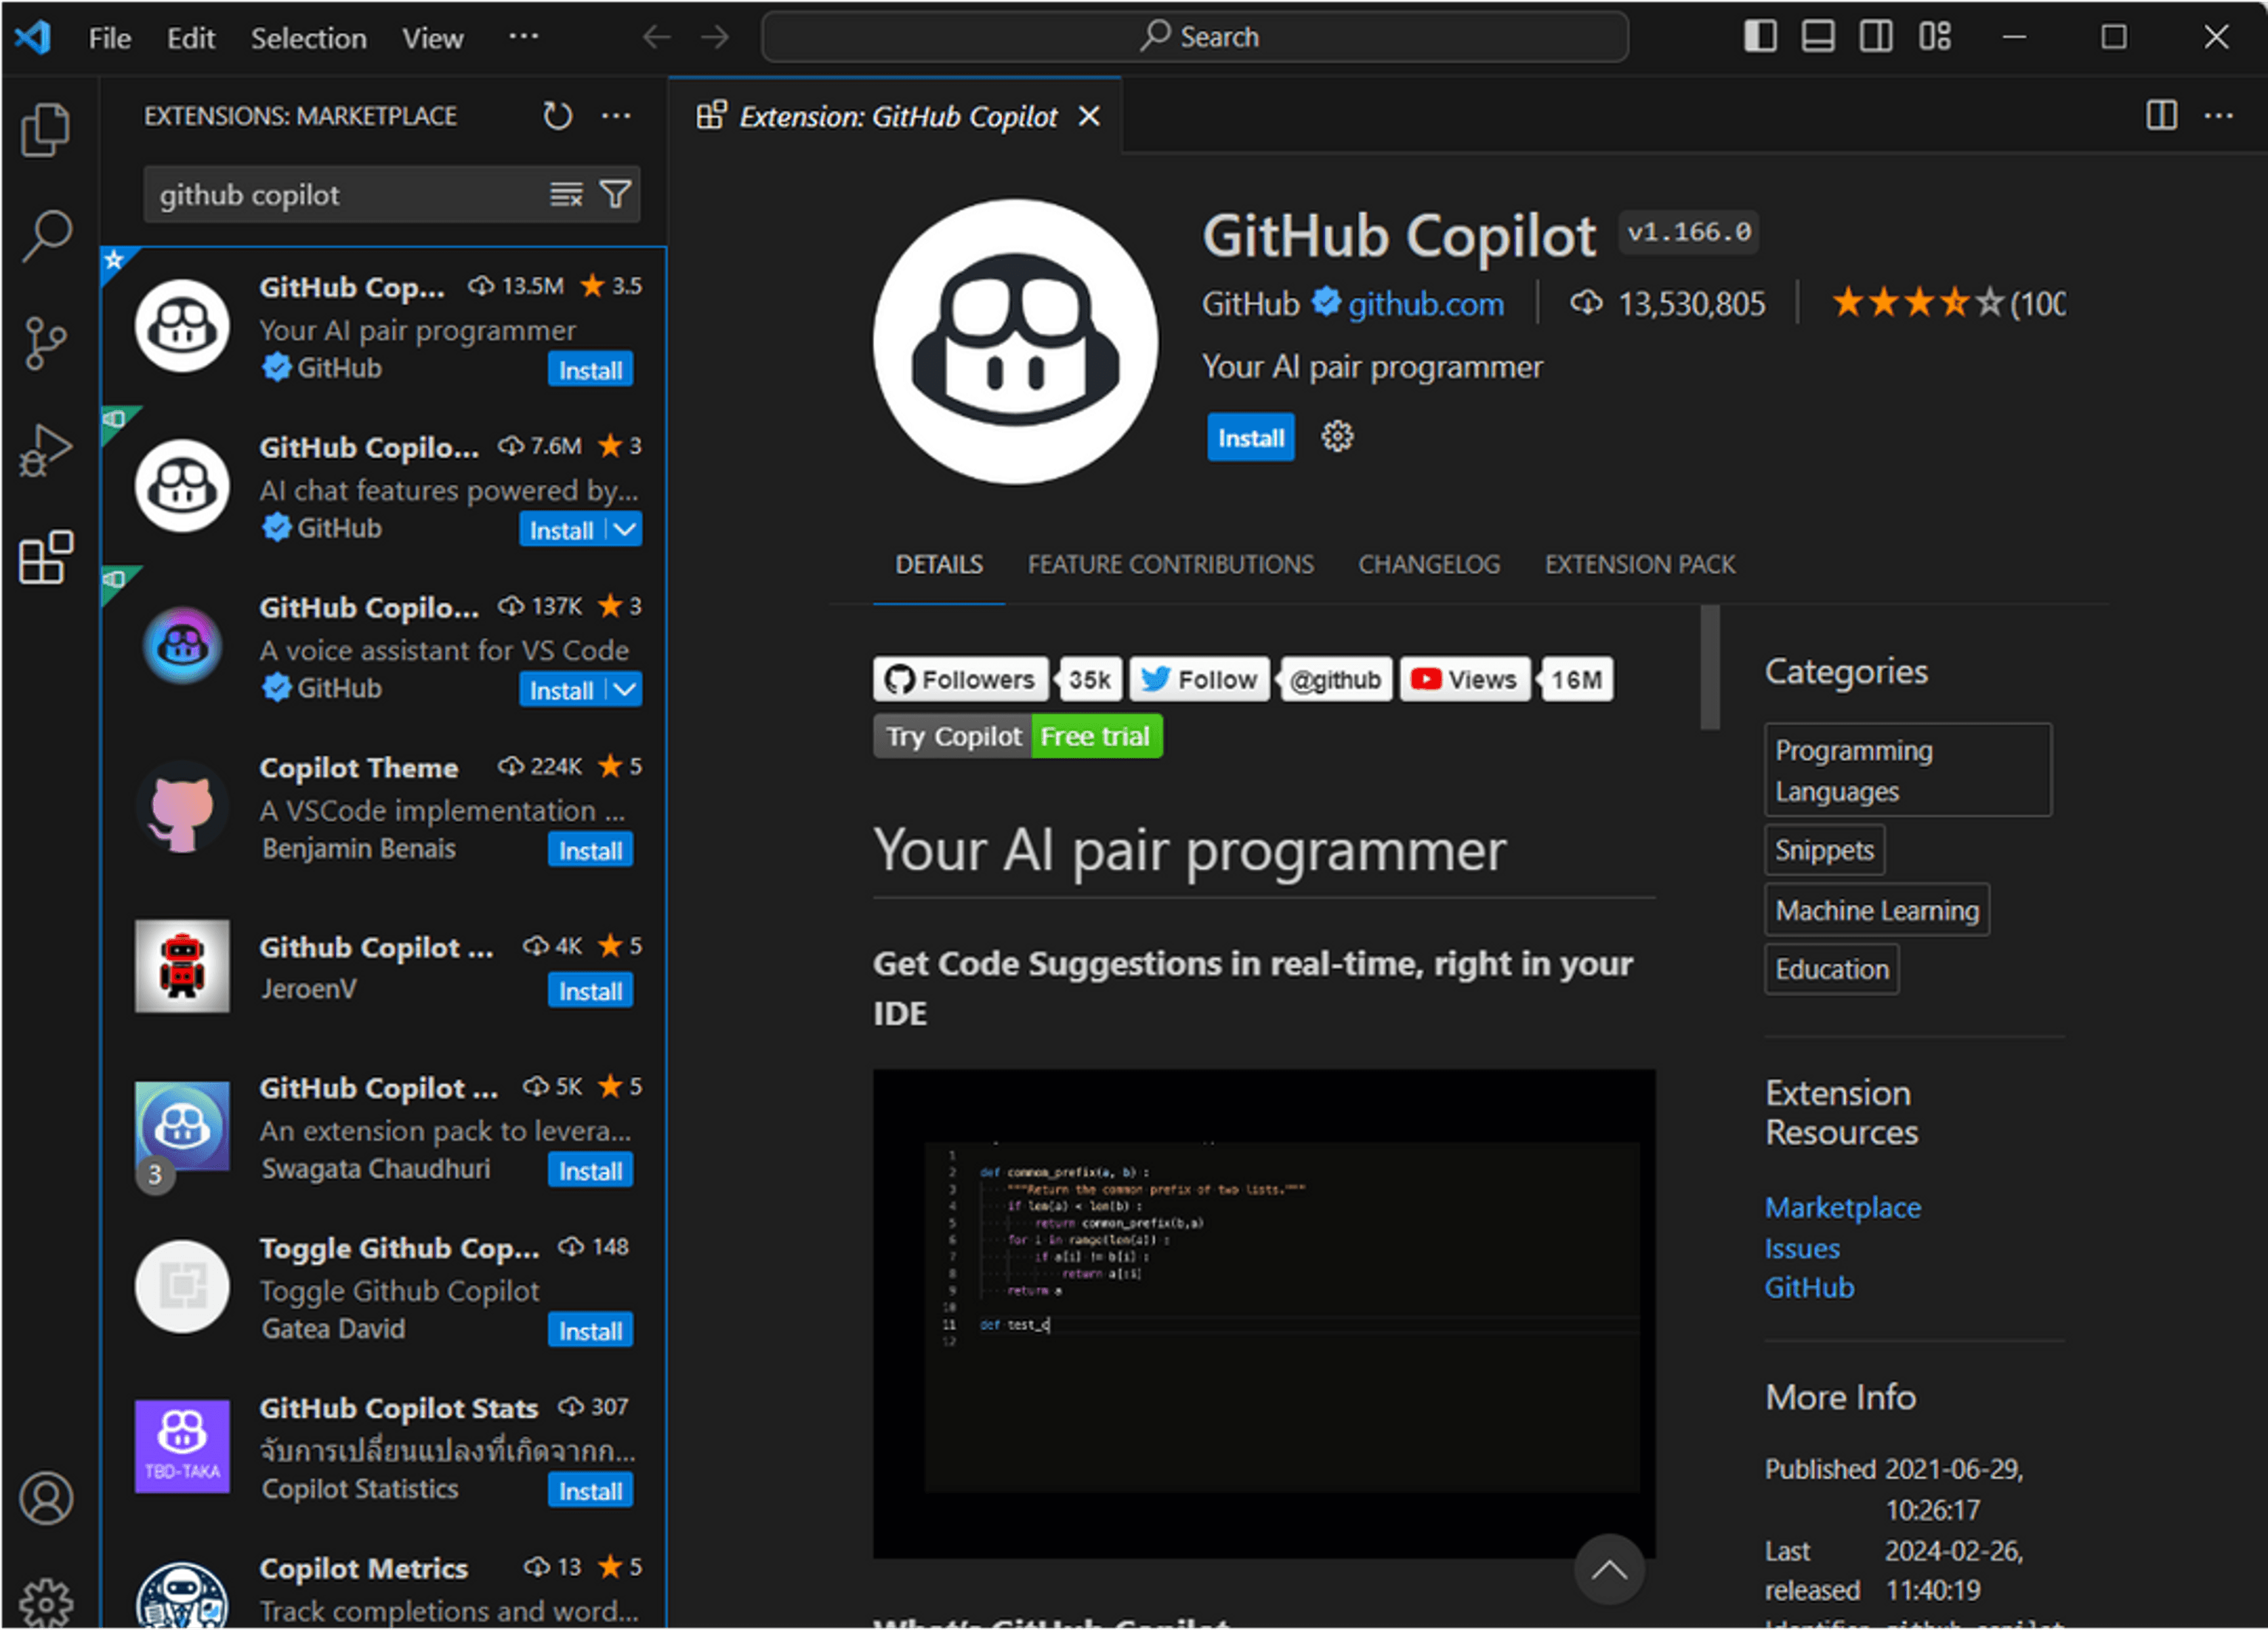
Go to the VS Code extensions marketplace (or your preferred IDE’s extension list).
Install the GitHub Copilot and GitHub Copilot Chat extensions
In VS Code, you’ll have to sign in through the IDE. It should be an icon in the bottom right corner

Consider also installing GitHub Copilot Pull Requests for code review features
Configuring Options
Many important Copilot options are now managed through the GitHub website rather than within the IDE. To access these settings. You can access them directly if you are already signed into GitHub by going to https://github.com/settings/copilot.
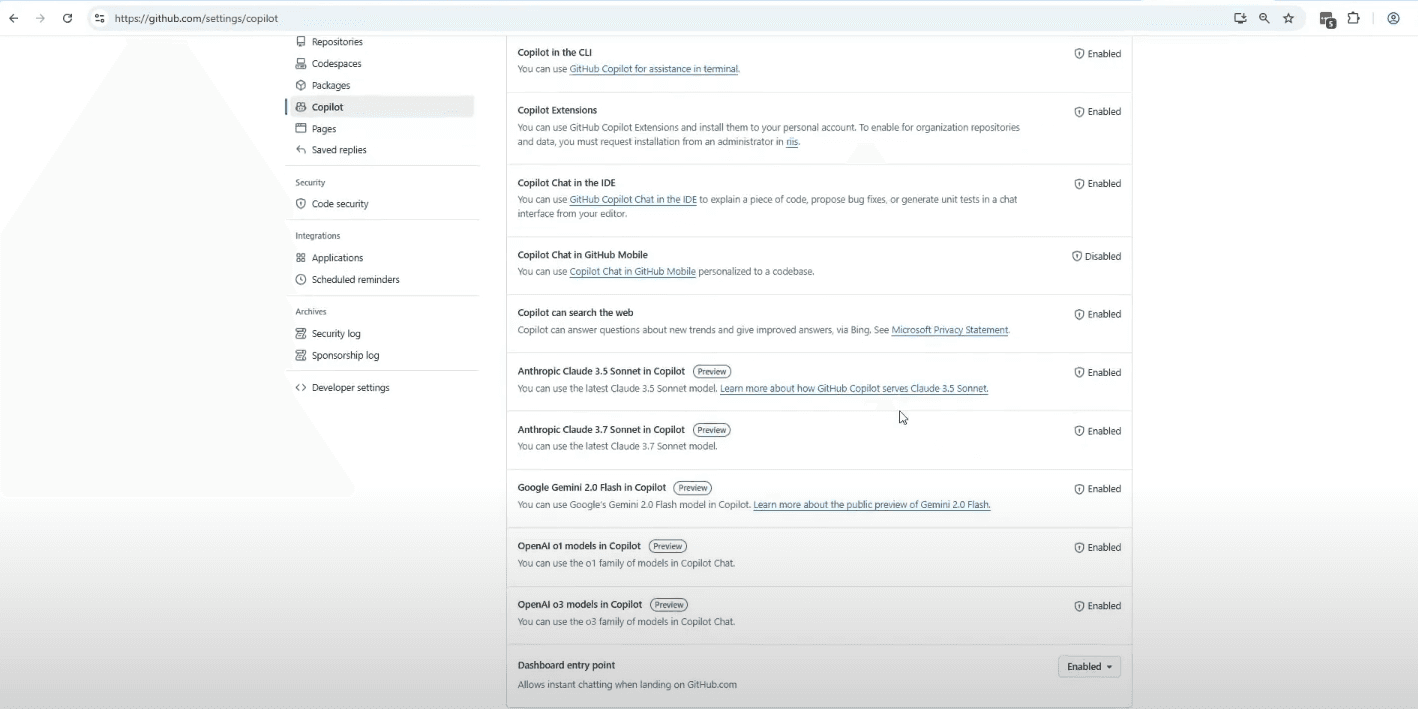
Sometimes you need a different model to fit the task at hand. Here you can choose the model you want to use, as well as some other important options to consider, such as:
Web search integration: Enabling this allows Copilot to search the web for solutions.
Pull request integration: This allows Copilot to assist with code reviews (Make sure to have Copilot in GitHub.com enabled.
Extensions support: Essential if you want to extend Copilot’s capabilities.
Public code matching: Controls whether Copilot can suggest code that matches public repositories.
Basic GitHub Copilot Features
Once set up, you can start leveraging Copilot by pressing on that icon in the bottom right corner again. This time, it should open up a chat dialog for us.
Code Generation
The most basic use of Copilot is generating code from scratch. Let’s look at a simple example. Give Copilot the prompt “Write me a Python file to multiply two numbers.”
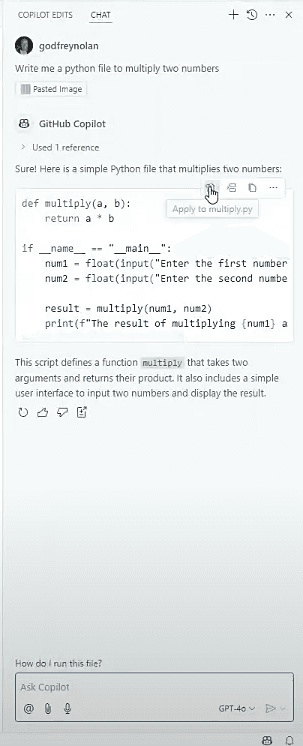
And there you go, it provides a fully functional Python script to multiply two numbers. Also, note that at the bottom of the chat interface, we have some options available to attach files, use speech to prompt it, and select our model in a dropdown. Another great feature of this chat interface is that you now have the option to Copy or Apply the code to a file. Let’s click on Apply and test the script in the terminal.
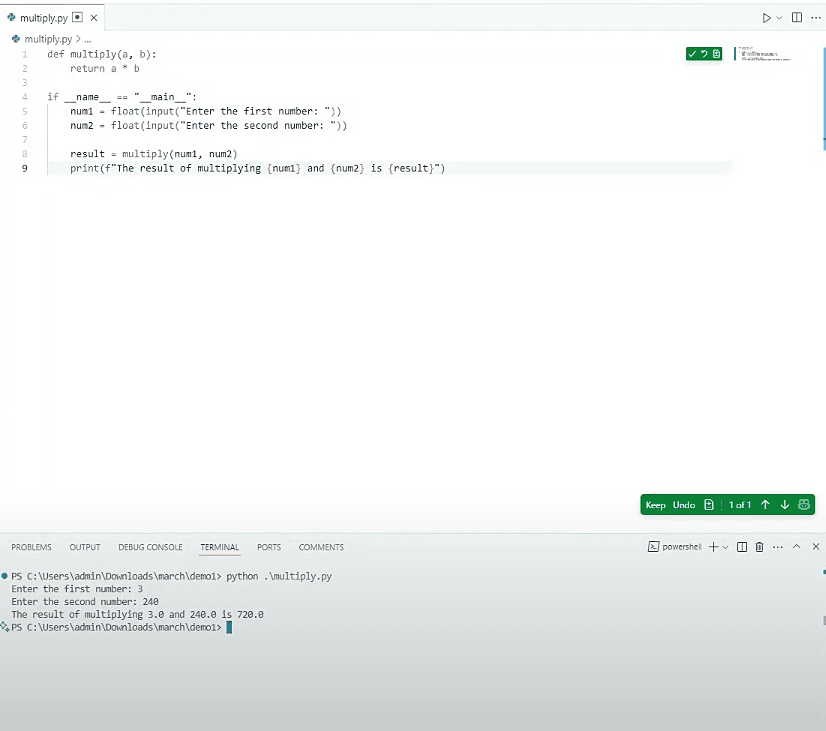
Here you can see that by putting in 3 and 240, we get the result of 720.0.
You can also generate your code inline with a Cmd + i (Mac) or Ctrl + i (Windows), although the chat interface is more feature-rich.
Command Palette
Typing a ‘/’ in the chat window will give you a list of command options. Some of these are directives, and some are simple command functions, for the like ‘/help’ and ‘/clear’.
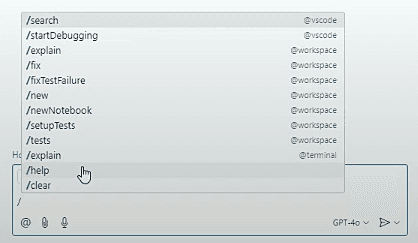
Here are some of our favorites:
Explain - Breaks down what the code is doing
Fix - Identifies and resolves errors in your code
New - Creates new files or functions
Tests - Generates unit tests for your code
Workspace - Analyzes your entire project
A good combo to get started is @workspace /fix. You can ask Copilot itself for a full list and explanations.
Enhancing the Development Workflow
Beyond basic code generation, Copilot can significantly improve your development workflow in several ways.
Unit Testing
One of the most valuable features of Copilot is its ability to generate unit tests for your code. This addresses a common pain point in development. One hardly has to scour the internet for memes about how developers hate writing unit tests. Finally, we have a solution.
For example, if you have a function like our multiply_numbers function above, you can ask Copilot to generate tests:
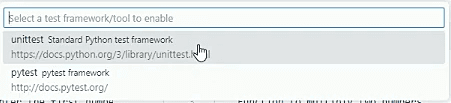
If this is your first /test request for the workspace, the prompt response should trigger some menus for selecting the test framework. And you should get something like this in response:
Run the test script in the terminal and you should get this:

Documentation Generation
Documentation is another area where developers often fall short. Copilot can generate comprehensive documentation for your code, saving time and ensuring consistency.
Building Applications from Scratch
Copilot truly shines when you use it to scaffold applications. We will demonstrate this by building a Flask web application that reads a CSV file of books and displays them in an HTML table with checkboxes to mark books as read. Although not complex in theory, the amount of boilerplate to set this up in the past was tiresome.
To start a project, you might give Copilot an instruction like:
It’s important to try and break down the steps. Sometimes, giving the prompt too much information works against you. Singularly focused tasks increase accuracy. If Copilot works as intended, you should have the basic Flask app ready. Execute it from the command line to test.

You may see it go overboard and try to make a giant application. A little reminder to keep it simple never hurts. Your simple Flask app directory structure should look something like this:
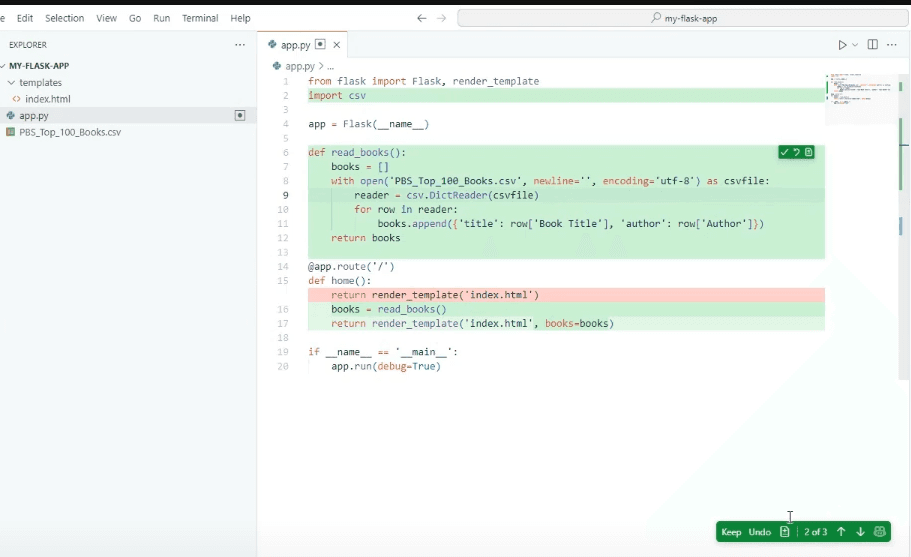
Now that Copilot has generated the basic structure of the application, you can refine with more specific requests:
If you use the apply to file option like we did earlier, you will notice that now that we have working files, the changes will be reflected inline in the interface with additions highlighted green and removals highlighted in red. Click the check to accept the code if it's correct, or else revert and modify your prompt.
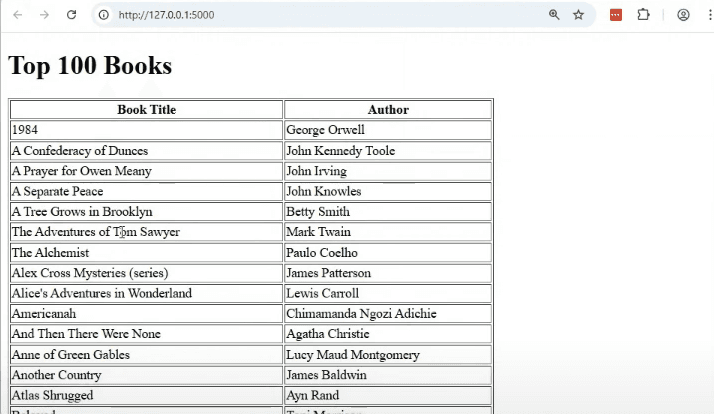
Move on to the next file which should be the index.html file, and accept the changes there also. If not instructed to do so, it will give you a basic web page with no visual polish:
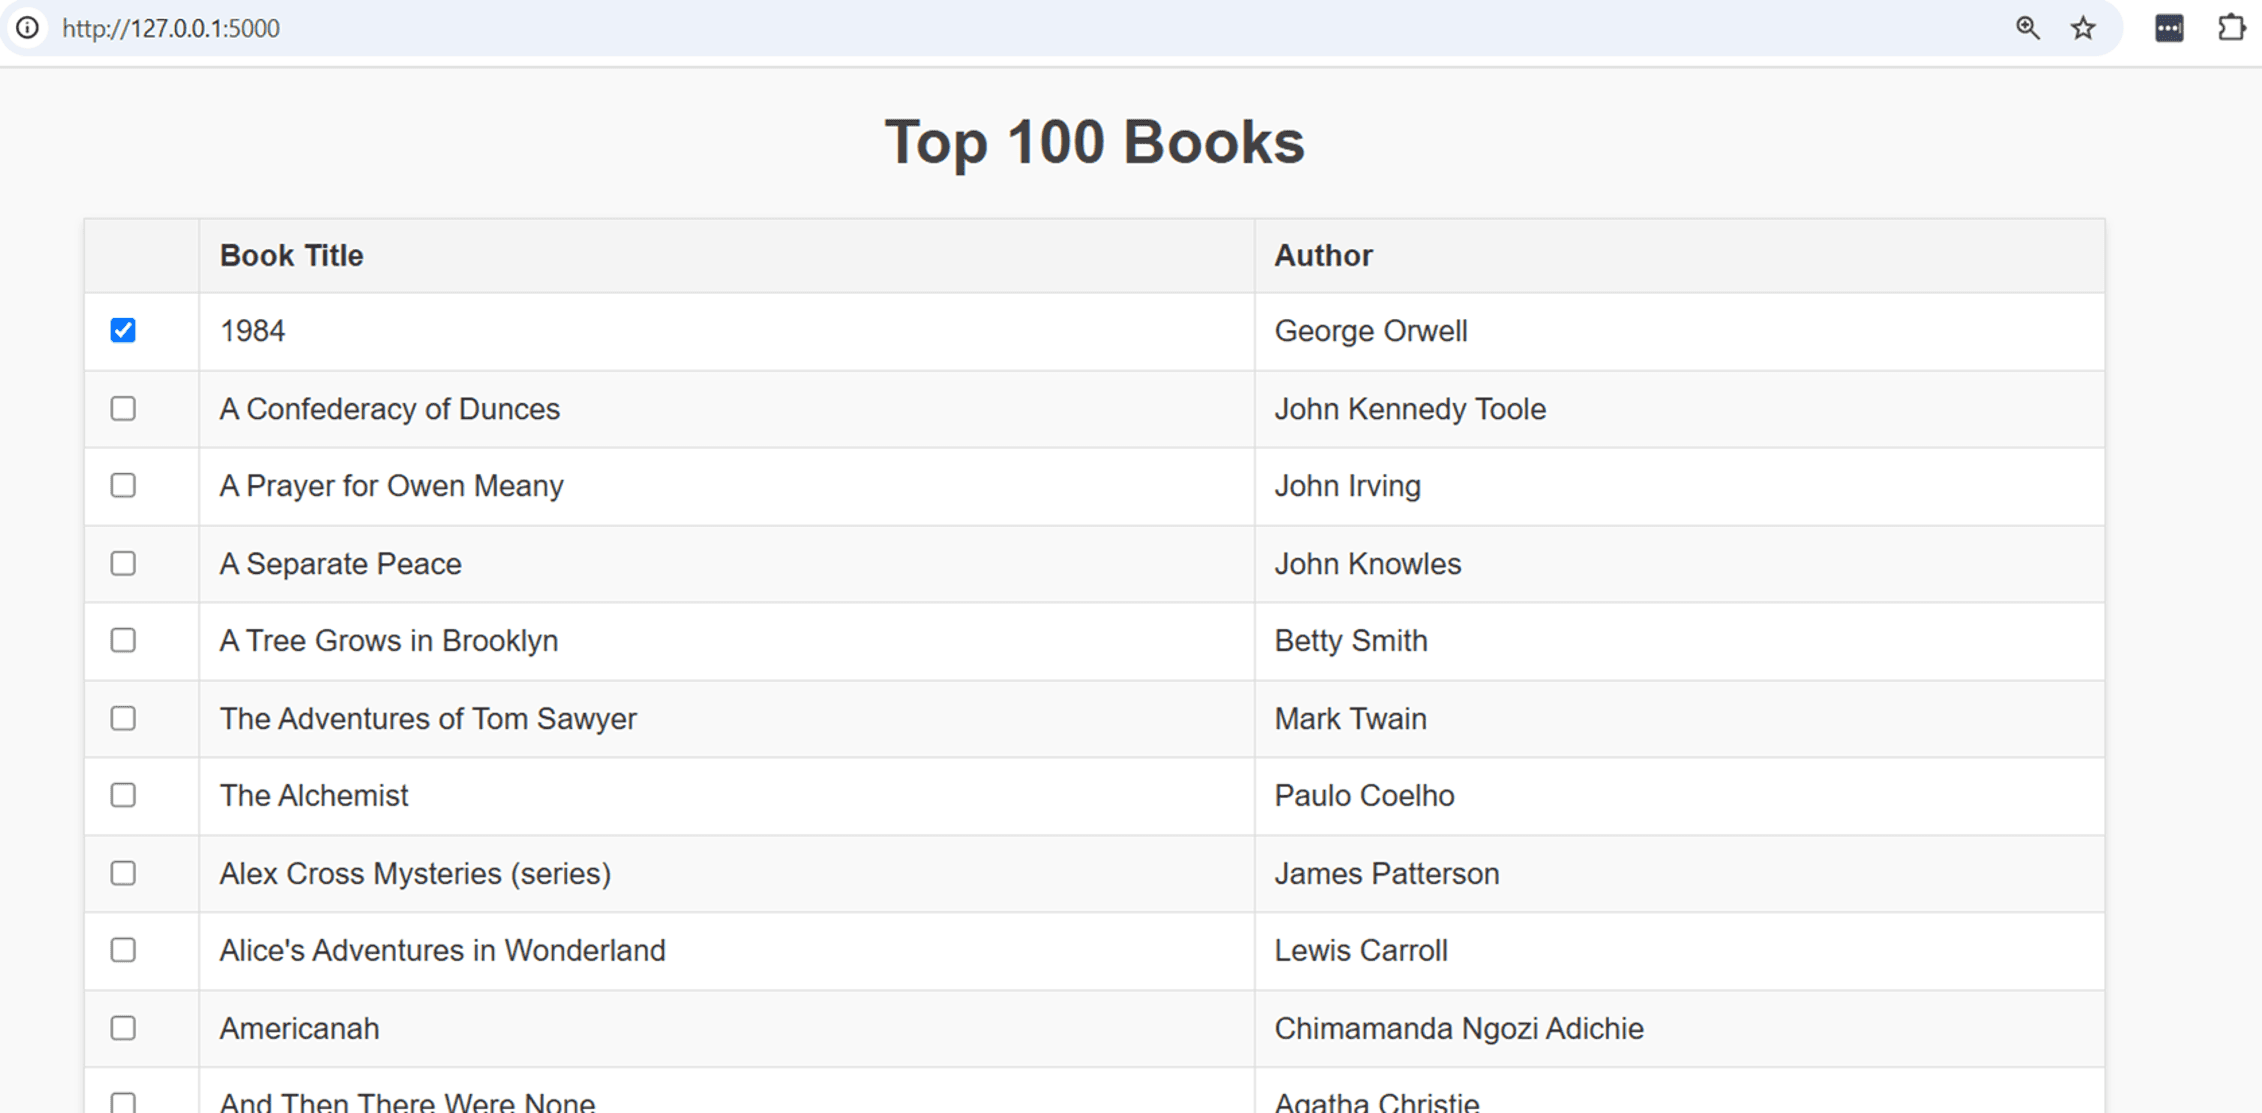
LLMs are great at CSS, so ask Copilot to generate some basic styling for you. It will then create a styles.css file which should be in a /static folder at the top of your app directory. To make this app fit our original goal, we need to add checkboxes. Let’s use this prompt:
This should modify our HTML file one more time and this is what you should see when you reload the browser after saving.
A checklist that doesn’t save state isn’t particularly useful, so we will want to turn this into a form with a save button so that when we reload next time, our state will be preserved. Issue the following prompt:
This should make changes to both index.html and app.py at a minimum. It may also modify styles.css, but not always. After the changes have been committed, once you reload the page and hit save, you will get a popup that says the books have been saved, but chances are likely, they have not been. To ensure this, let’s issue the prompt:
This should get Copilot to create the /saved_books route if it doesn’t already exist. It will also make changes to app.py to handle the file saving function. Alternatively, you can have it update your original CSV file, but that would replace the original data. Check the CSV file created or modified when you save to make sure the data has been updated. Now, you have a fully functioning reading list app.
Did Everything Work Out Perfectly?
You may have run into errors during the process. Vibe coding may be a meme, but the truth is, programming knowledge will help you from falling into an error doom loop. If you run into app-breaking errors, try not only copying and pasting them into the chat to fix them, but also use the chat to interpret the error for you. This will help you learn to spot the problems before they break your app and better direct the model to produce the results you are looking for.
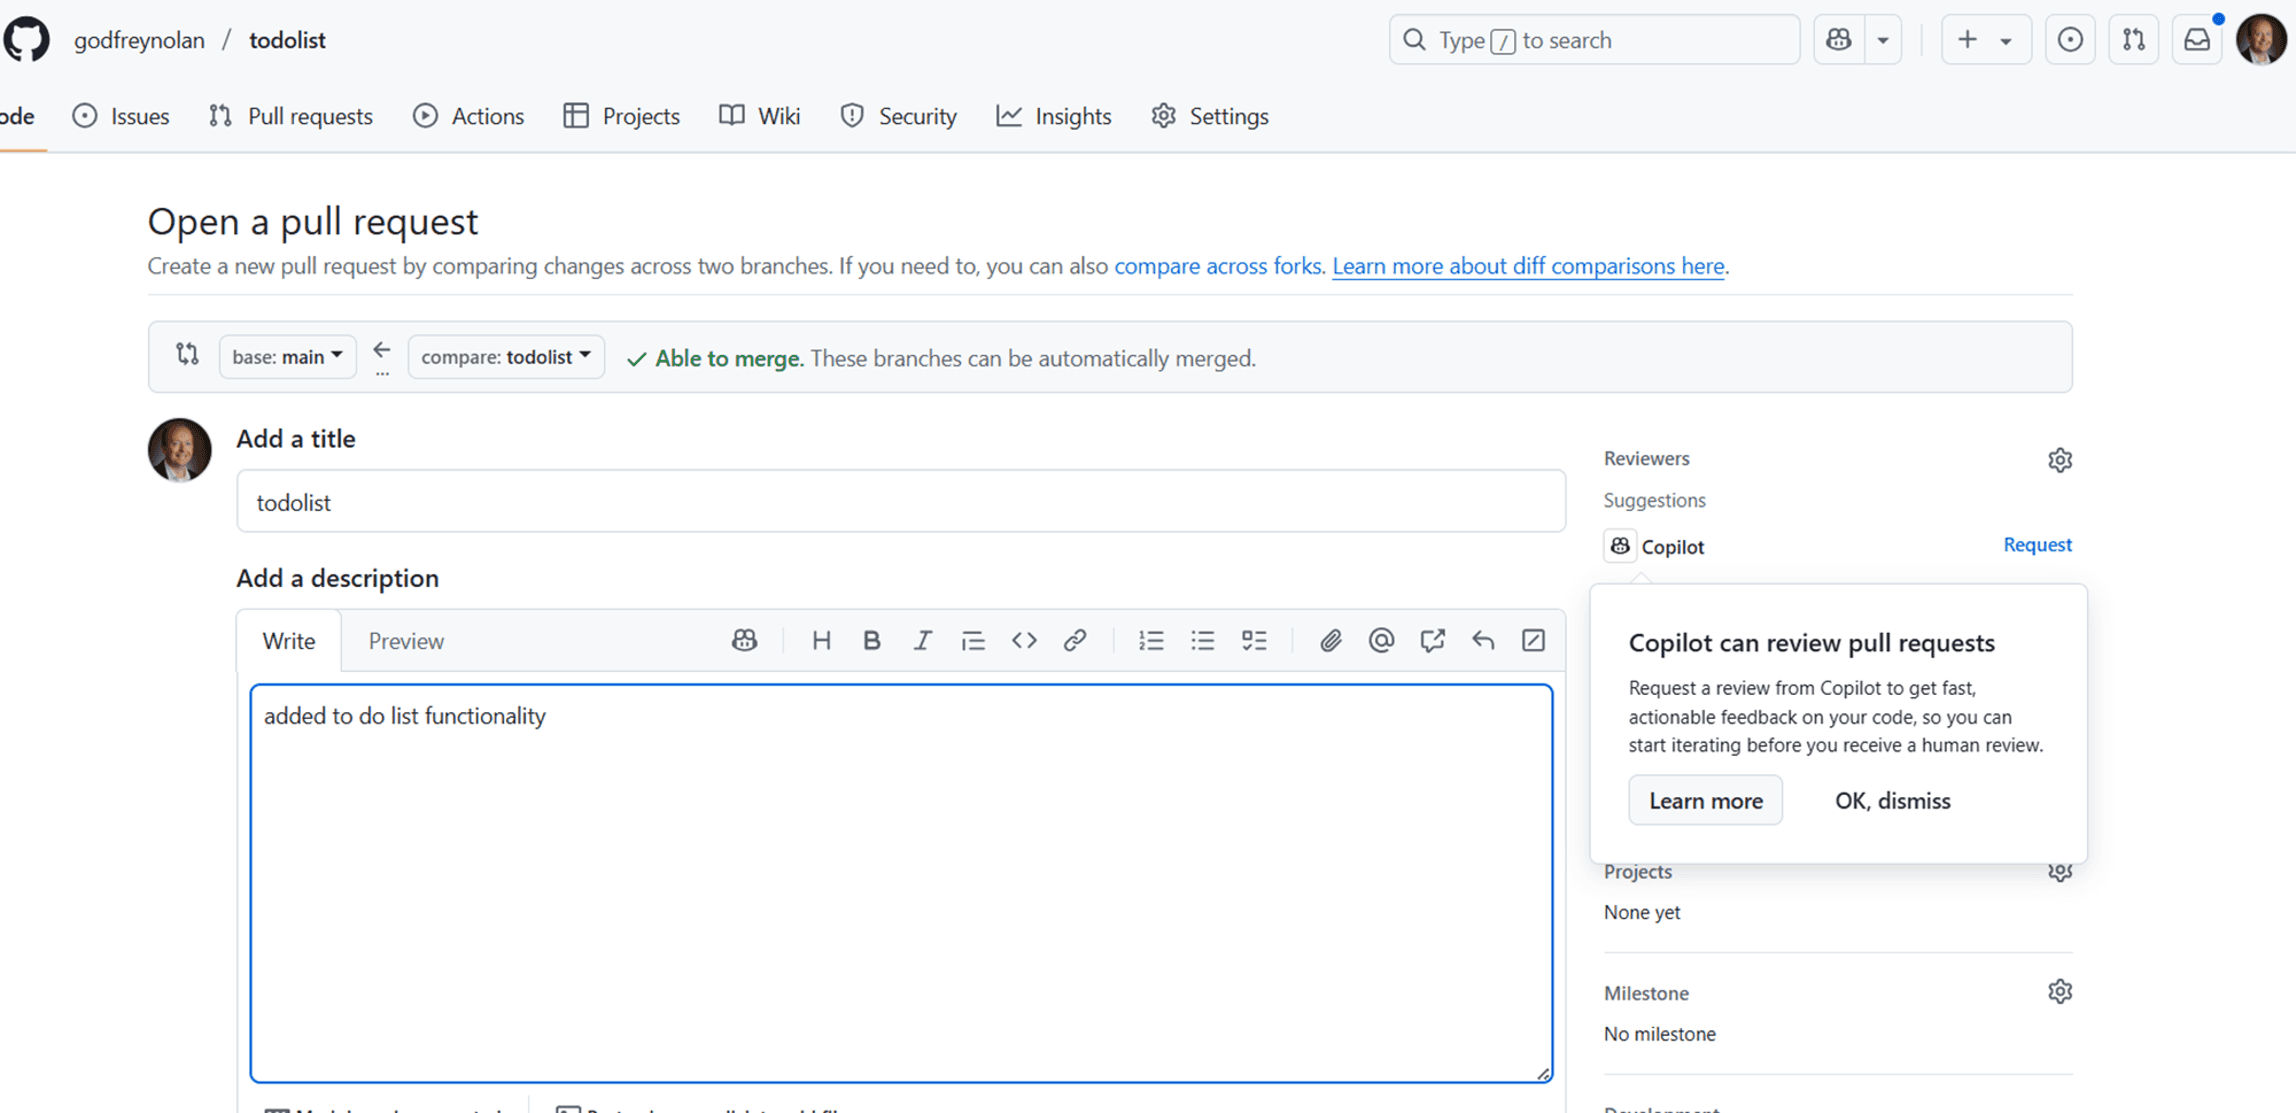
As you iterate on your application, you can ask Copilot to add features, improve styling, or fix bugs. You can see an example of the final app at https://github.com/godfreynolan/todolist.
Extending Copilot Functionality
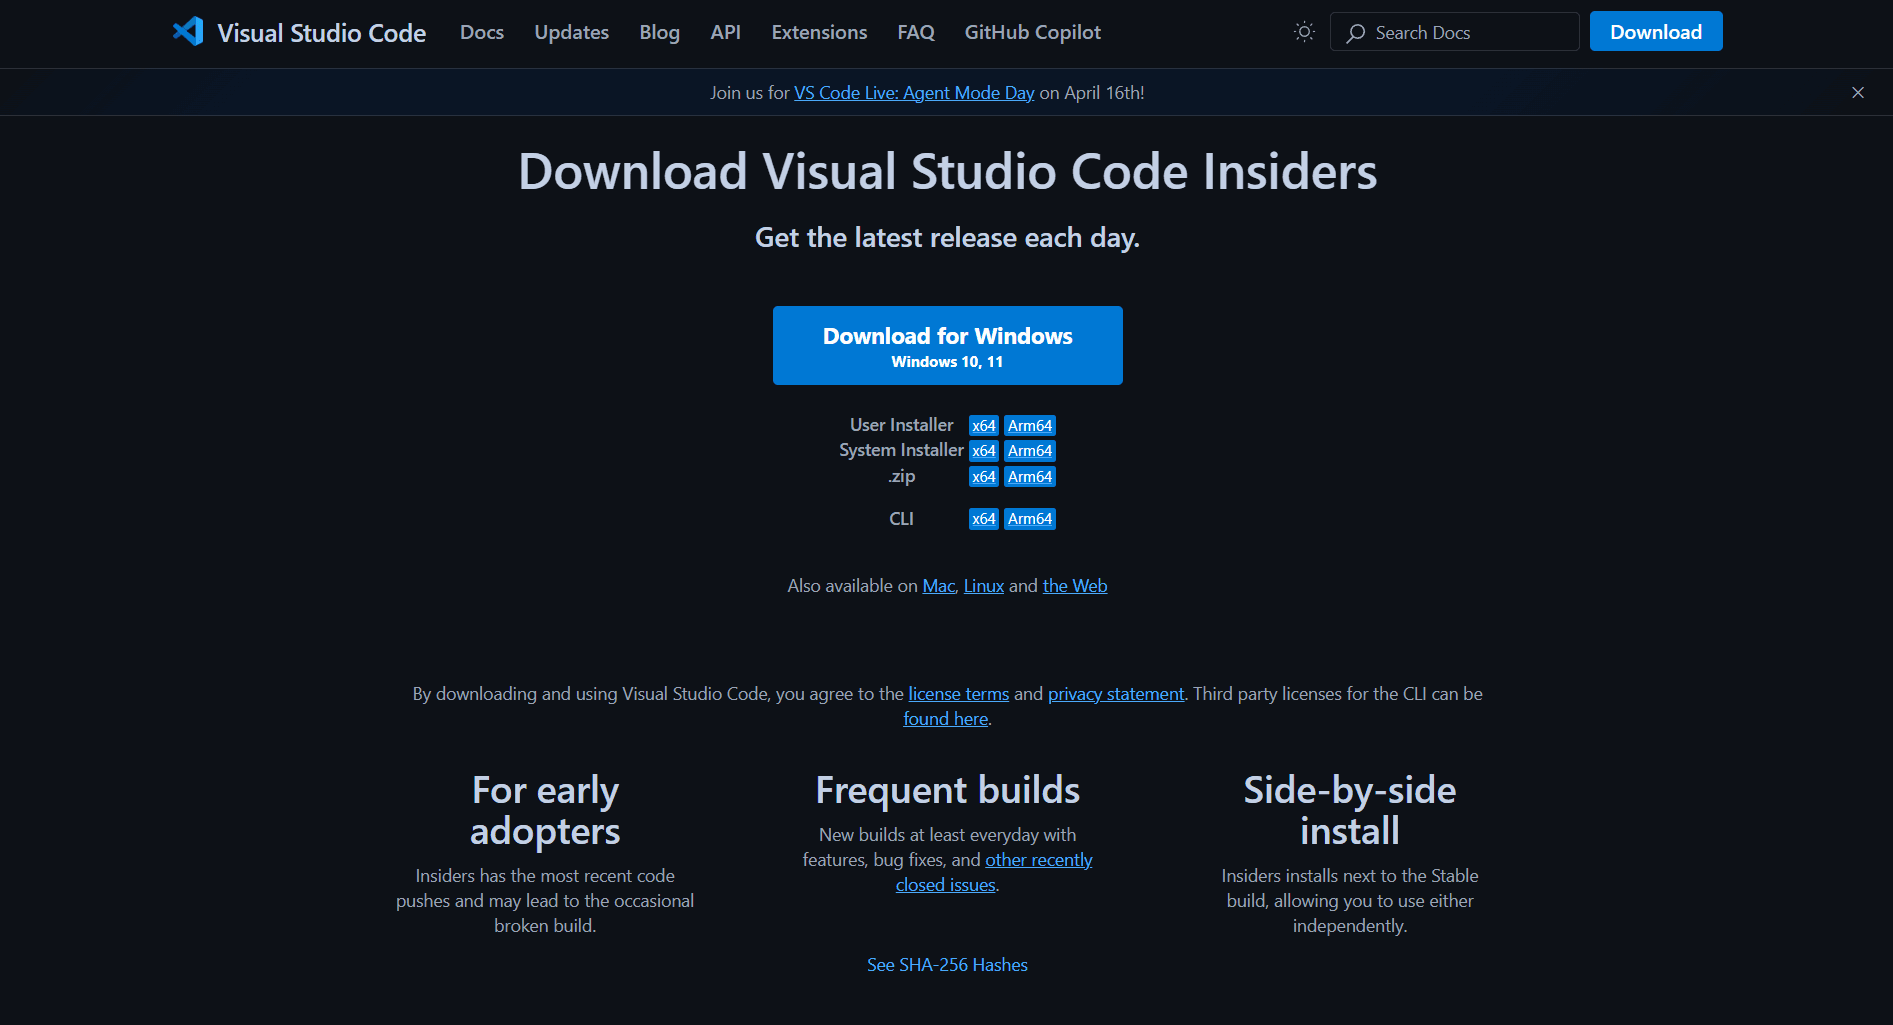
Beyond the basics of code generation, Copilot can be applied to numerous practical scenarios that significantly enhance developer productivity. Download Visual Studio Code Insiders to get started extending the functionality of Copilot and access to the latest features as they drop.
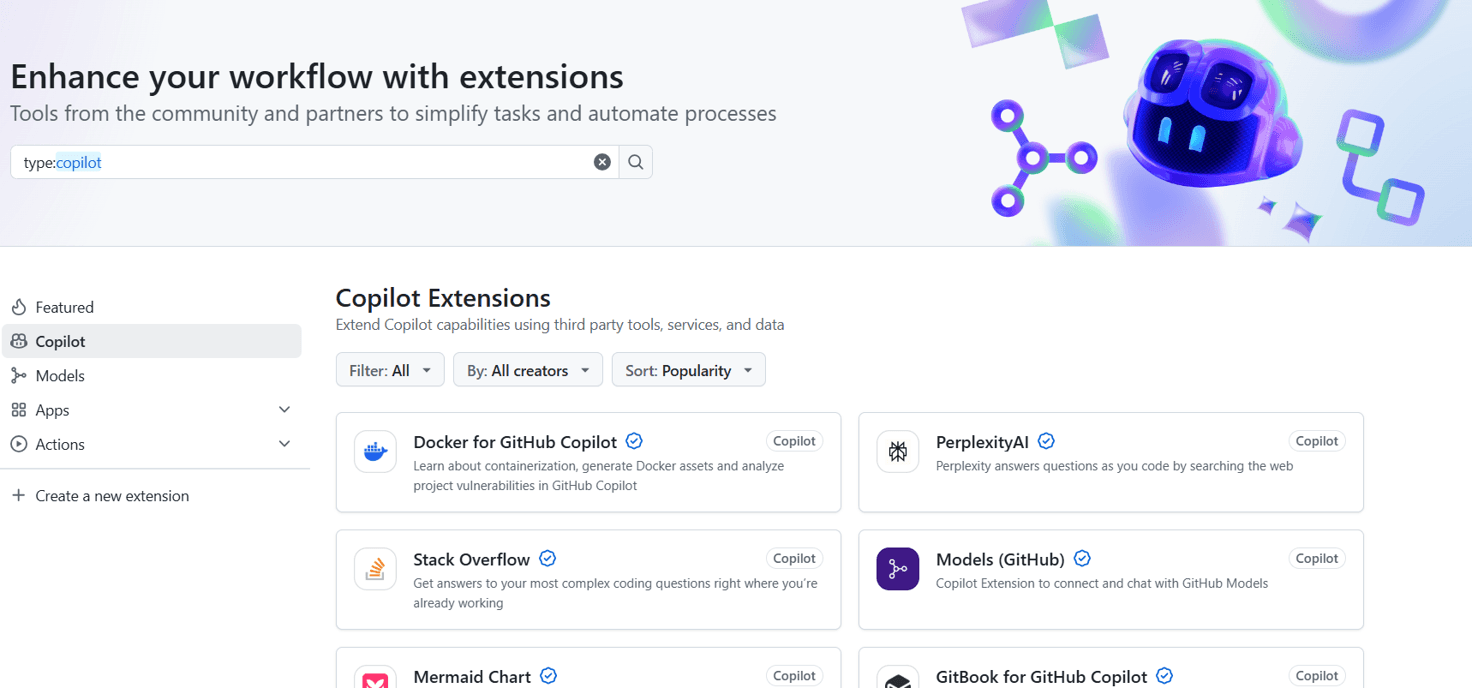
The Power of Copilot Extensions
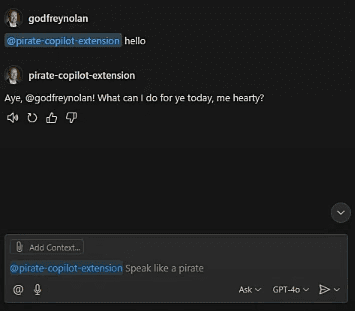
One of the early frustrating features of LLMs was their isolation from the normal tools and resources programmers have for other applications. They aren’t on an island like they used to be, and extensions will help you do amazing things like RAG, API, or database access, and more. As an example, we are going to use an extension to have Copilot respond to us as a pirate.
Unlike VS Code native extensions, these are a little bit harder to set up. The first thing you need to do is set up a GitHub App. You can find that in your GitHub account under Settings>Developer settings > GitHub Apps. You will need to name the app and, most importantly, point it at the settings page for the app for the Homepage URL.
Also, turn the webhook off at the bottom. This way, it knows it’s not waiting for a response after it has been triggered.
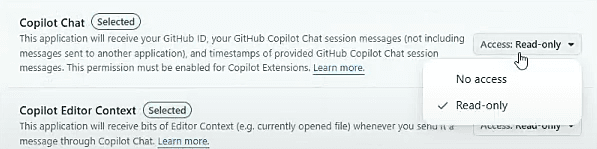
That handles the regular settings. Now, navigate to Permissions and set Copilot Chat to Read-only. The default is No access.
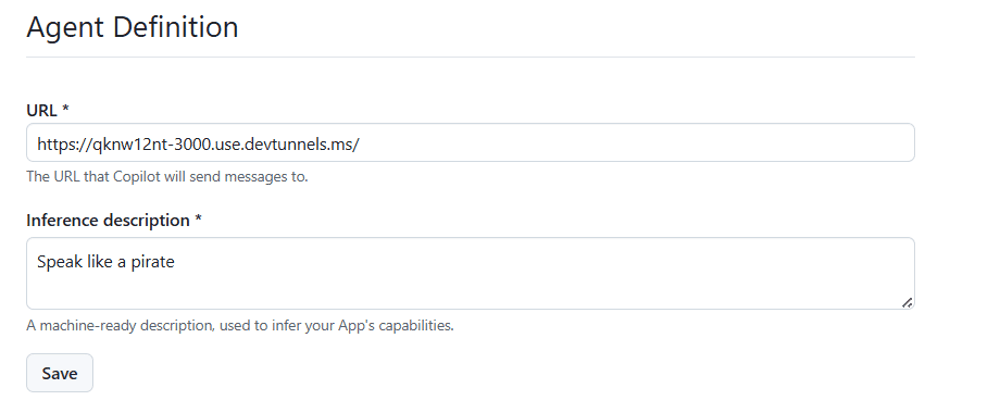
Now move down to Copilot in the sidebar menu. For Agent Type select Agent.
Take note of the URL field. We will need to get back to that.
Finally, it asks for an Inference Description
Now hit save.
Move on over to our terminal and issue the following commands in order individually:
Normally, in VS Code, you are keeping to the terminal, but in this case, we are going to take a peek at the PORTS tab.

Add a port for Port 3000 and change the visibility to public. This will give you a Forwarded Address. Go back to our Copilot options in our Github App and put that in the URL field we told you to remember from above.
To get this to work, now you will need to use the @{{EXTENSION-NAME}} command. Now we will have a pirate coding companion. Argh!
Agents
We have covered a different kind of agents in a previous tutorial, but the Agent functionality in Copilot operates a little differently. You can find it in the Ask dropdown menu in the chat.
Let’s try going through our Flask App example from above, and we can see that this is a very different experience.
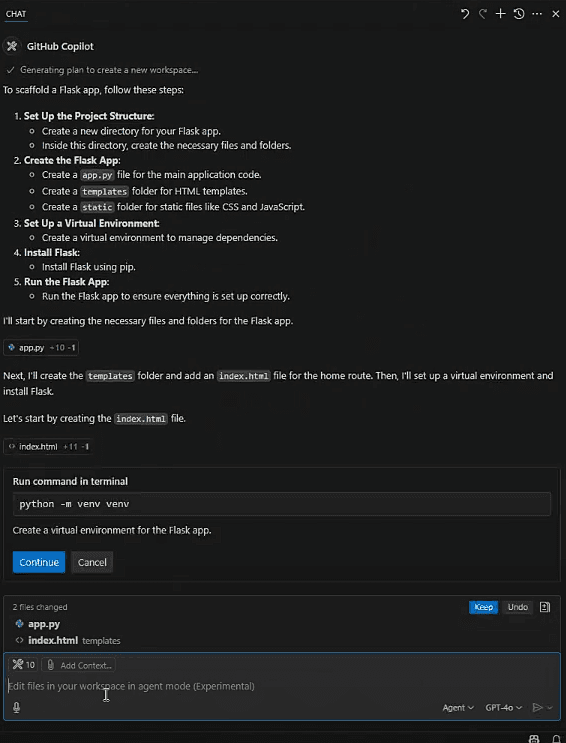
In the image above, you can see that it is not only outlining all the steps of the process and creating the files, but also prompts the user back to issue pre-baked commands that would have to be done by hand otherwise. This feature is still in beta, but it’s nice that Copilot is already showing promise by removing tedious repetitive actions throughout the app development process.
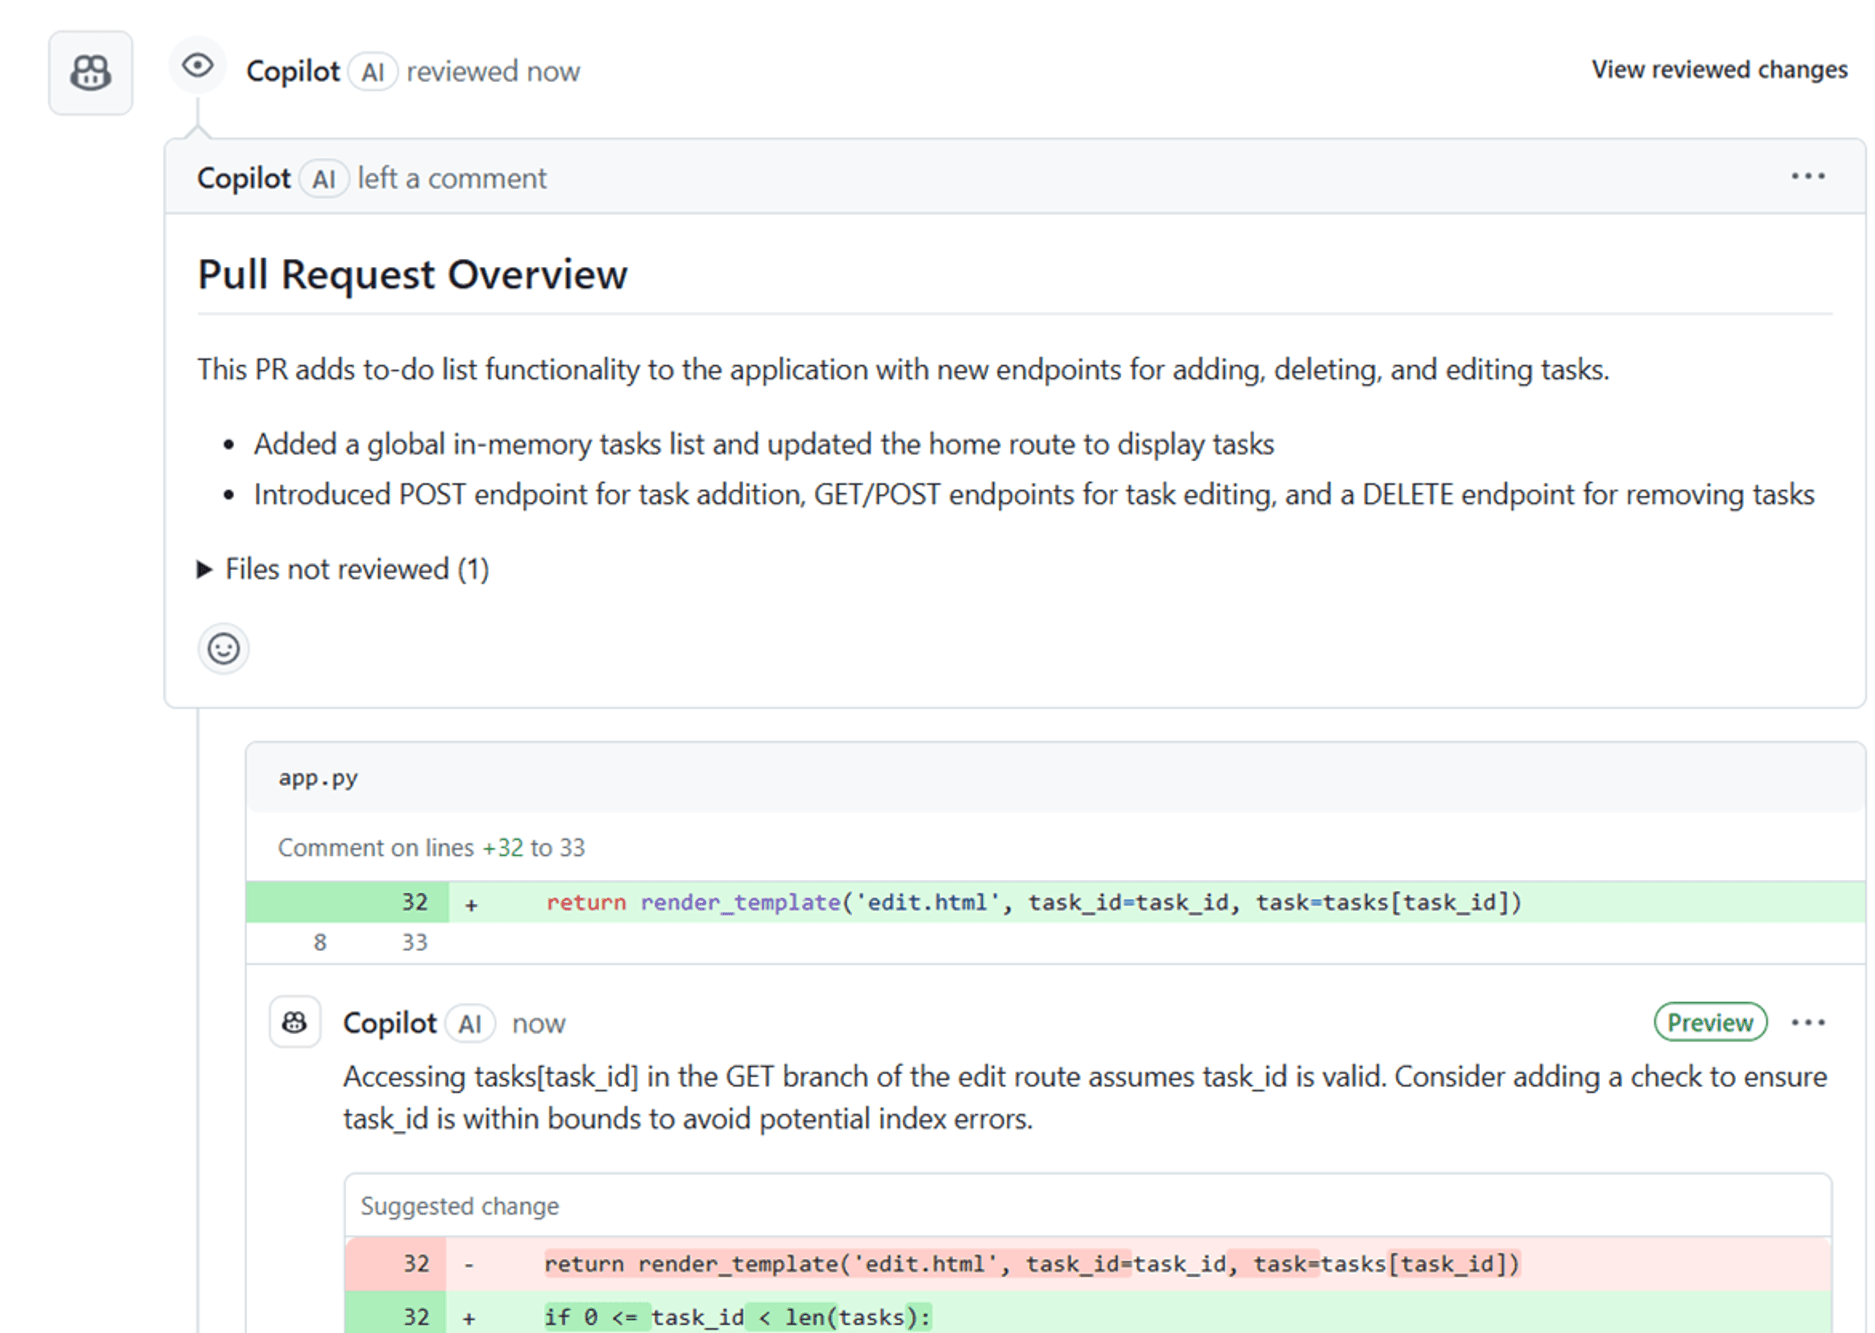
Leveraging Copilot for Code Reviews
One of the newer and more powerful features of GitHub Copilot is its ability to assist with code reviews.
Pull Request Reviews
When you create a pull request on GitHub, you can add Copilot as a reviewer. It will analyze your changes and provide suggestions for improvements, spot potential bugs, and ensure code quality.
This feature is particularly helpful for:
Junior developers who want feedback before submitting to senior team members
Solo developers who don’t have teammates to review their code
Teams looking to standardize their code quality checks
And as a bonus point, it’s also good for reviewing its own generated code. This may seem counterintuitive, but the reviewer model is operating under different directives than the one generating the code.
Conclusion
In this tutorial, we’ve proven that GitHub Copilot represents a significant shift in how developers write and maintain code. By providing AI-powered assistance throughout the development process, it can dramatically improve productivity, reduce the time spent on routine tasks, and help developers focus on solving more interesting and complex problems. With all these new powers at your fingertips, you’re on your way to making something awesome!
Additional Resources
▪https://github.com/openai/openai-agents-python
▪https://github.com/copilot-extensions/blackbeard-extension
▪https://code.visualstudio.com/insiders/
▪https://github.com/godfreynolan/todolist
