Feb 11, 2020
Combining AI or Machine Learning together with drones will mean that many of today’s mundane tasks in construction, agriculture, building security, shipping, warehousing will be replaced by automated drones. In this blog we’re going to look at how we automated counting cattle using a Parrot Anafi drone and Google’s TensorFlow to get you started on using AI in your drone apps. The end result will be a mobile application running on an Android phone that gives a real time count of the cows that the drone’s camera can see.
Intro to ML object detection
There are four major steps we need to follow
Gather the data
Label the images
Train the model
Test the model
These tasks are independent of the mobile app programming. We can deploy the model on the phone after we’ve completed each of these steps.
Gather the data
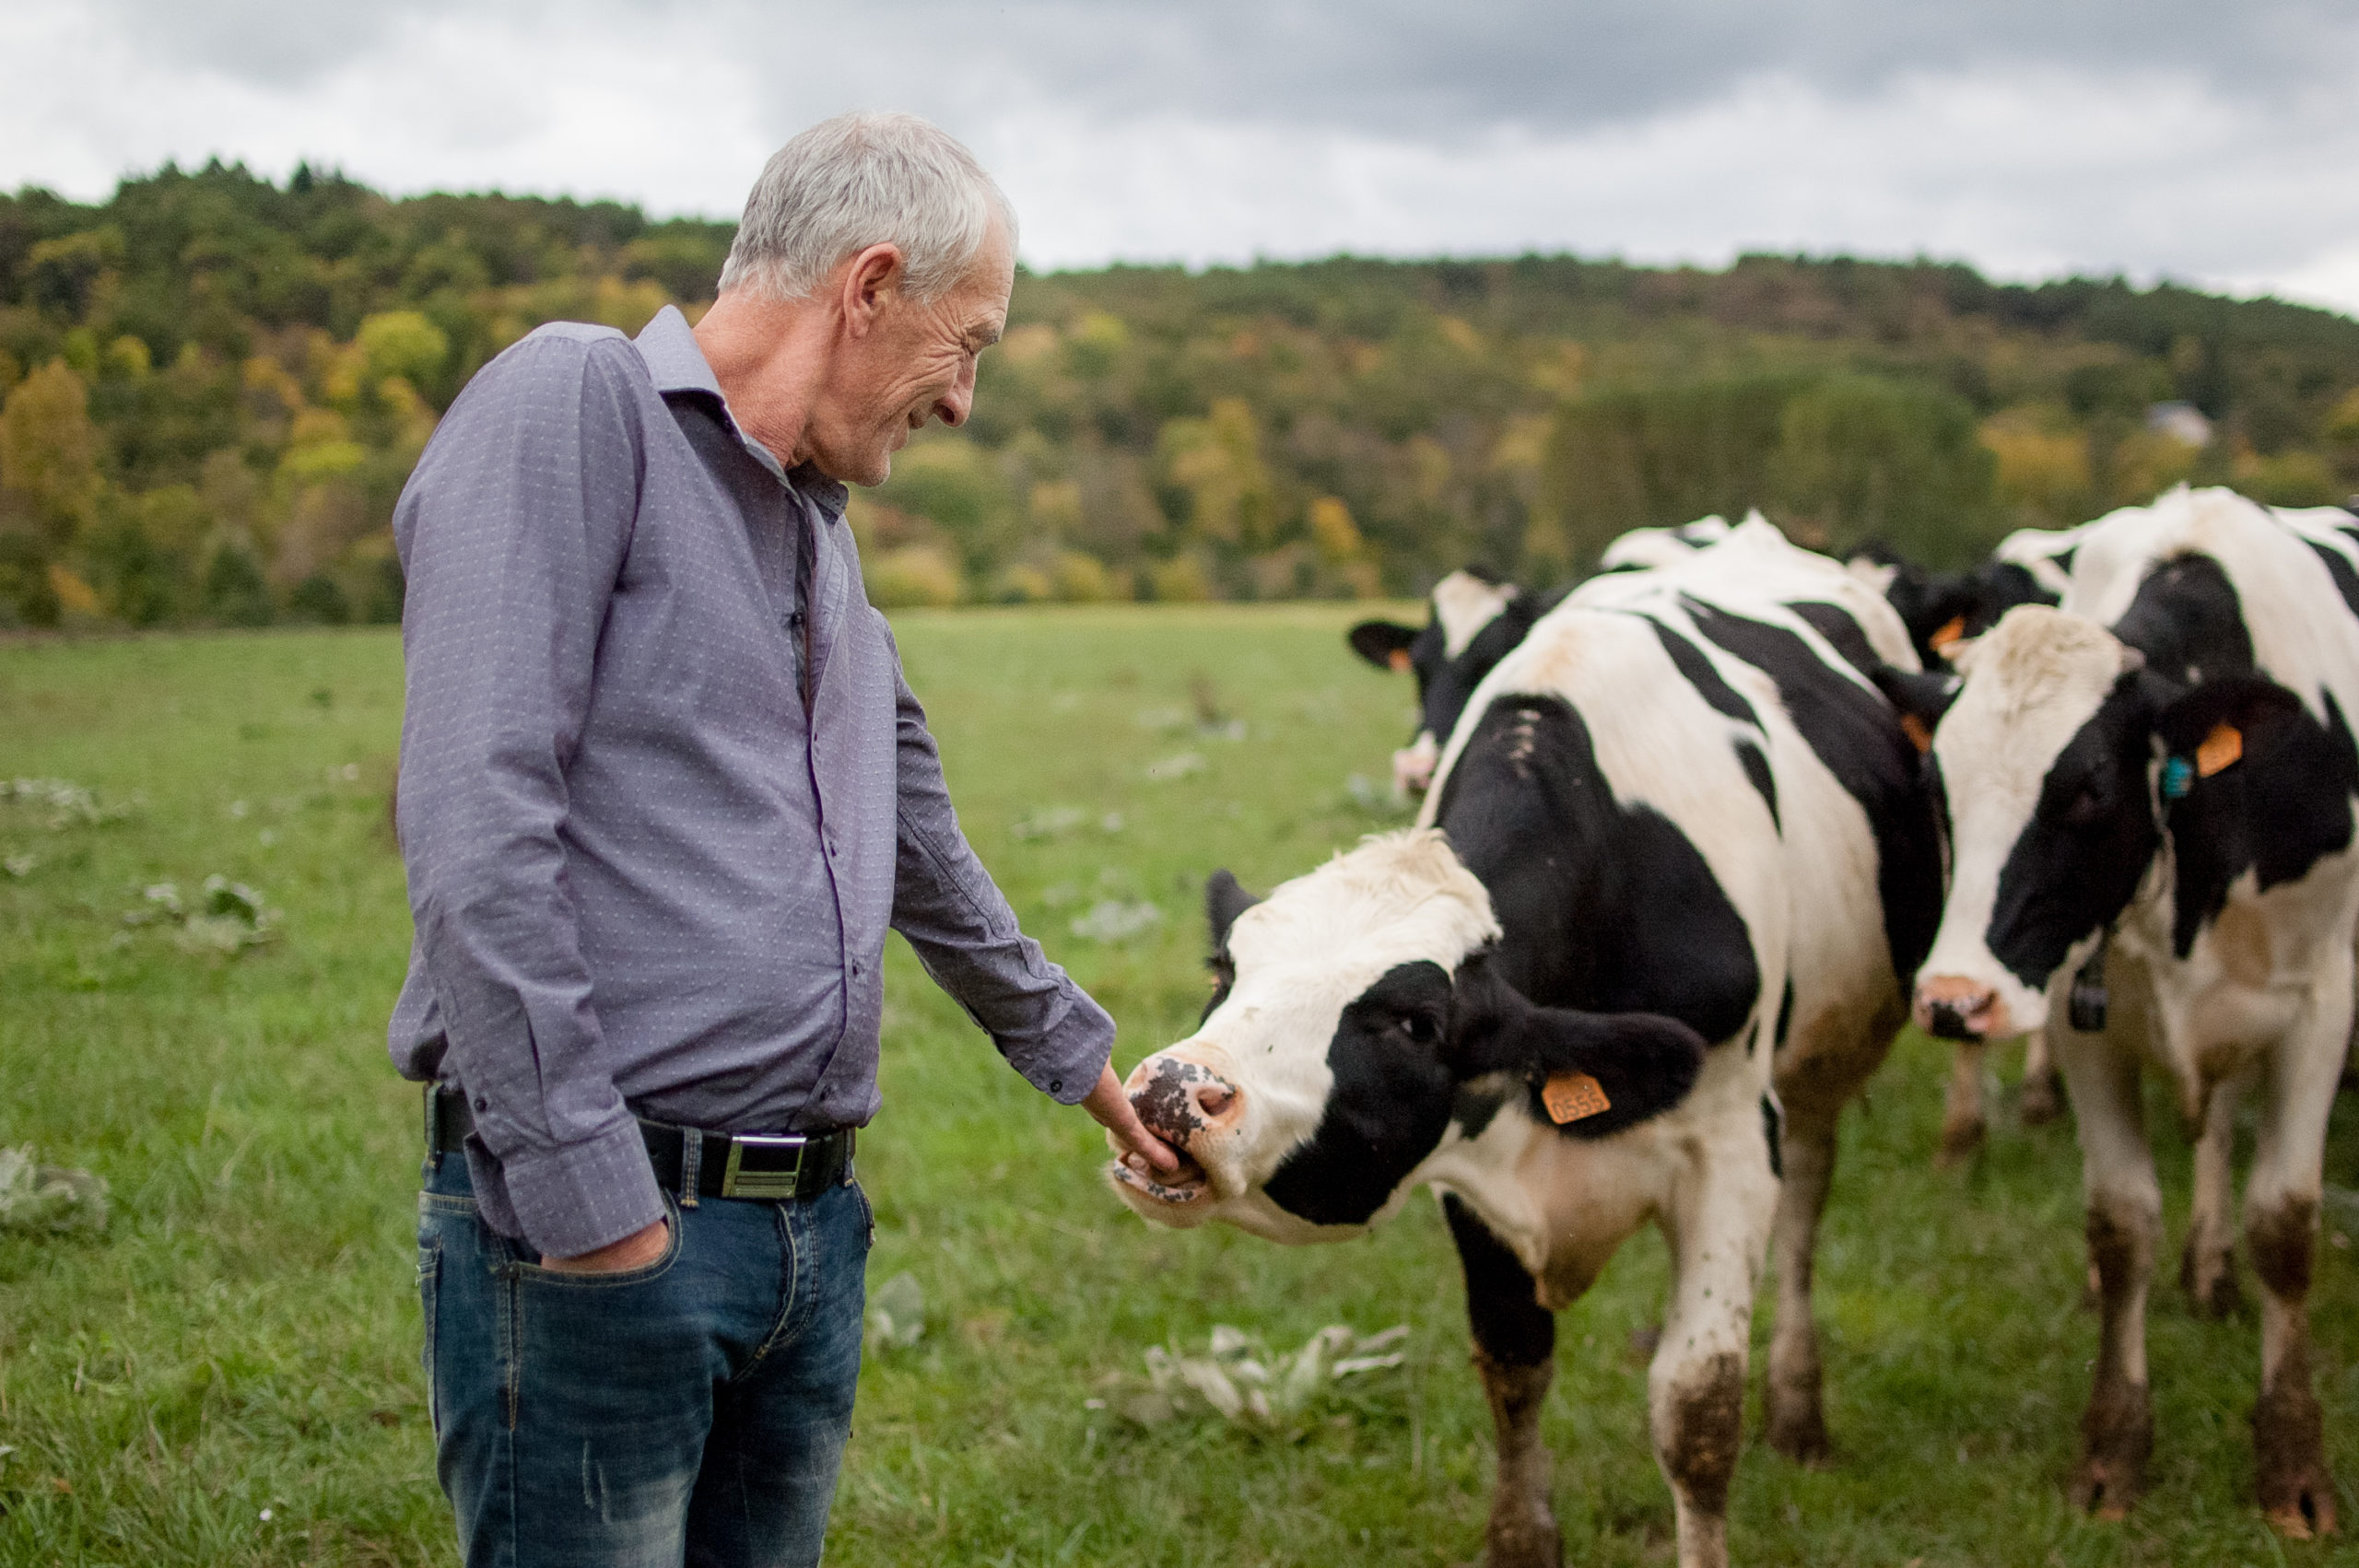
We need approx 5000 images of cows in the field or pasture to train our neural network. These should be collected under a variety of conditions such as different seasons, different farms, different times of the day and of course different weather. We also asked our pilots to fly at a height of 50 ft, with the camera pointing straight down.
Label the images
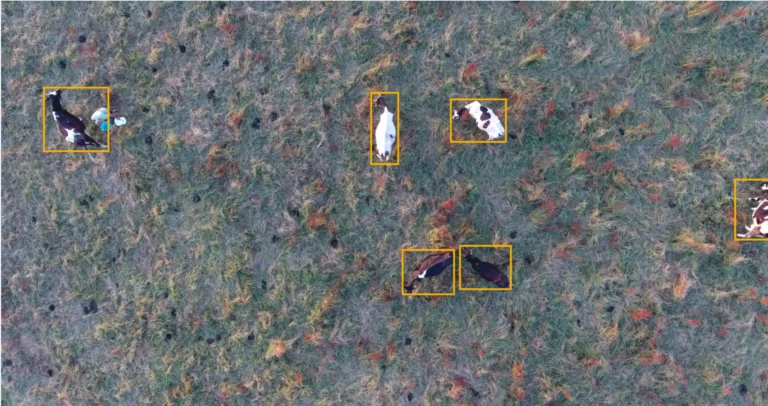
Figure 1: Outsourced Labeled Image
We need to draw a box around each of the cows in each image, see Figure 1. These labeled images train our neural network so it learns how to recognize cows. It’s a labor intensive task and you either do it yourself using software like labelimg or you can outsource the labeling task to a labeling agency like Hive. Remember Garbage in, Garbage Out so you need to be extra careful to make sure your labeling is accurate and consistent.
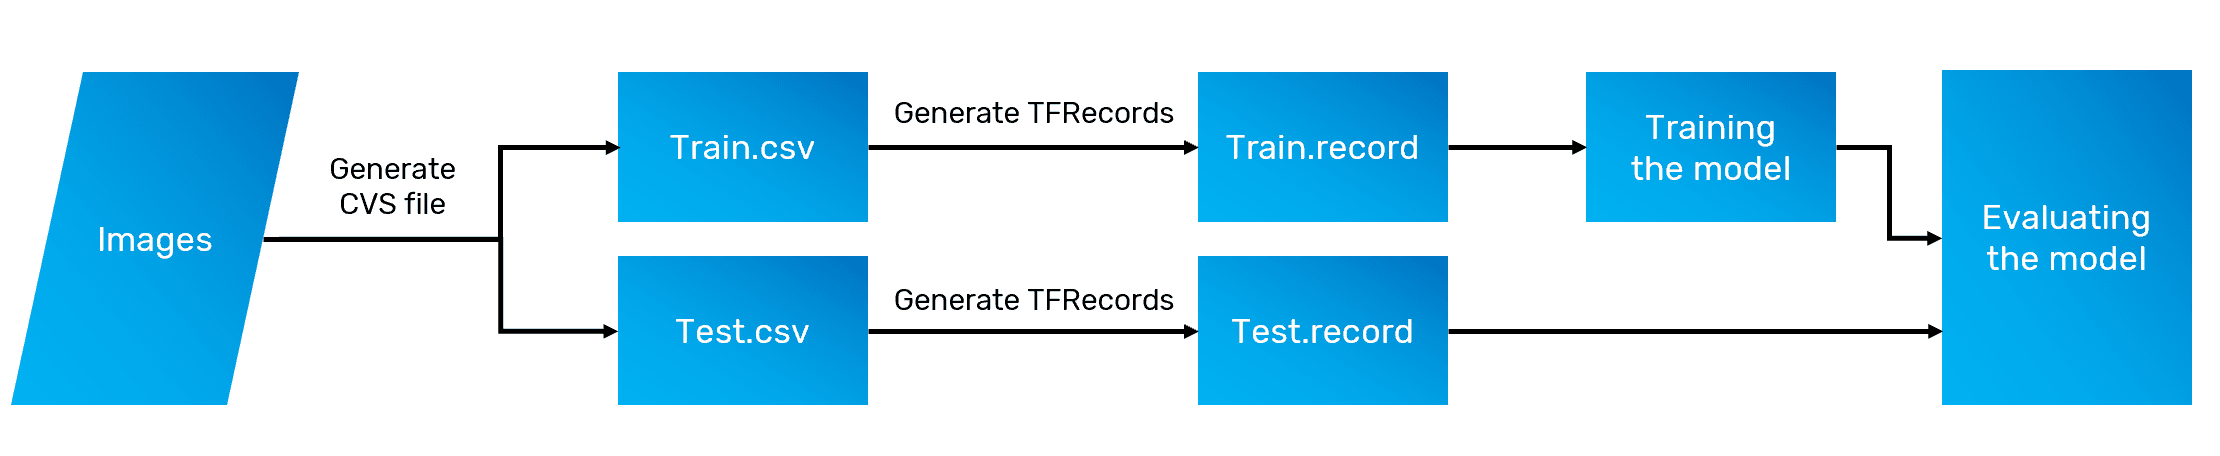
Figure 2: TFRecords
Once the images are labeled we need to generate training and testing images. The testing images will help us see if our training works. Figure 2 describes the Tensorflow Records process. We can use the following scripts (originally used to detect pet raccoons) to get our images ready.
xml_to_csv.py converts our images into csv files
generate_tfrecord.py converts our csv files into TensorFlow Train.record and Test.record formats.
We also need a label map file, similar to Listing 1.
Listing 1: Cattle Label Map File
Train the model
Now that we have the data prepared, we’re ready to move onto the training. There are five steps in our training that we need to follow :-
1. Set up Google Cloud Platform
2. Set up Docker Environment
3. Configure Local Google Cloud Environment
4. Set up Object Detection API
5. Train the model
Set up Google Cloud Platform
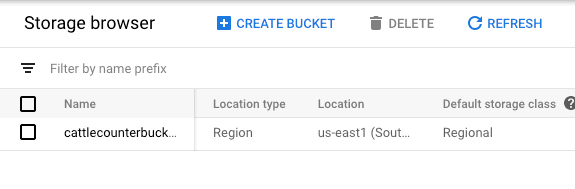
Figure 3: Storage
Sign up for a Google Cloud platform account. Login and create your new project, and you’ll also need to enable the ML engine for your project. Next we need to go to “Storage” and create a new bucket for our data. We’ll call it “cattlecounterbucket”, see Figure 3. Finally create a sub-directory in your storage bucket called “data.”
Set up Docker Environment
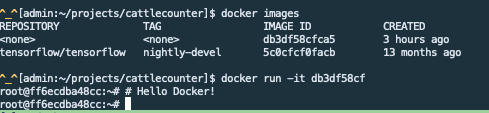
Figure 4: Docker Images
Install Docker on your machine. Download the TensorFlow object detection Dockerfile, this will install all the prerequisites for our training. Build the image by running
Find the ID of the docker image you’ve just built by running
Attach to the image by running
You should then see a command prompt from inside of the Docker container, see Fig 4.
Configure Local Google Cloud Environment
We need to set up the Google Cloud environment by giving it our credentials and project information. Start by running the following command.
Let GCP know your Project ID and Bucket Name.
Tell the Gcloud tool which project and bucket we are working with.
Since we are training a model, we’ll want access to Google’s Cloud TPUs. Fetch the name of your service account by running the following
Store the TPU service account identifier from the above response
Grant TPU permissions to the project
Set up the Object Detection API
Test the API from your container, by running the following command:
Check that the output shows passing tests, see Figure 5.

Figure 5: Object Detection API tests
Copy your TFRecord files and label map from your host machine into your docker container.
Move your data into your Google Cloud bucket.
We’re using the TensorFlow object detection model to detect the cattle. The model is doing all the heavy lifting and we’re basically configuring it to work with our labeled images. Download the object detection model and copy it to your storage bucket.
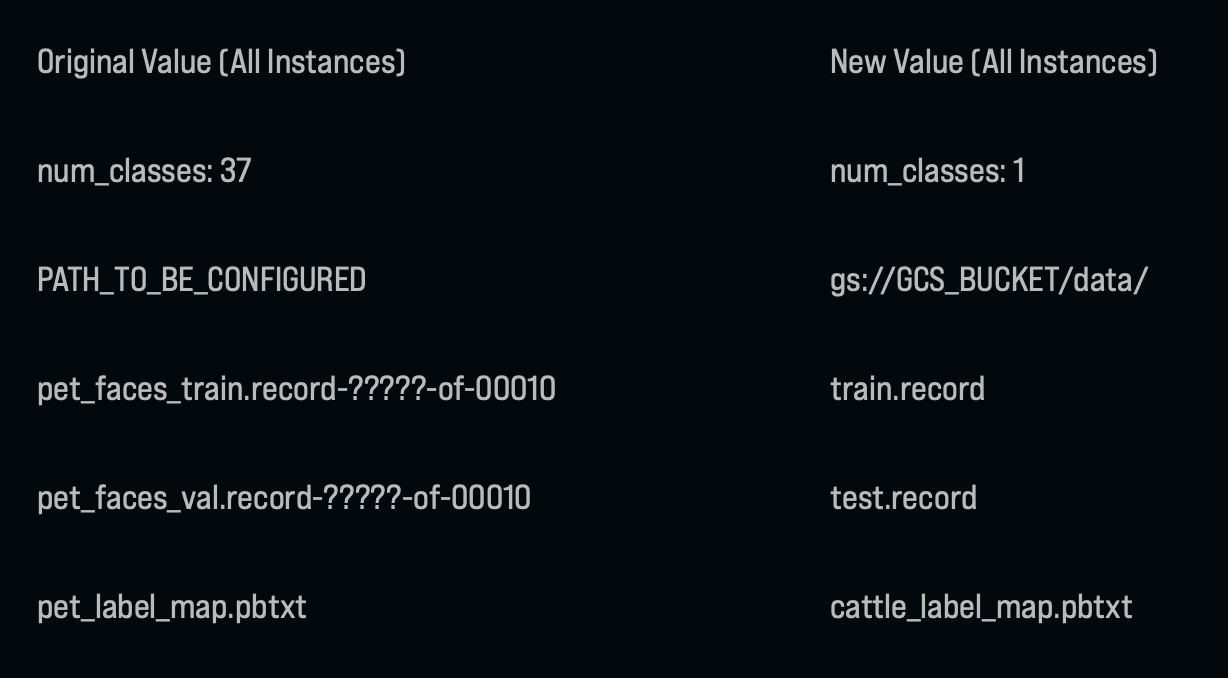
Edit the detection configuration in /tensorflow/models/research/object_detection/samples/configs/ssd_mobilenet_v1_0.75_depth_quantized_300x300_pets_sync.config. Use the following table to update the configuration values.
Upload the new configuration to your Google cloud bucket
Package the object detection API by running
Train the Model
We’re now ready to start training the model. Create a file called training_config.yaml with the following contents, see Figure 6.
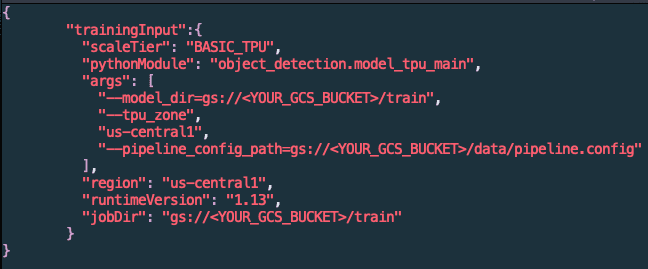
Figure 6: Training Configuration
Create a similar config file for evaluation or testing, eval_config.yaml. Add the one additional args key “–checkpoint_dir=gs://<YOUR_GCS_BUCKET>/train”
Start the training job on Google Cloud Platform by running the following commands:
While we’re at it, let’s start another job to do the evaluation:
Open the Google Cloud console in your browser and click the AI Platform tab, and then click “Jobs”. You should see your jobs queued, see Figure 7.
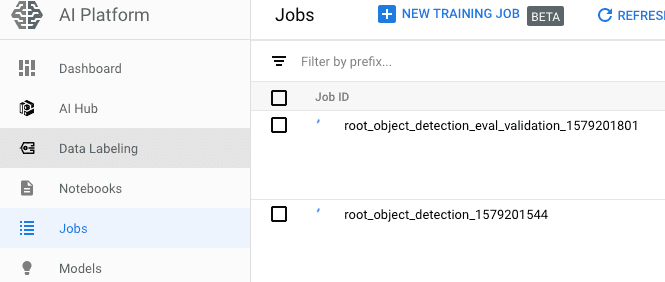
Figure 7: GCP console
You should see a green icon next to each job when they are complete.
Test the model
We can use TensorBoard to see our object detection accuracy calculated during the validation phase. TensorBoard is a browser-based tool. Install and run it as follows.
Assuming you have python and pip installed on your machine, install Tensorflow with the following command.
Install Google Cloud CLI so we can access the jobs.
Start TensorBoard from your bucket’s training directory with
Open TensorBoard in your browser at http://localhost:6006
Go to the images tab to see how well your model did (right) against the original labeled image (left), see Figure 8.
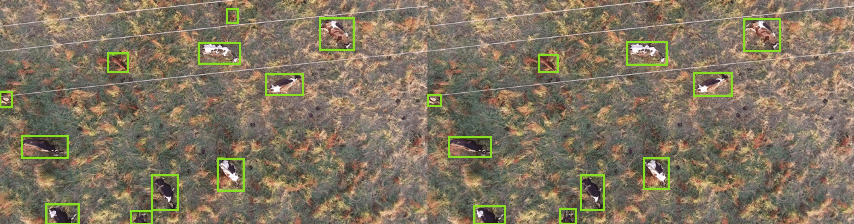
Figure 8: Labeled image vs. Object detection
Deploying on Android
We can use TFlite to convert our trained model to work on an Android device. First let’s set up some config files on our Docker container.
We also need to modify the export script to increase the number of detection boxes from 10 to 100. Edit object_detection/export_tflite_ssd_graph.py (line 106).
We have two new files, tflite_graph.pb and tflite_graph.txt in our output directory. Use the Tensorflow Lite Optimizing Converter (TOCO), to optimize the model for mobile.
Building the Android App
Now we can start integrating the model into our Parrot application. Create a new Kotlin project in Android Studio and make sure the following dependencies are in your app’s build.gradle file.
We have a singleton, but it’s not doing much yet. Add some instance variables to set up the ground SDK and methods to initialize it with context.
Place a GsdkStreamView in your layout and pass it into the following so we can manipulate the video stream. It may look complicated, but all that’s really going on is ensuring that streaming is enabled and playing the stream for the given stream view whenever it’s available.
Finally, we take bitmaps from the video stream and classify them in real-time with TensorFlow, which will give us a list of bounding boxes to overlay on our video feed.
Conclusion
While this is a longish blog post, it’s worth noting that most of what we’re doing is configuring existing systems to create our cattle counting object detection. We didn’t have to create the model and we outsourced the labeling to a third party. We also used TensorFlow Lite examples to manipulate the video stream and the Parrot SDK to provide the video of the cattle.
