Aug 1, 2017
Android fragmentation can make testing Android apps very time consuming. It is impossible to test every phone and tablet on every carrier in every market for every version of Android.
As of August 2015, OpenSignal.com reported that there were 24,000 different Android devices available. No doubt that’s well over 30,000 now. There are also 9 different versions of the Android OS since Jelly Bean – 10 if you include Android O. Finally, there are a half dozen major mobile phone carriers in the US. Like we said it’s just not possible to test that number of different combinations.
QA will often test the app on a handful of emulators, push to production and then literally hope for the best. But what options are out there if you want to catch more defects on more devices?
Build a Test Lab
If you’re lucky enough to have lots of test phones lying around the quickest solution is to build your own testing lab. Buy a 10 port USB hub. Make sure it’s powered otherwise you won’t be able to connect to all the devices. Enable the Developer Options on each phone or tablet by going to the Settings and then clicking on the About Phone 7 times. And then make sure USB debugging is enabled. Connect the USB hub to your Mac.
Connect each and every phone or tablet to the hub one at a time. If the Mac recognizes the device then you should see something like the Allow USB debugging? image in Figure 1.
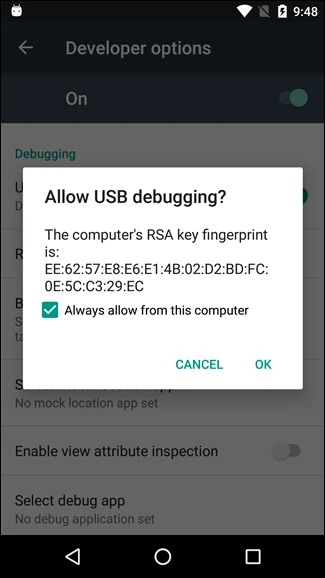
Figure 1: Allow USB Debugging
Check the Always allow from this computer and then hit OK. The device is now connected. You can double check by running adb devices from the command line. Repeat for the rest of your devices.
Record or write your own Espresso test. If you haven’t used Espresso before and want to write your own test then check out our earlier blog on Espresso or alternatively from within Android Studio you can go to Run and then choose the Record Espresso Test button and get Studio to write it for you, see Figure 2.

Figure 2: Record your own test.
Android Studio will start your app in an Emulator or device of your choosing and you can walk through the screens to test the UI. Save the test when you’re done.
To run the Espresso test or tests on your connected hub of devices type the following from the command line
You should see the tests running in parallel on each device. And because we’re running these from the command line we can also run them easily from Jenkins by using an Execute Shell build step. Figure 3 shows our ETADetroit app running on a small hub of 4 devices.
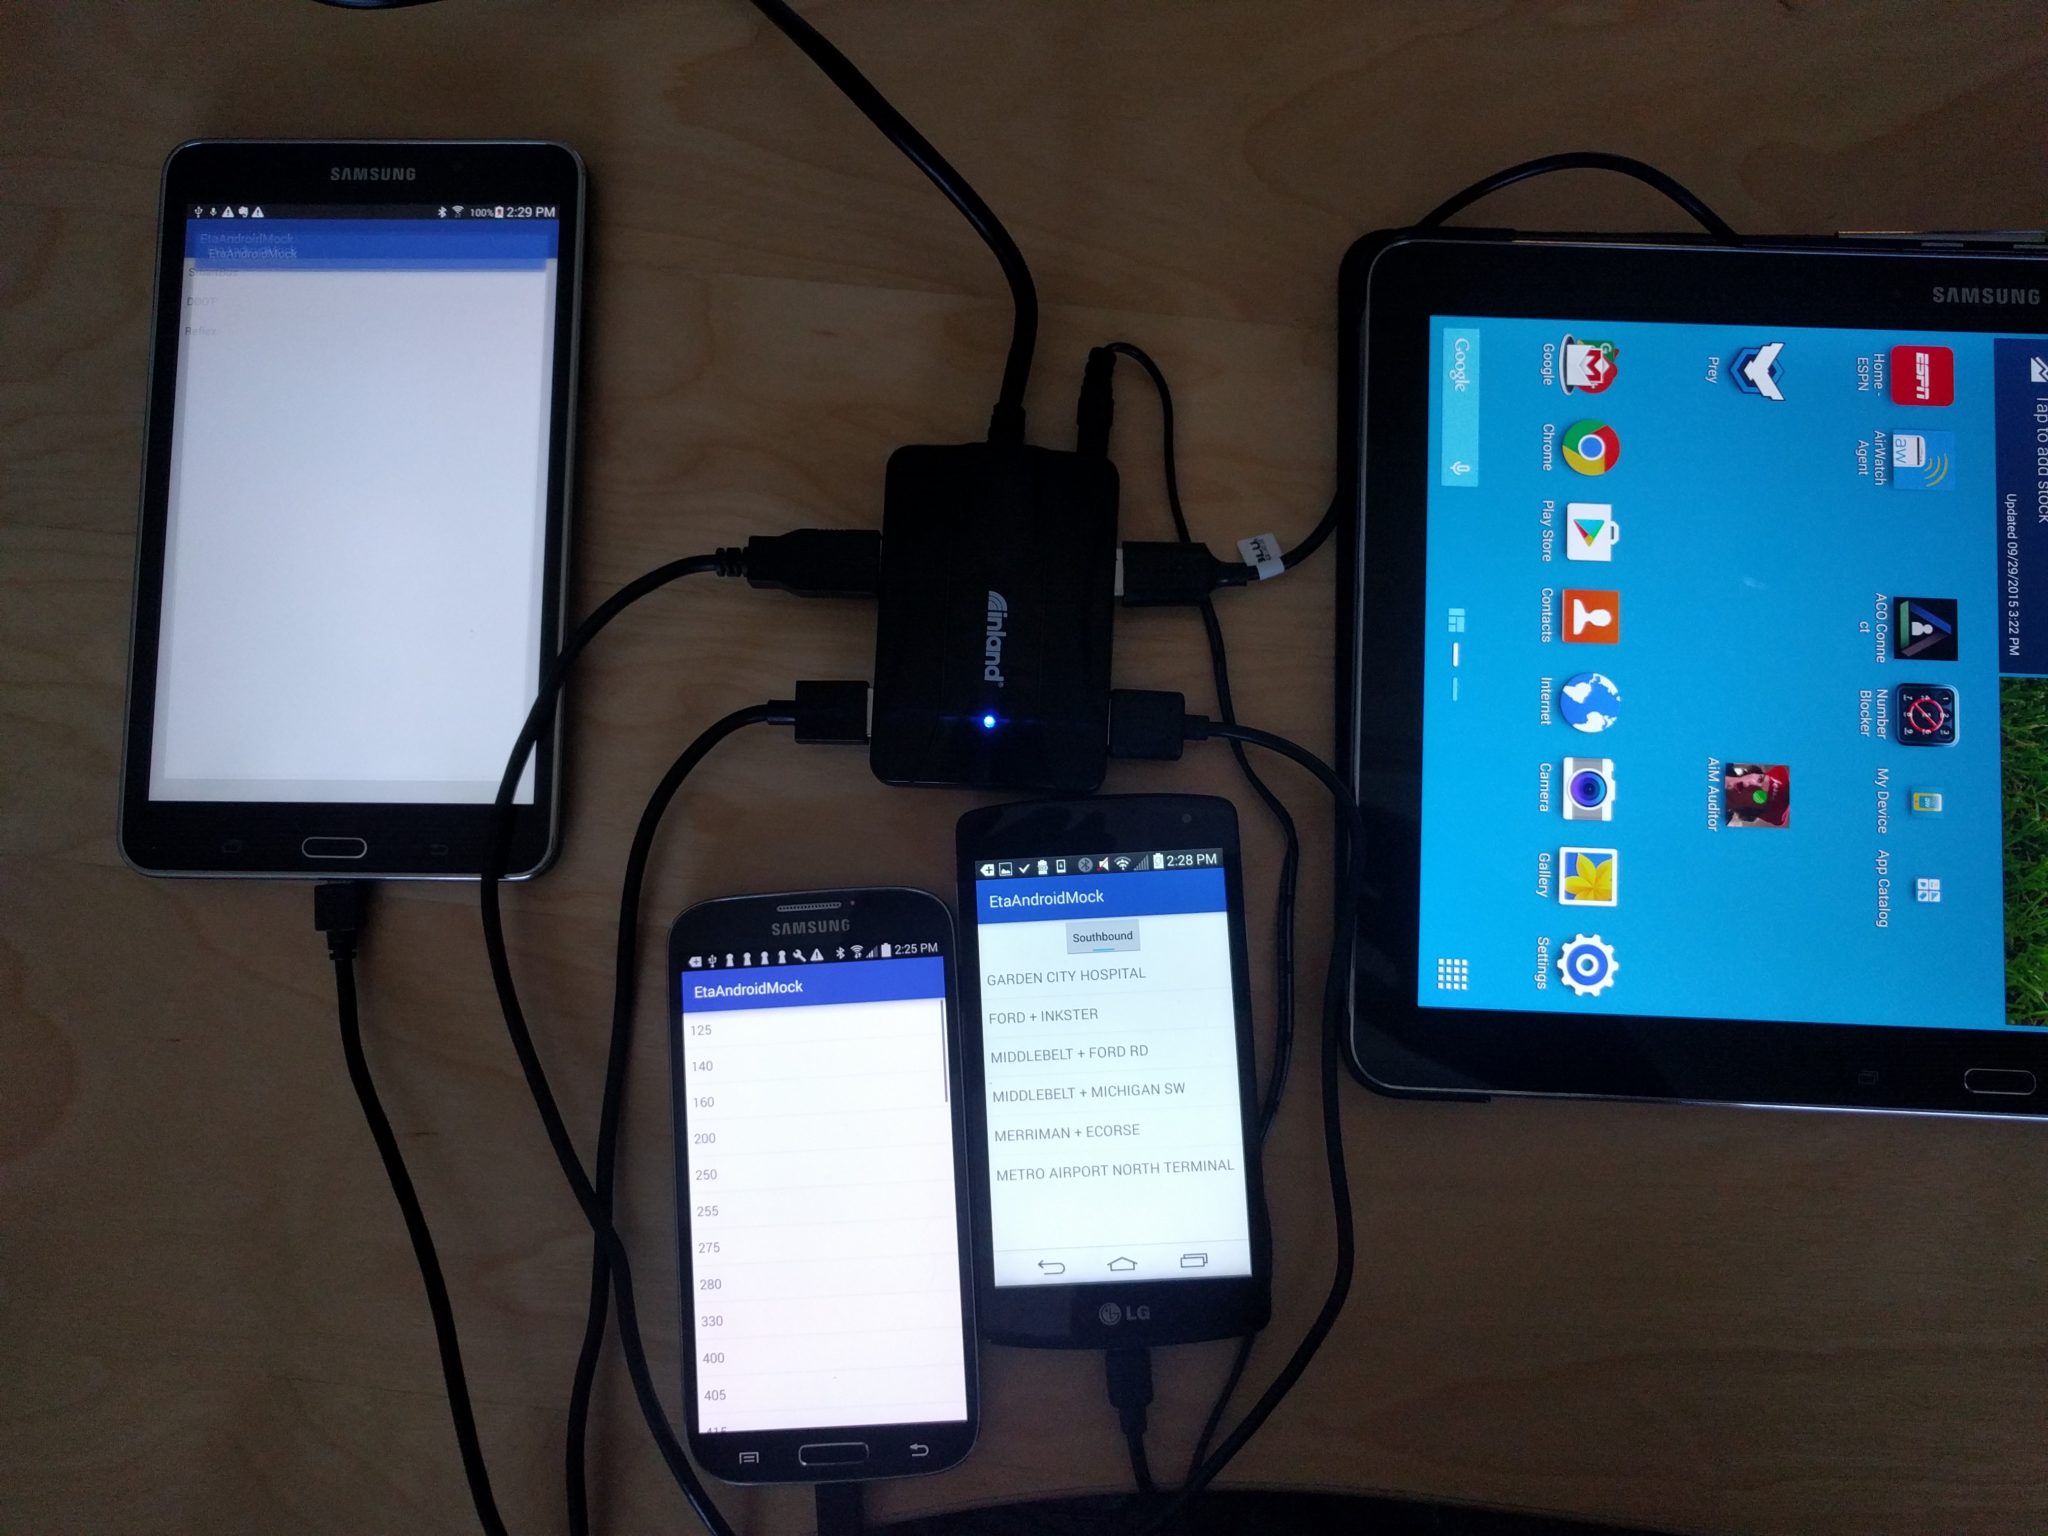
Figure 3: Test Lab
AWS Device Farm
Test labs are great if you’re happy testing your app against a smallish number of devices. For us, we find real devices quicker and more realistic than using Android emulators. But it’s still limited by the number of phones you have access to at any one time.
So if you don’t have lots of phones cluttering up your office drawers or you need a much wider variety of devices then you might want to use a cloud based system such as Amazon’s solution, the AWS Device Farm. It was originally called AppThwack before it was bought by Amazon back in 2015.
To setup the same test as we had running on our Device Lab, we first sign in to https://aws.amazon.com/device-farm/.
Choose the application type, in this case Android/iOS, see Figure 4.
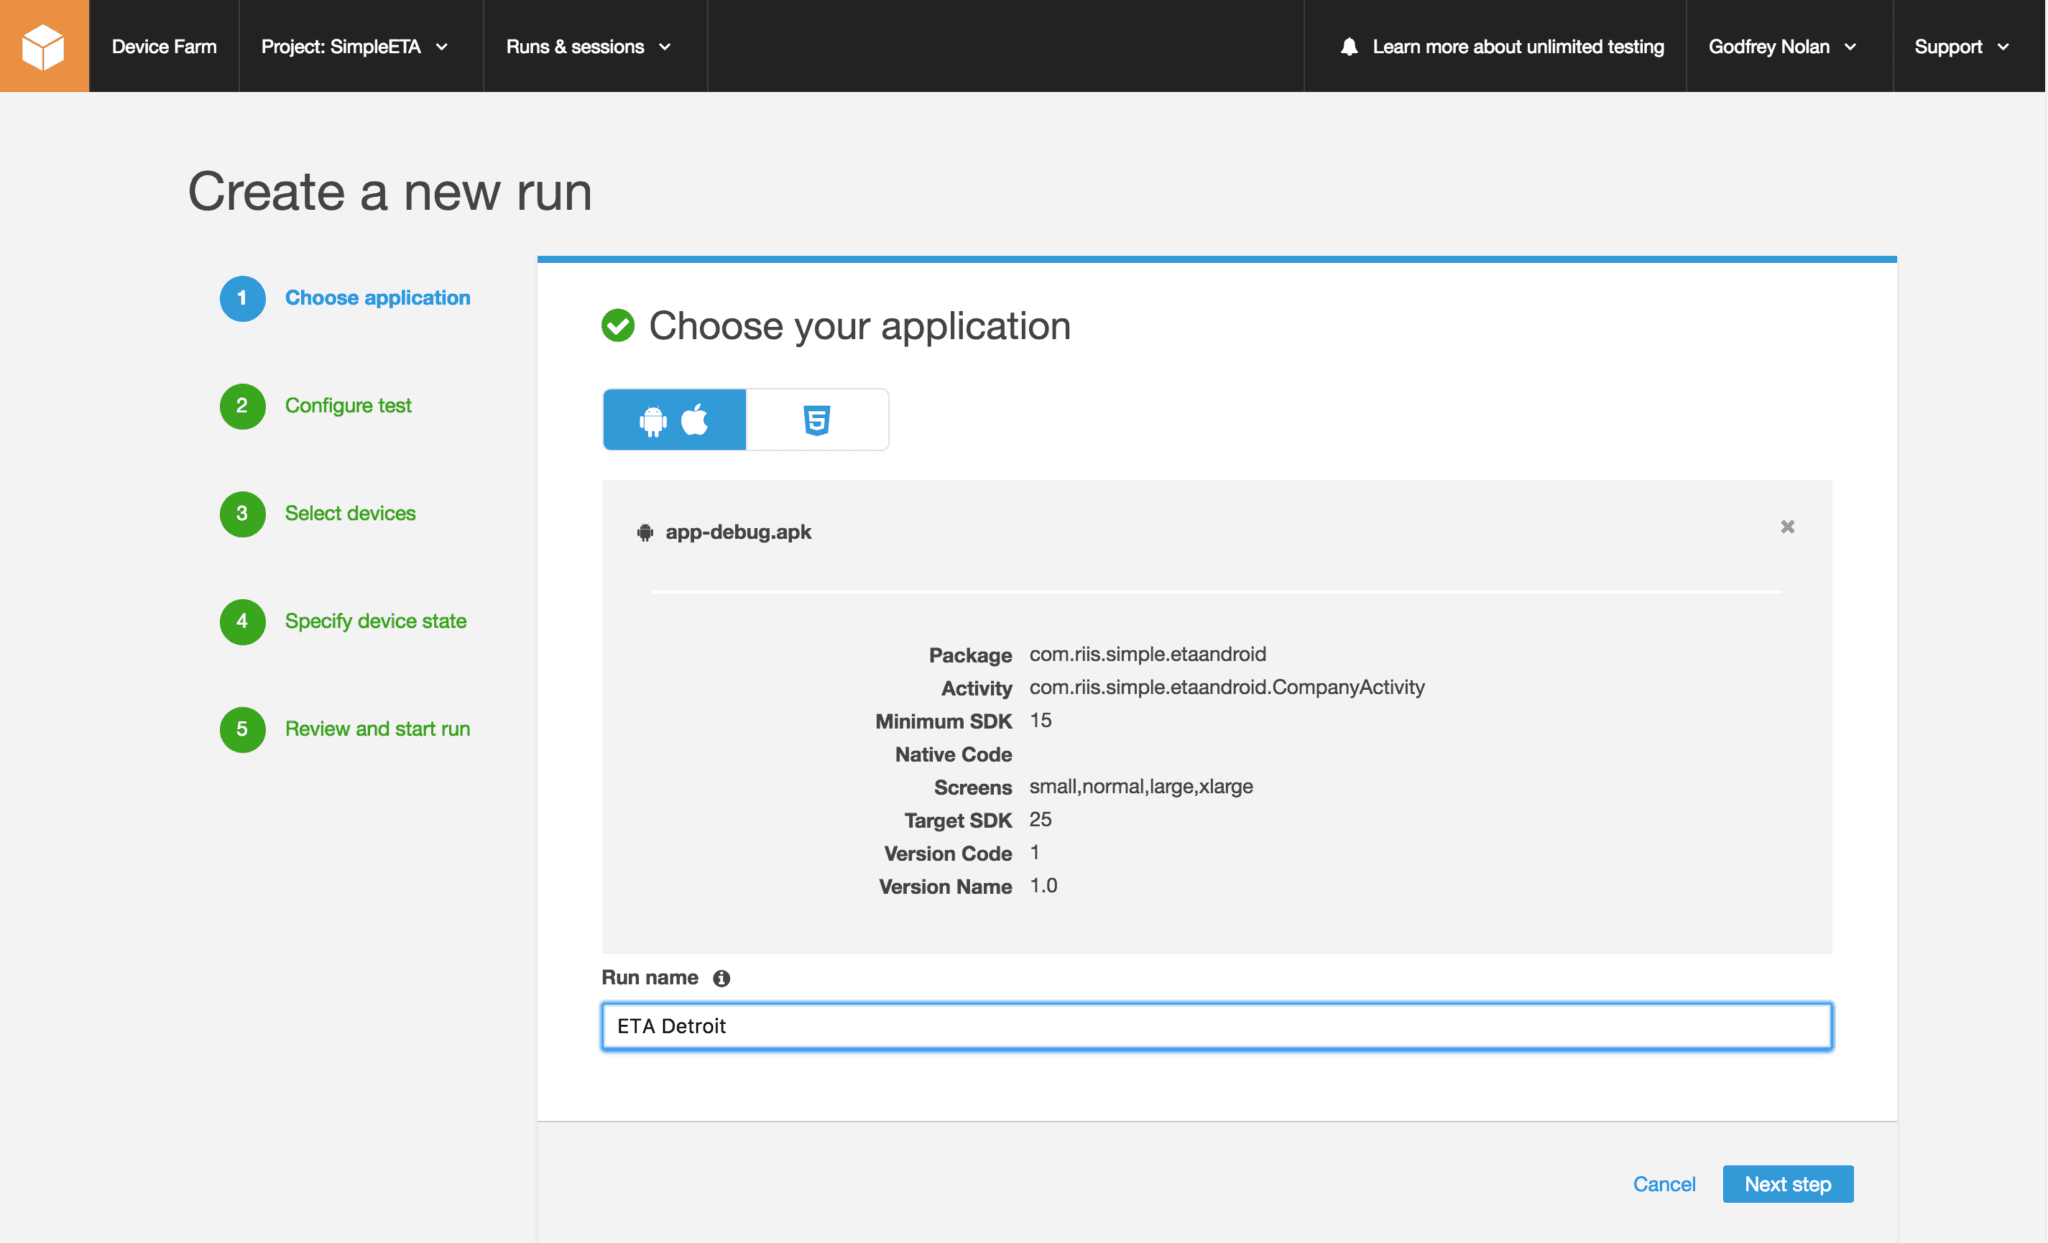
Figure 4: Application type.
We want to run our Espresso tests in the device farm, so configure the tests by choosing Instrumentation. We also need to upload our Espresso tests. The quickest way to do this is to run gradlew connectedCheck with a connected device or emulator running. And then upload the androidTest apk which you can find in the app/build/outputs/apk folder as shown in Figure 5.
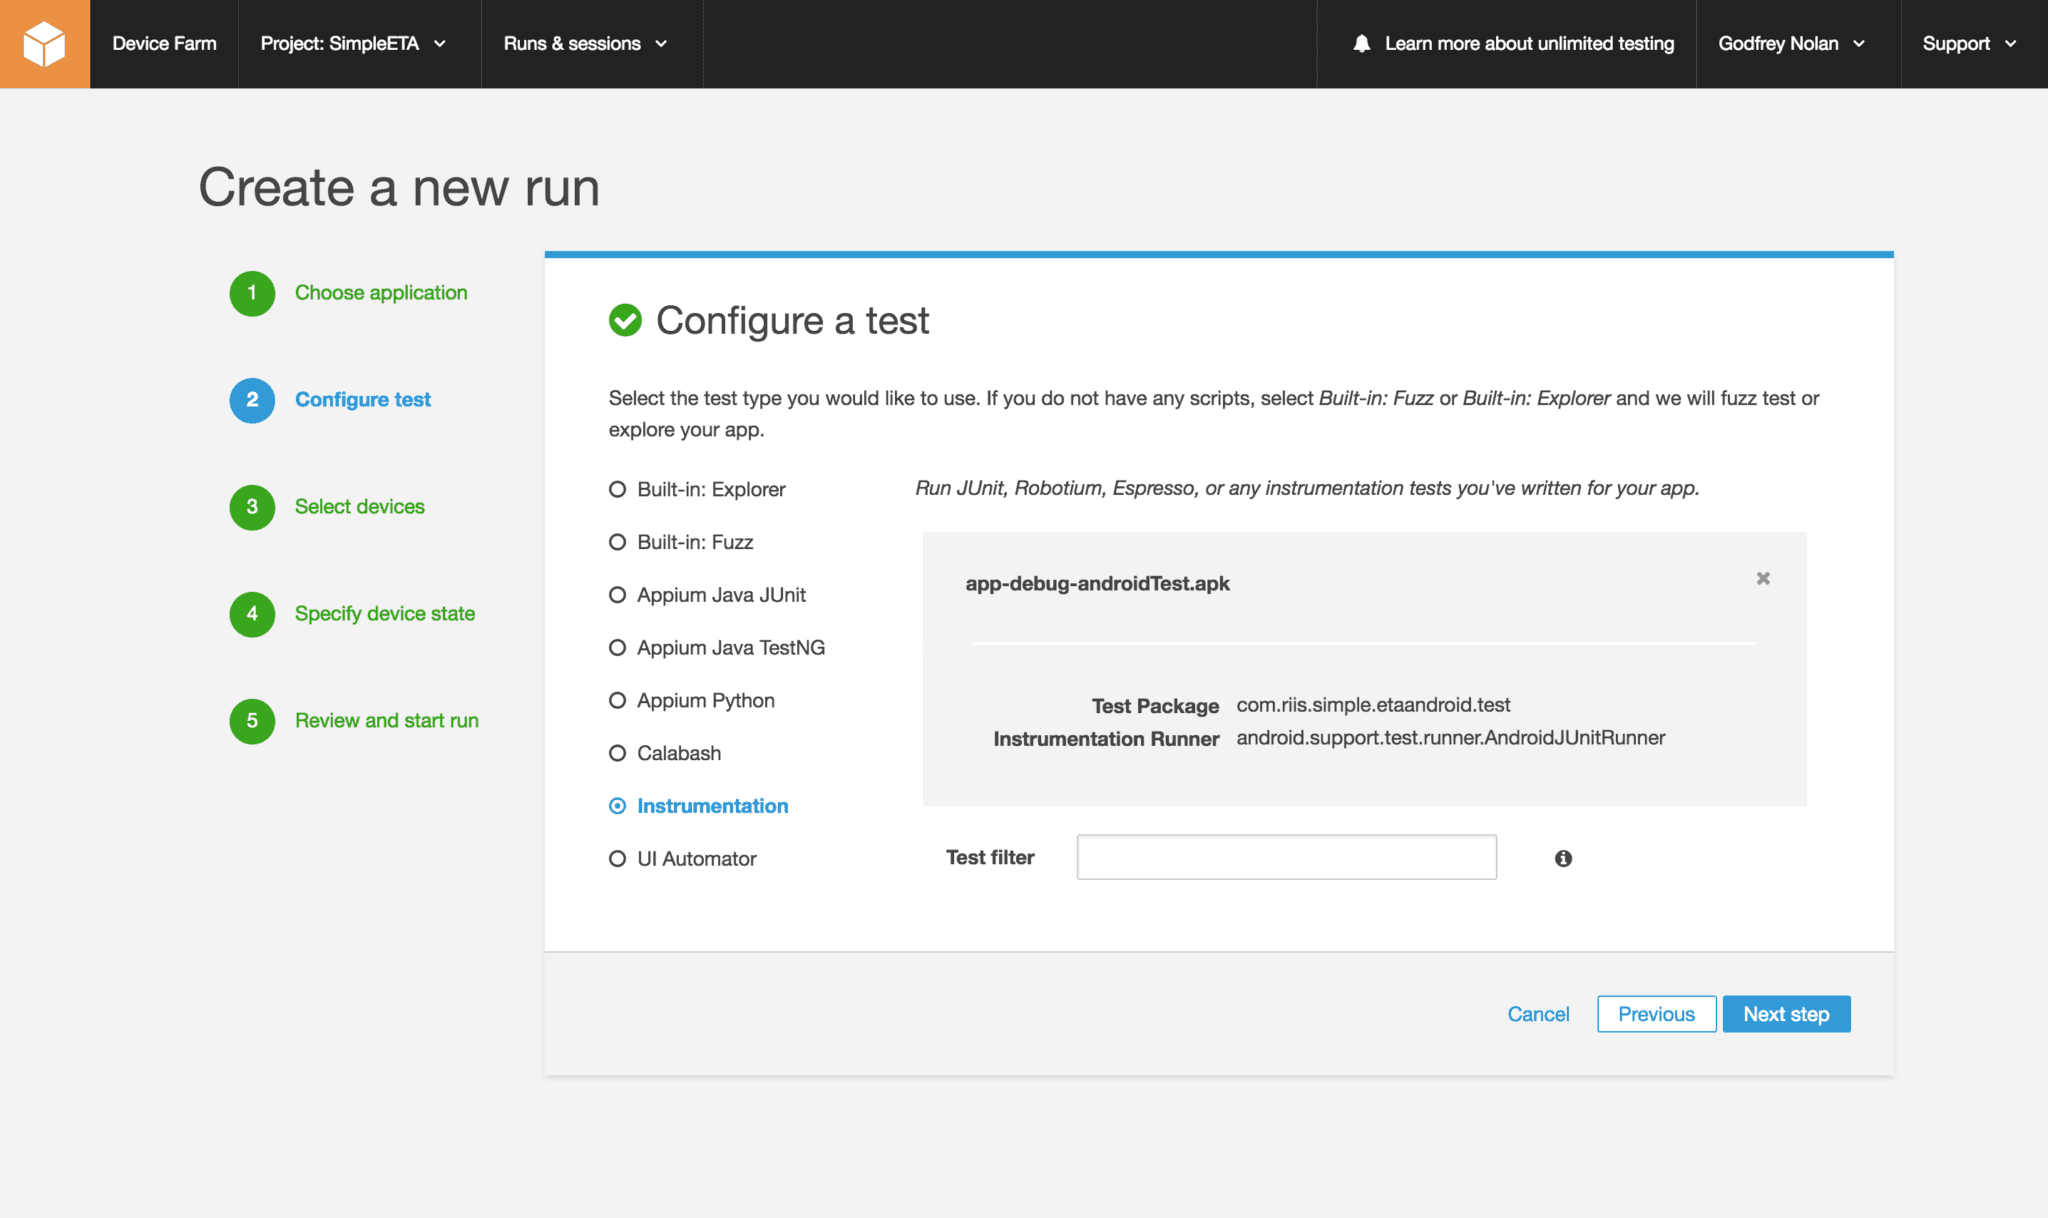
Figure 5: Upload Espresso Tests
Choose your devices in Figure 6. AWS Device Farm currently costs a minimum of $250 for each device for 3 months. We’ve got the default 5 shown here which would be $1250/quarter.
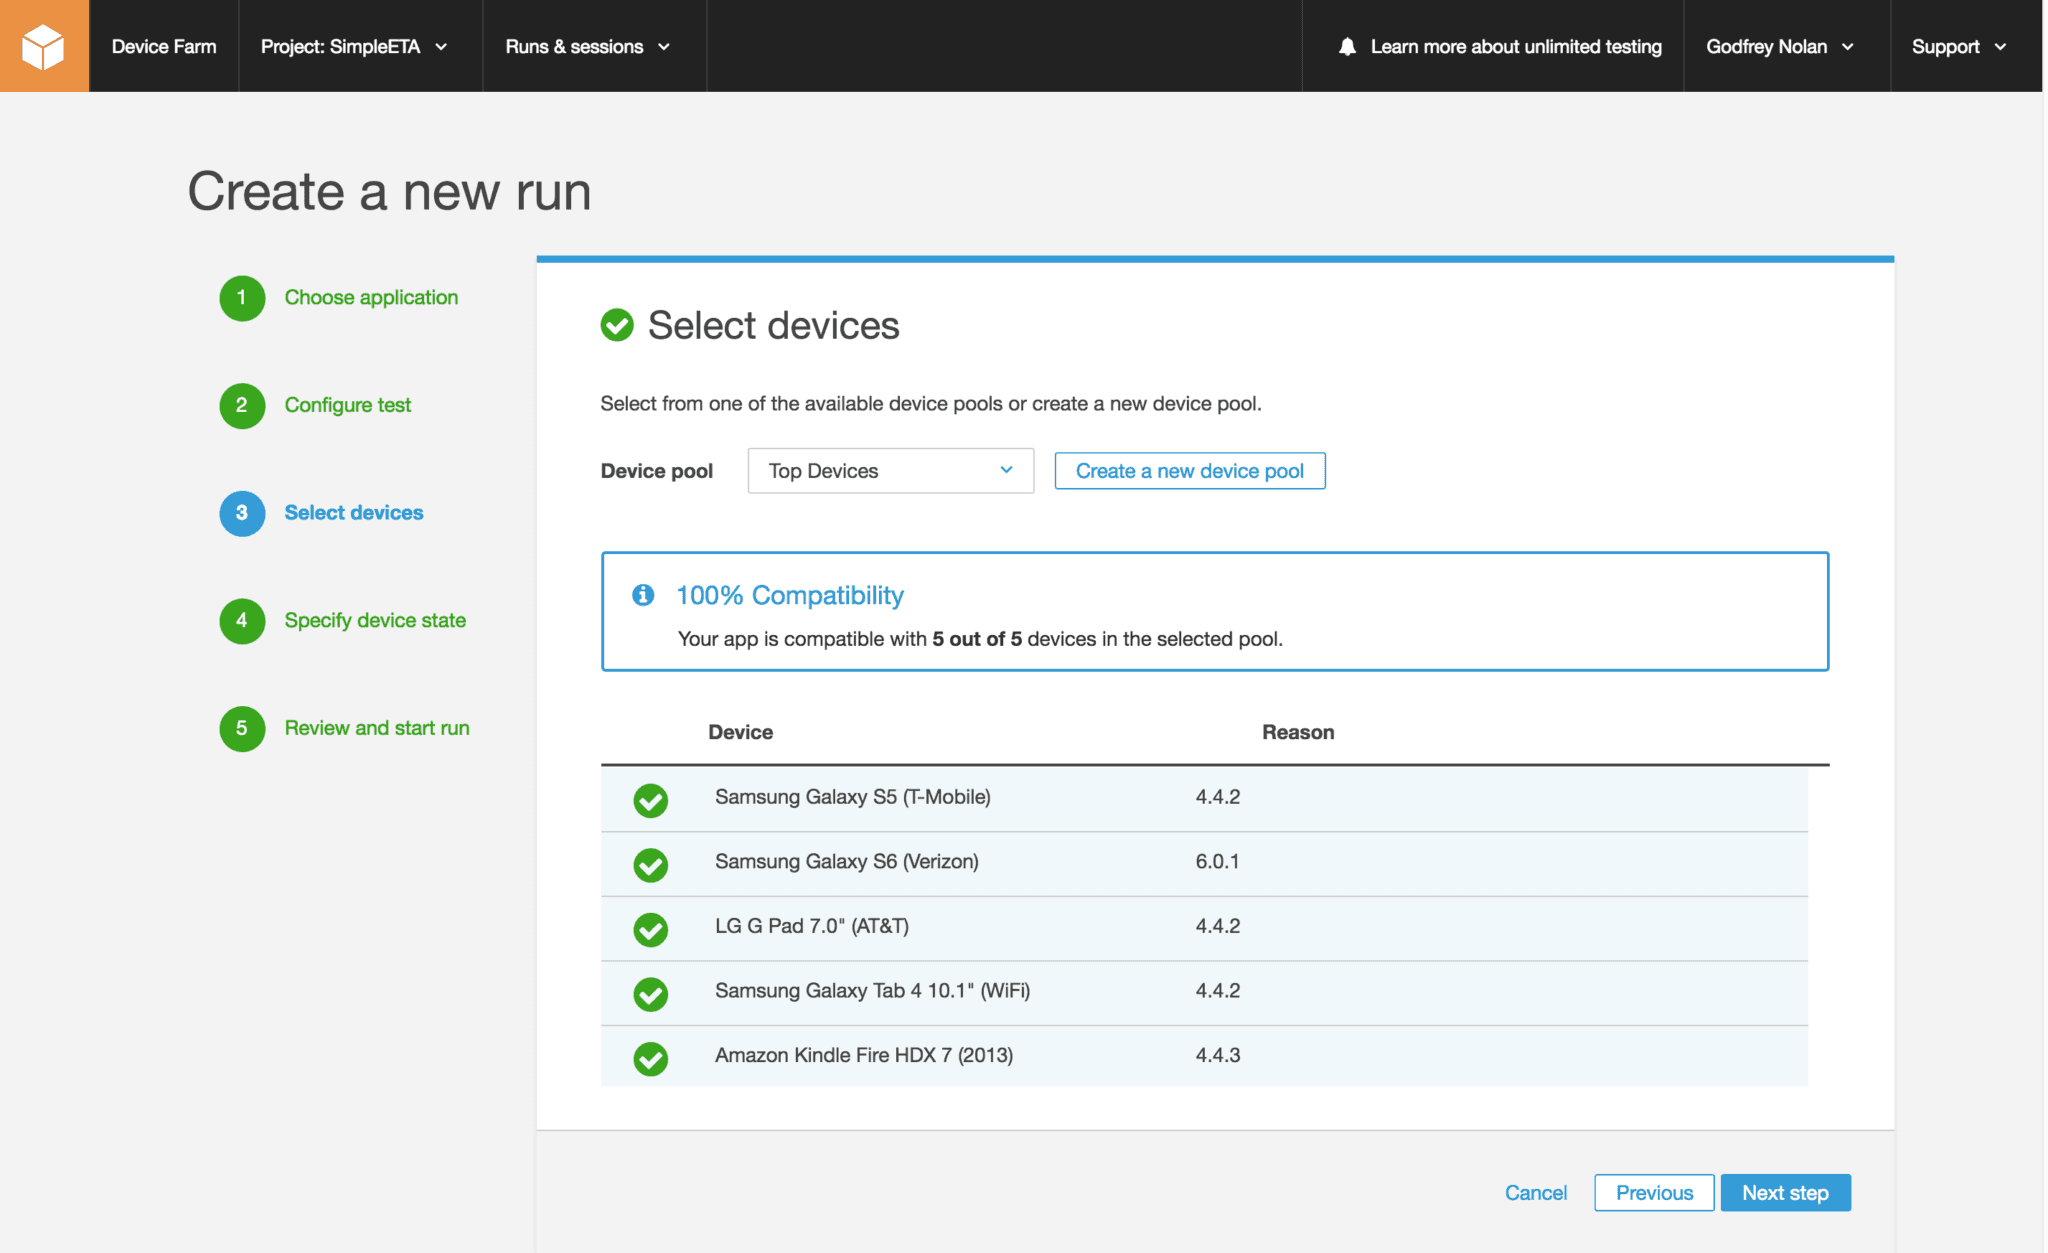
Figure 6: Choose Devices
Step through the remaining configuration and run the tests. The output is all online and clickable so you can see how each test ran on each device in Figure 7.
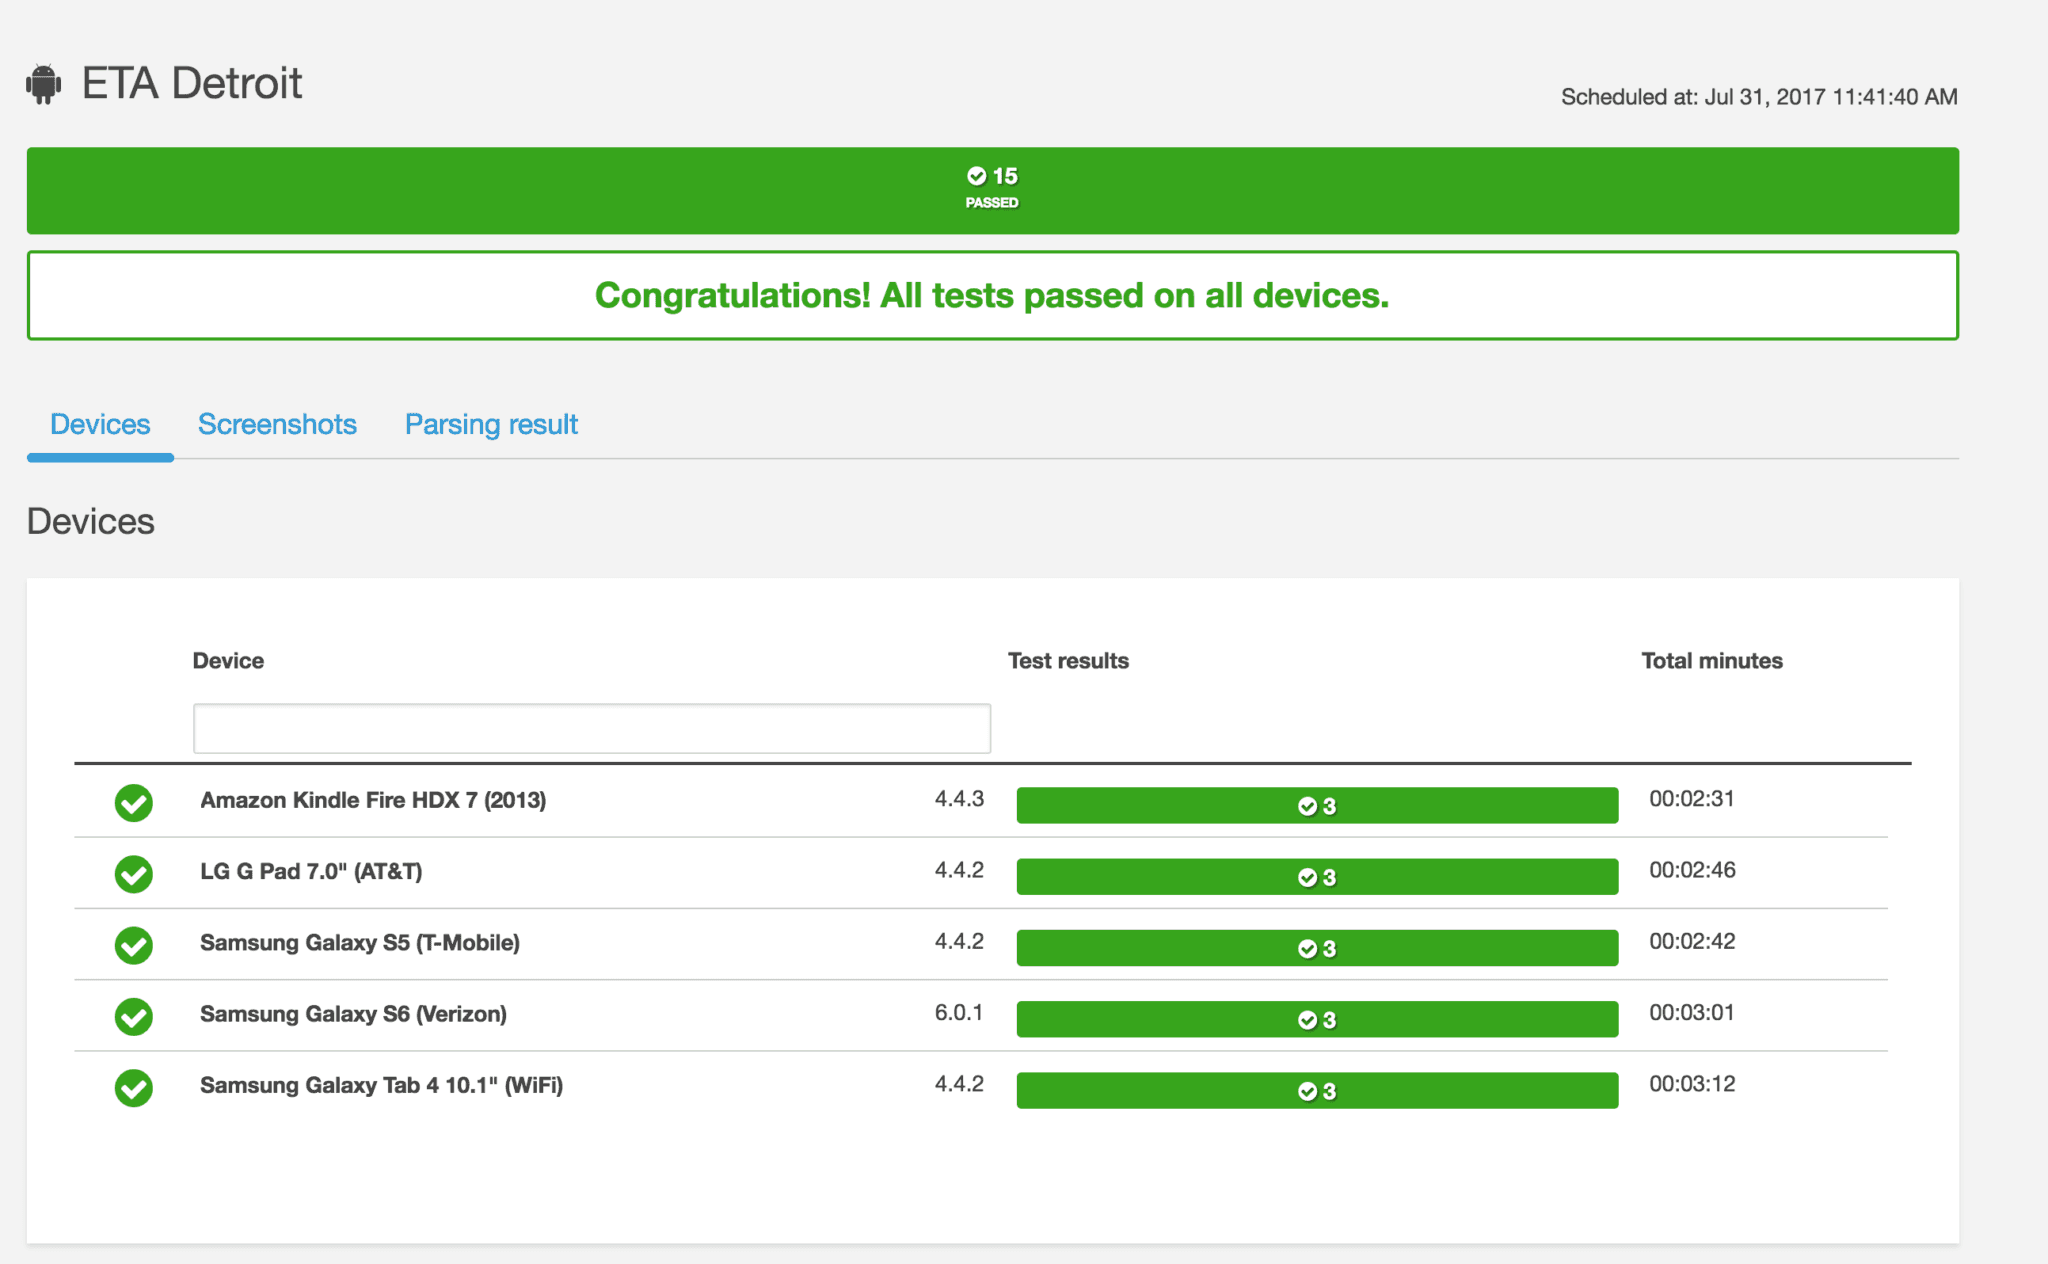
Figure 7: Test Results
AWS Device Farm also provides video recordings of the tests which is a nice step above screenshots. So you can see exactly how each test failed if necessary, see Figure 8.

Figure 8: Test Videos
Conclusion
Android Fragmentation makes testing Android apps much more complicated than iOS. Testing on one or two emulators isn’t going to be enough to find all the defects. You can increase your chances of finding defects on different devices by setting up a test lab. In this blog we looked at how to set up your own test device lab and also how to use the AWS Device Farm to do the same. Neither option is perfect, you’re probably not going to be able to test more than about a dozen devices, but it is a significant step above testing on one or two emulators in Android Studio.
